-
Elegance, distilled: the 60% Apple Extended Keyboard II
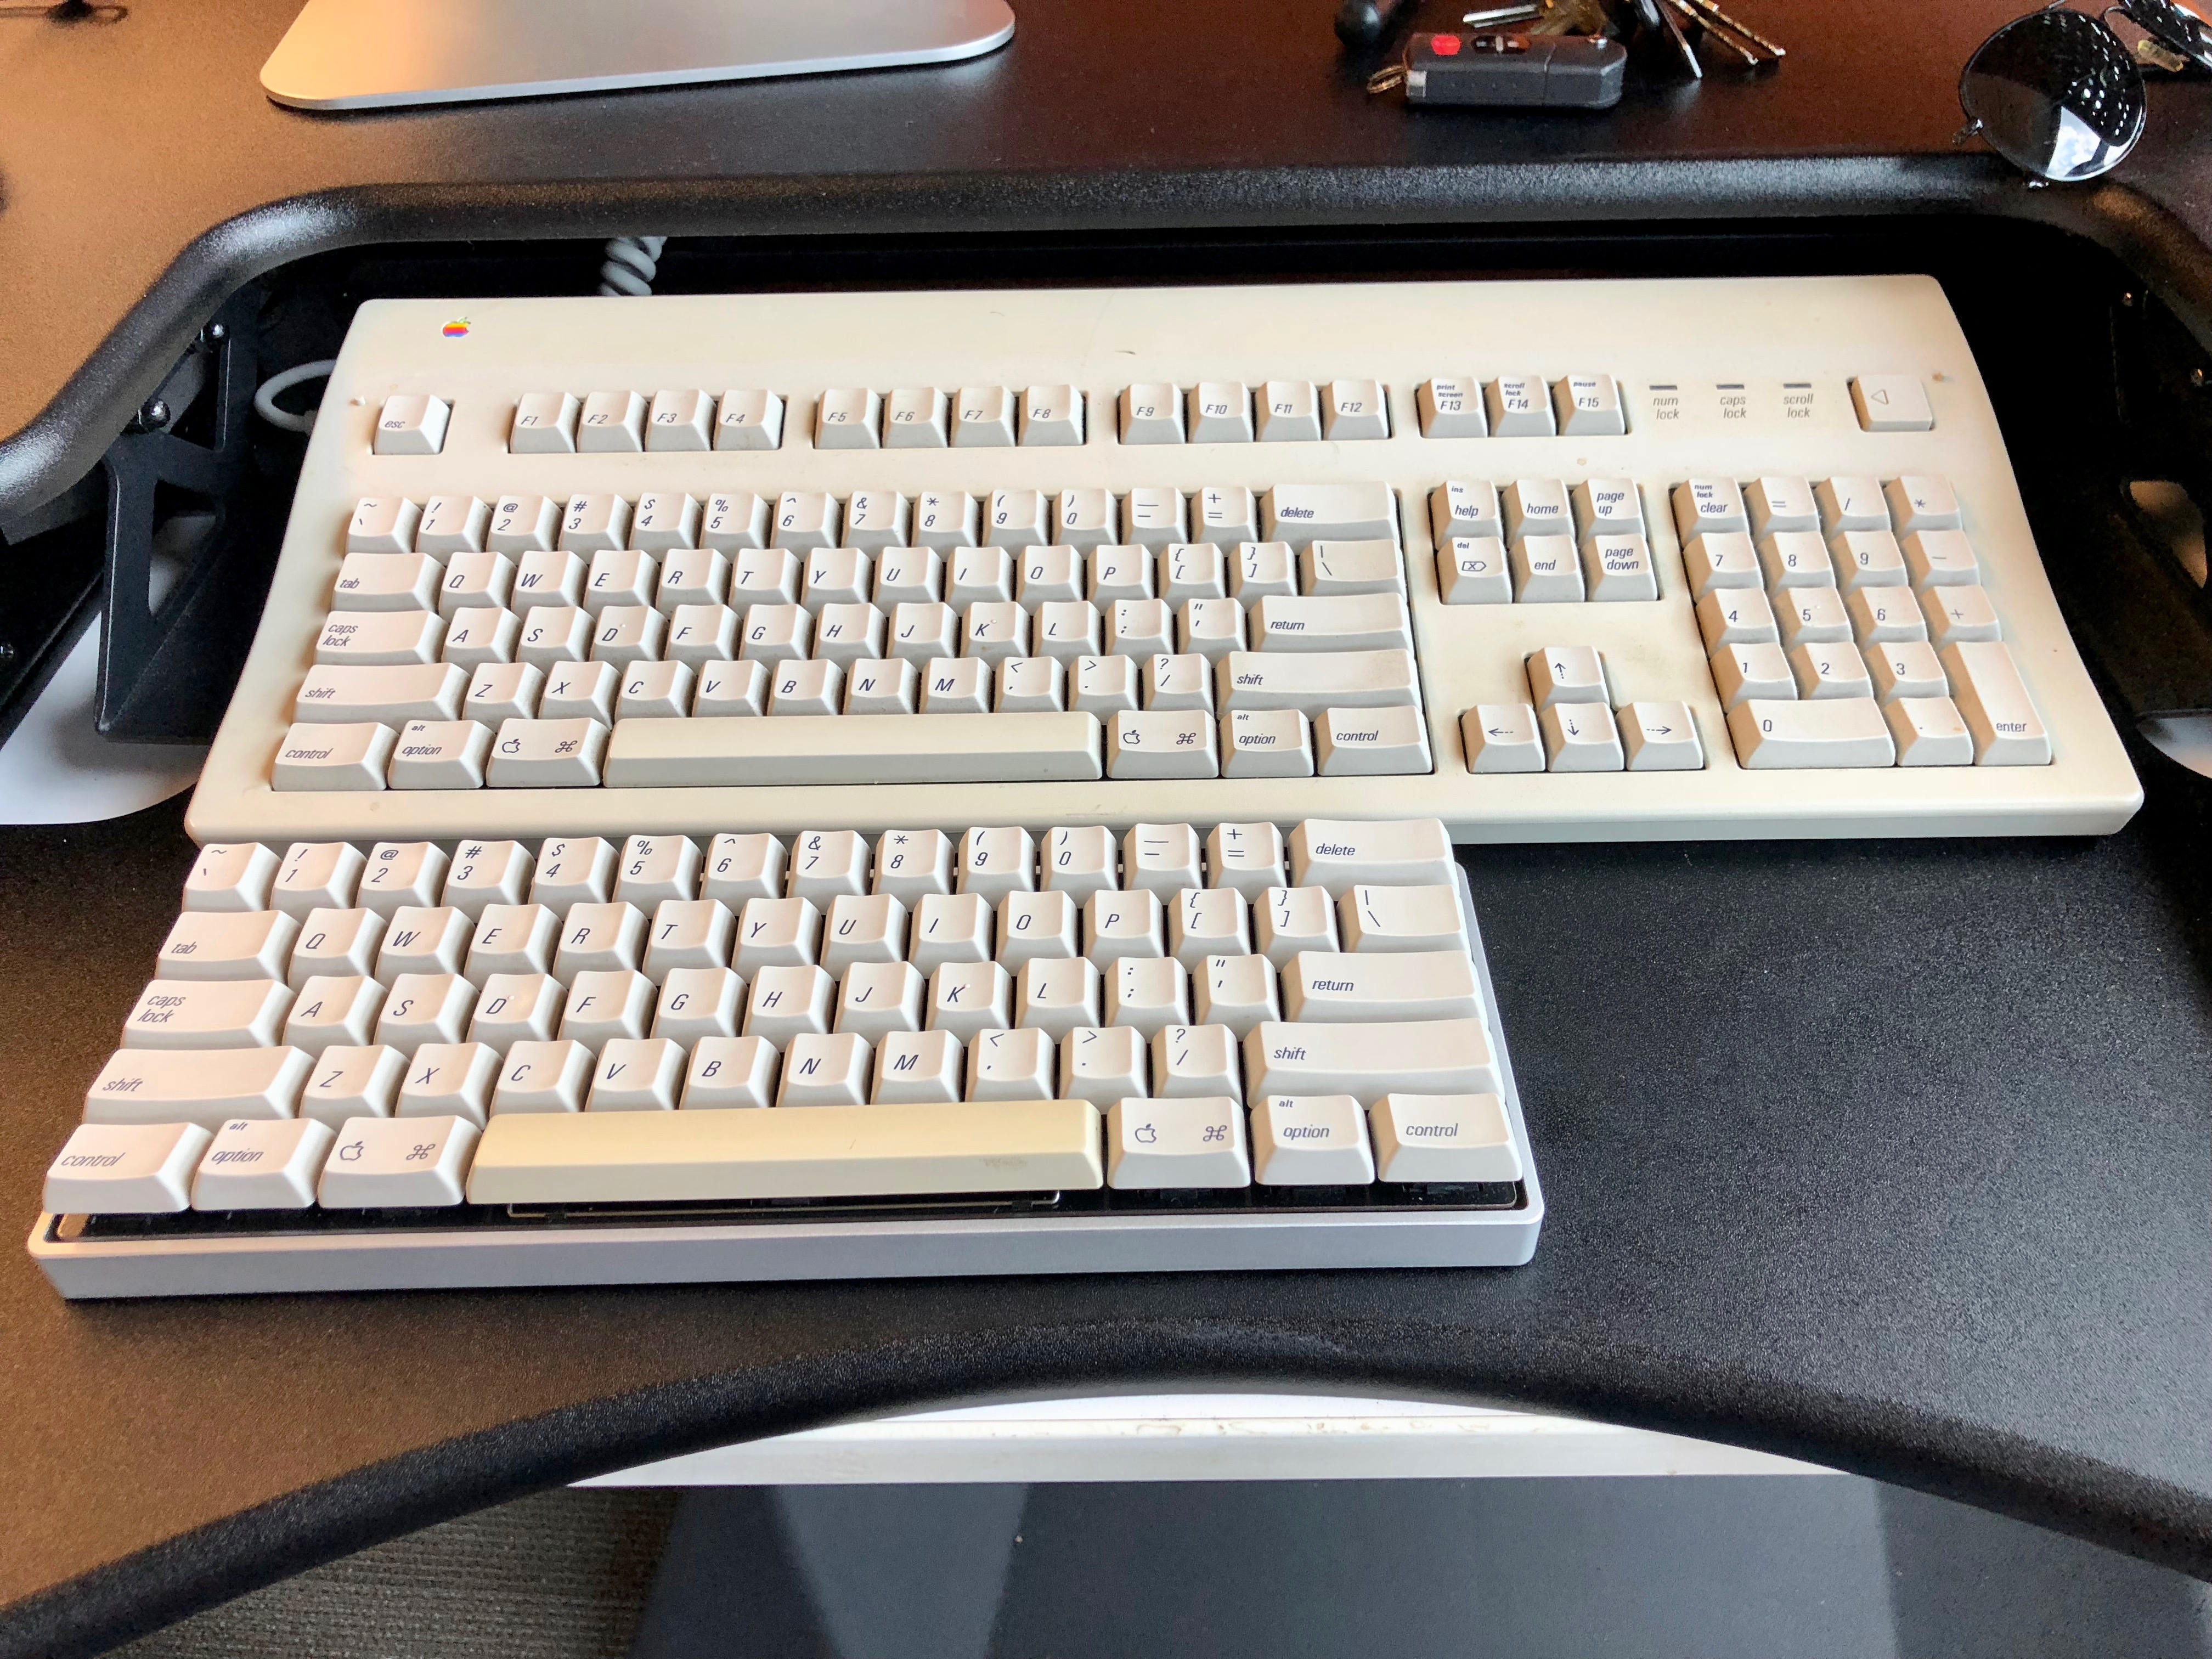
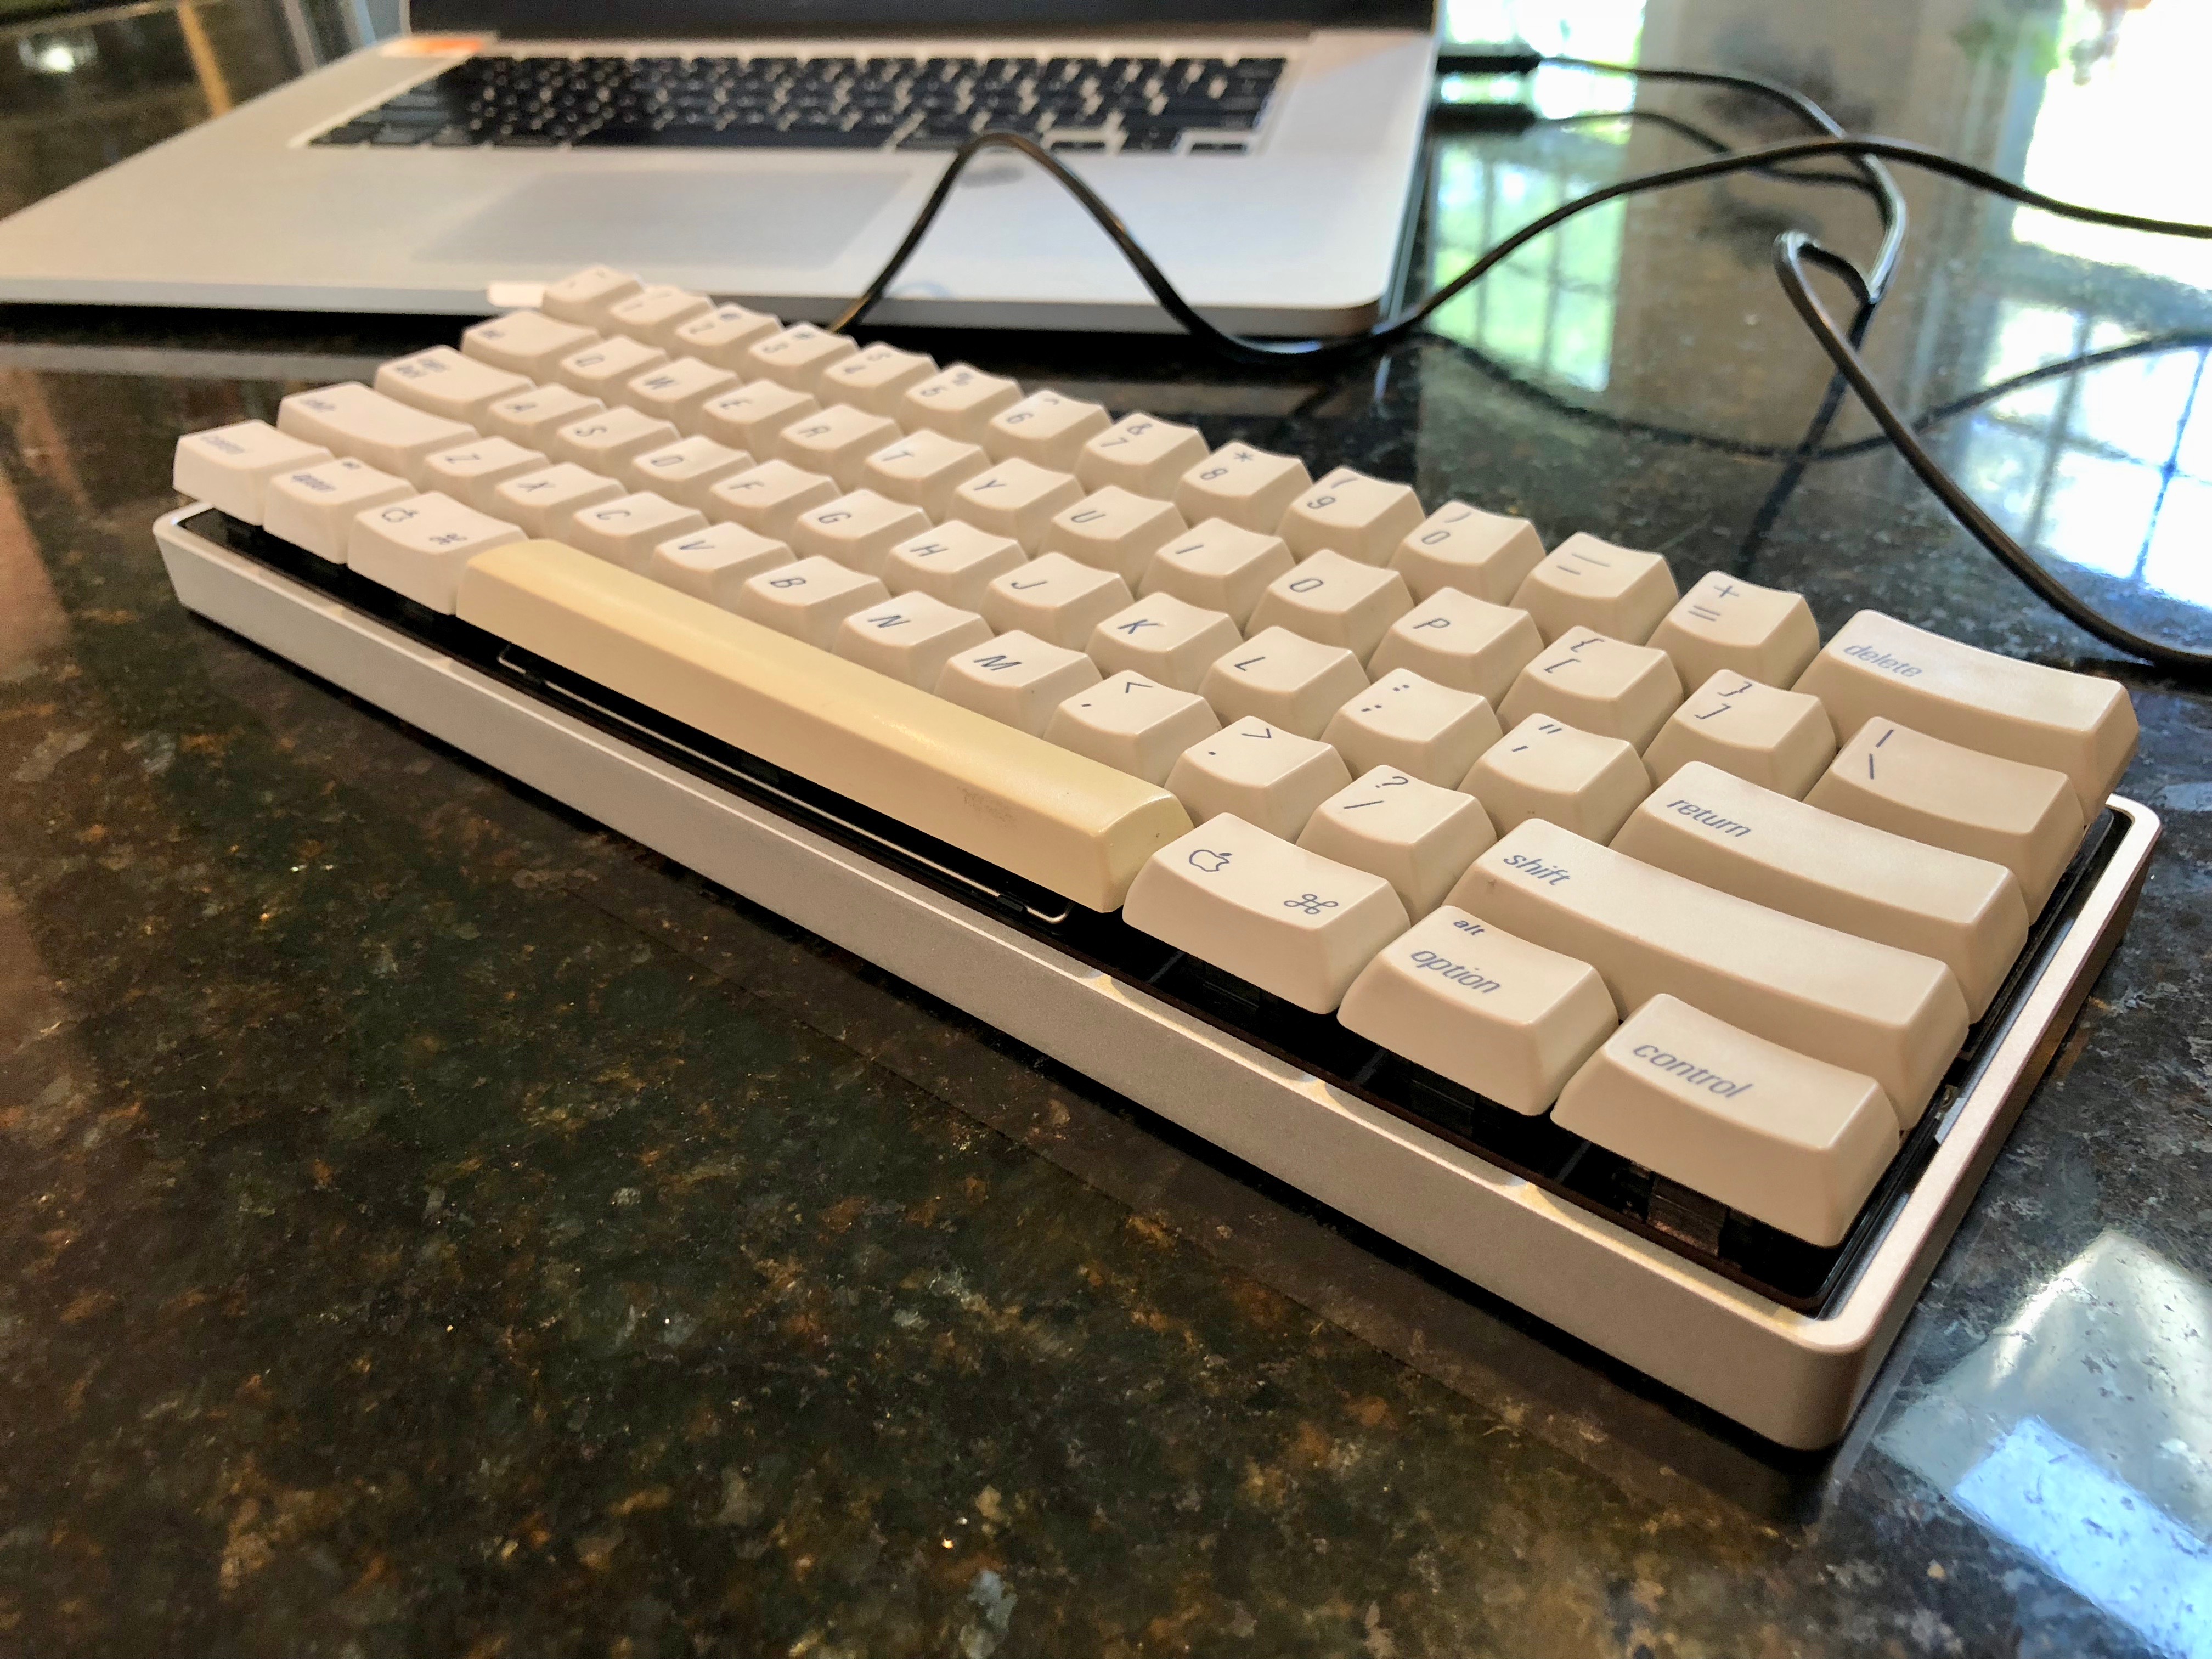
Have I mentioned that I love mechanical keyboards? I have? Well, I’ve just finished up another little project, and I’m typing on it right now. It’s considerably smaller than the Nimitz, but just as satisfyingly clicky.
The Hook
I don’t remember exactly what prompted me to visit this picture, but I was utterly captivated when I saw it. You’ll recall, I have several spares. I have switches, keycaps, and solder. All I need is a custom PCB and a GH60 case. Help me, Hasu. I ordered one set of the PCB and plates. I still have two spare keyboards, having built a second Teensy adapter so I could leave one keyboard at work and one at my studio. This keyboard is so much smaller, I can actually fit it in my bag and tote it along with me, and I have future plans to make it a truly on-the-go tool.
Desoldering switches
The Apple Extended Keyboard II disassembles pretty easily. There’s only one screw, and a minimal amount of prying to get the case open. A keycap puller gets the switches clear for removal. Luckily, the only keycap that had problems on this keyboard was the
helpkey. Who needs that, with Geek Hack and Deskthority available? Slow and steady gets the switches desoldered. Several of them had the pins bent down, presumably to make a better connection. Patience and needle nosed pliers won out in the end, though. Cleared out and bent straight, I had 60 little switches ready to be redeployed.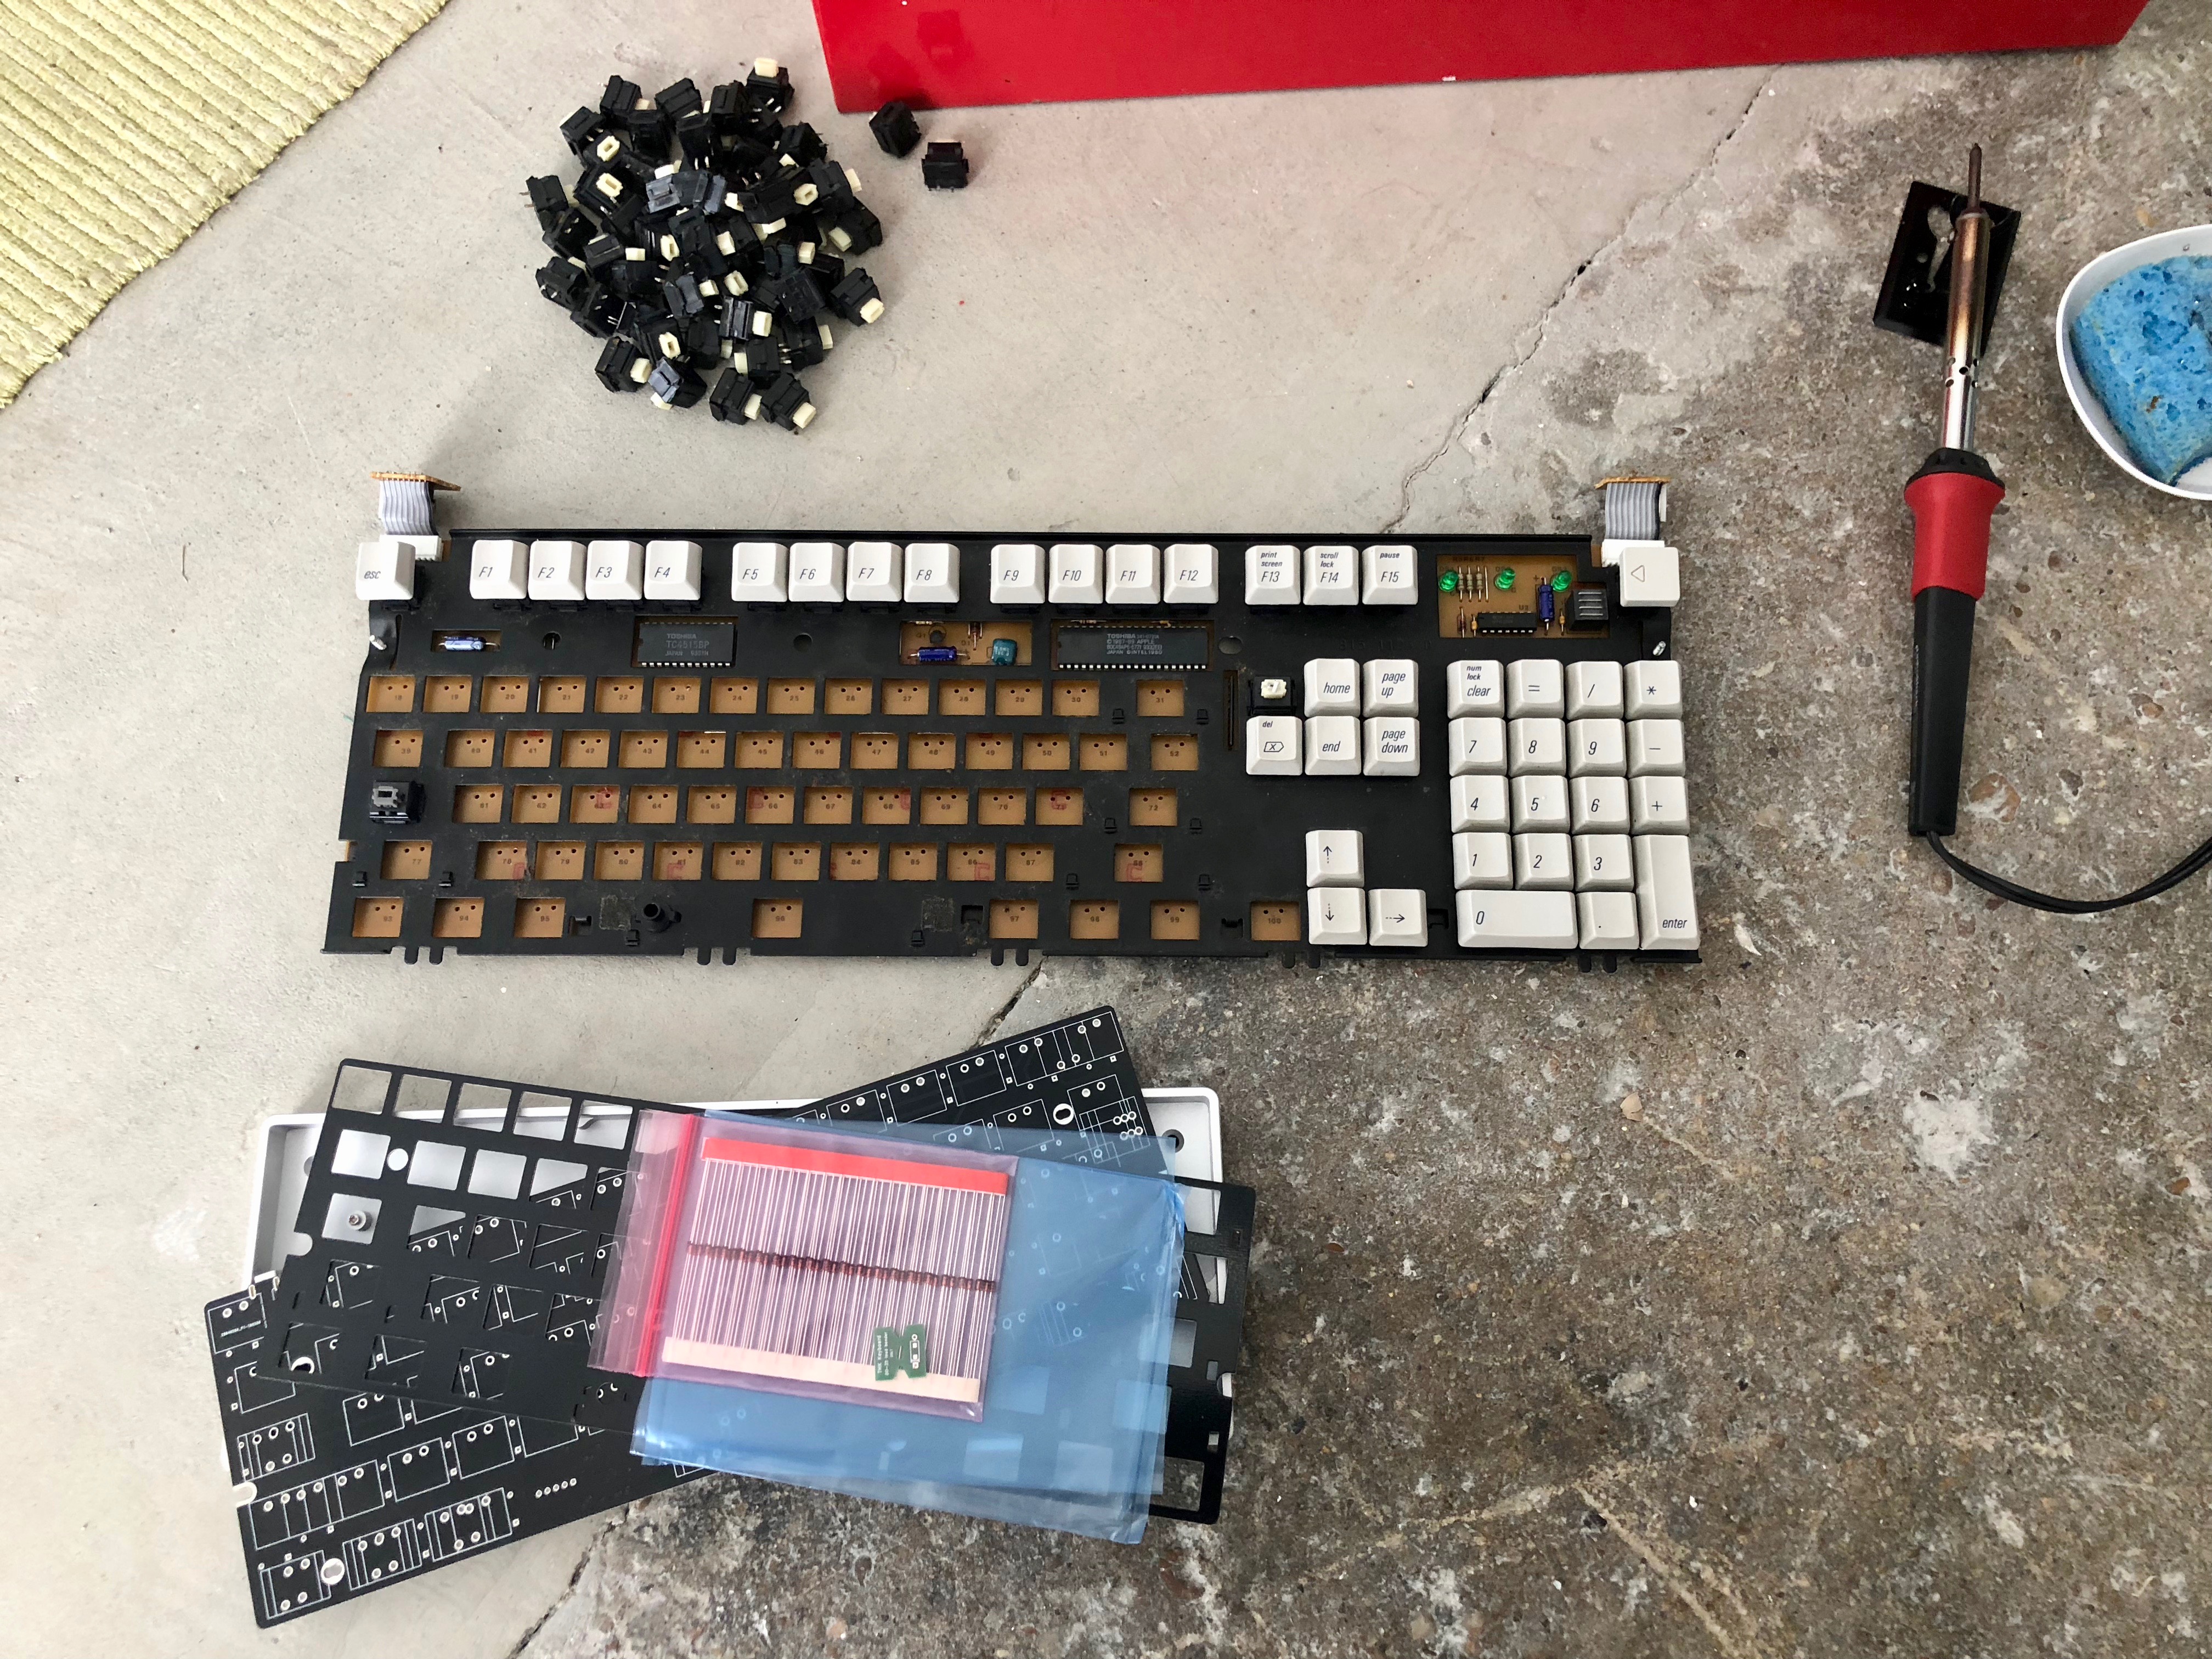
Cleaning keycaps
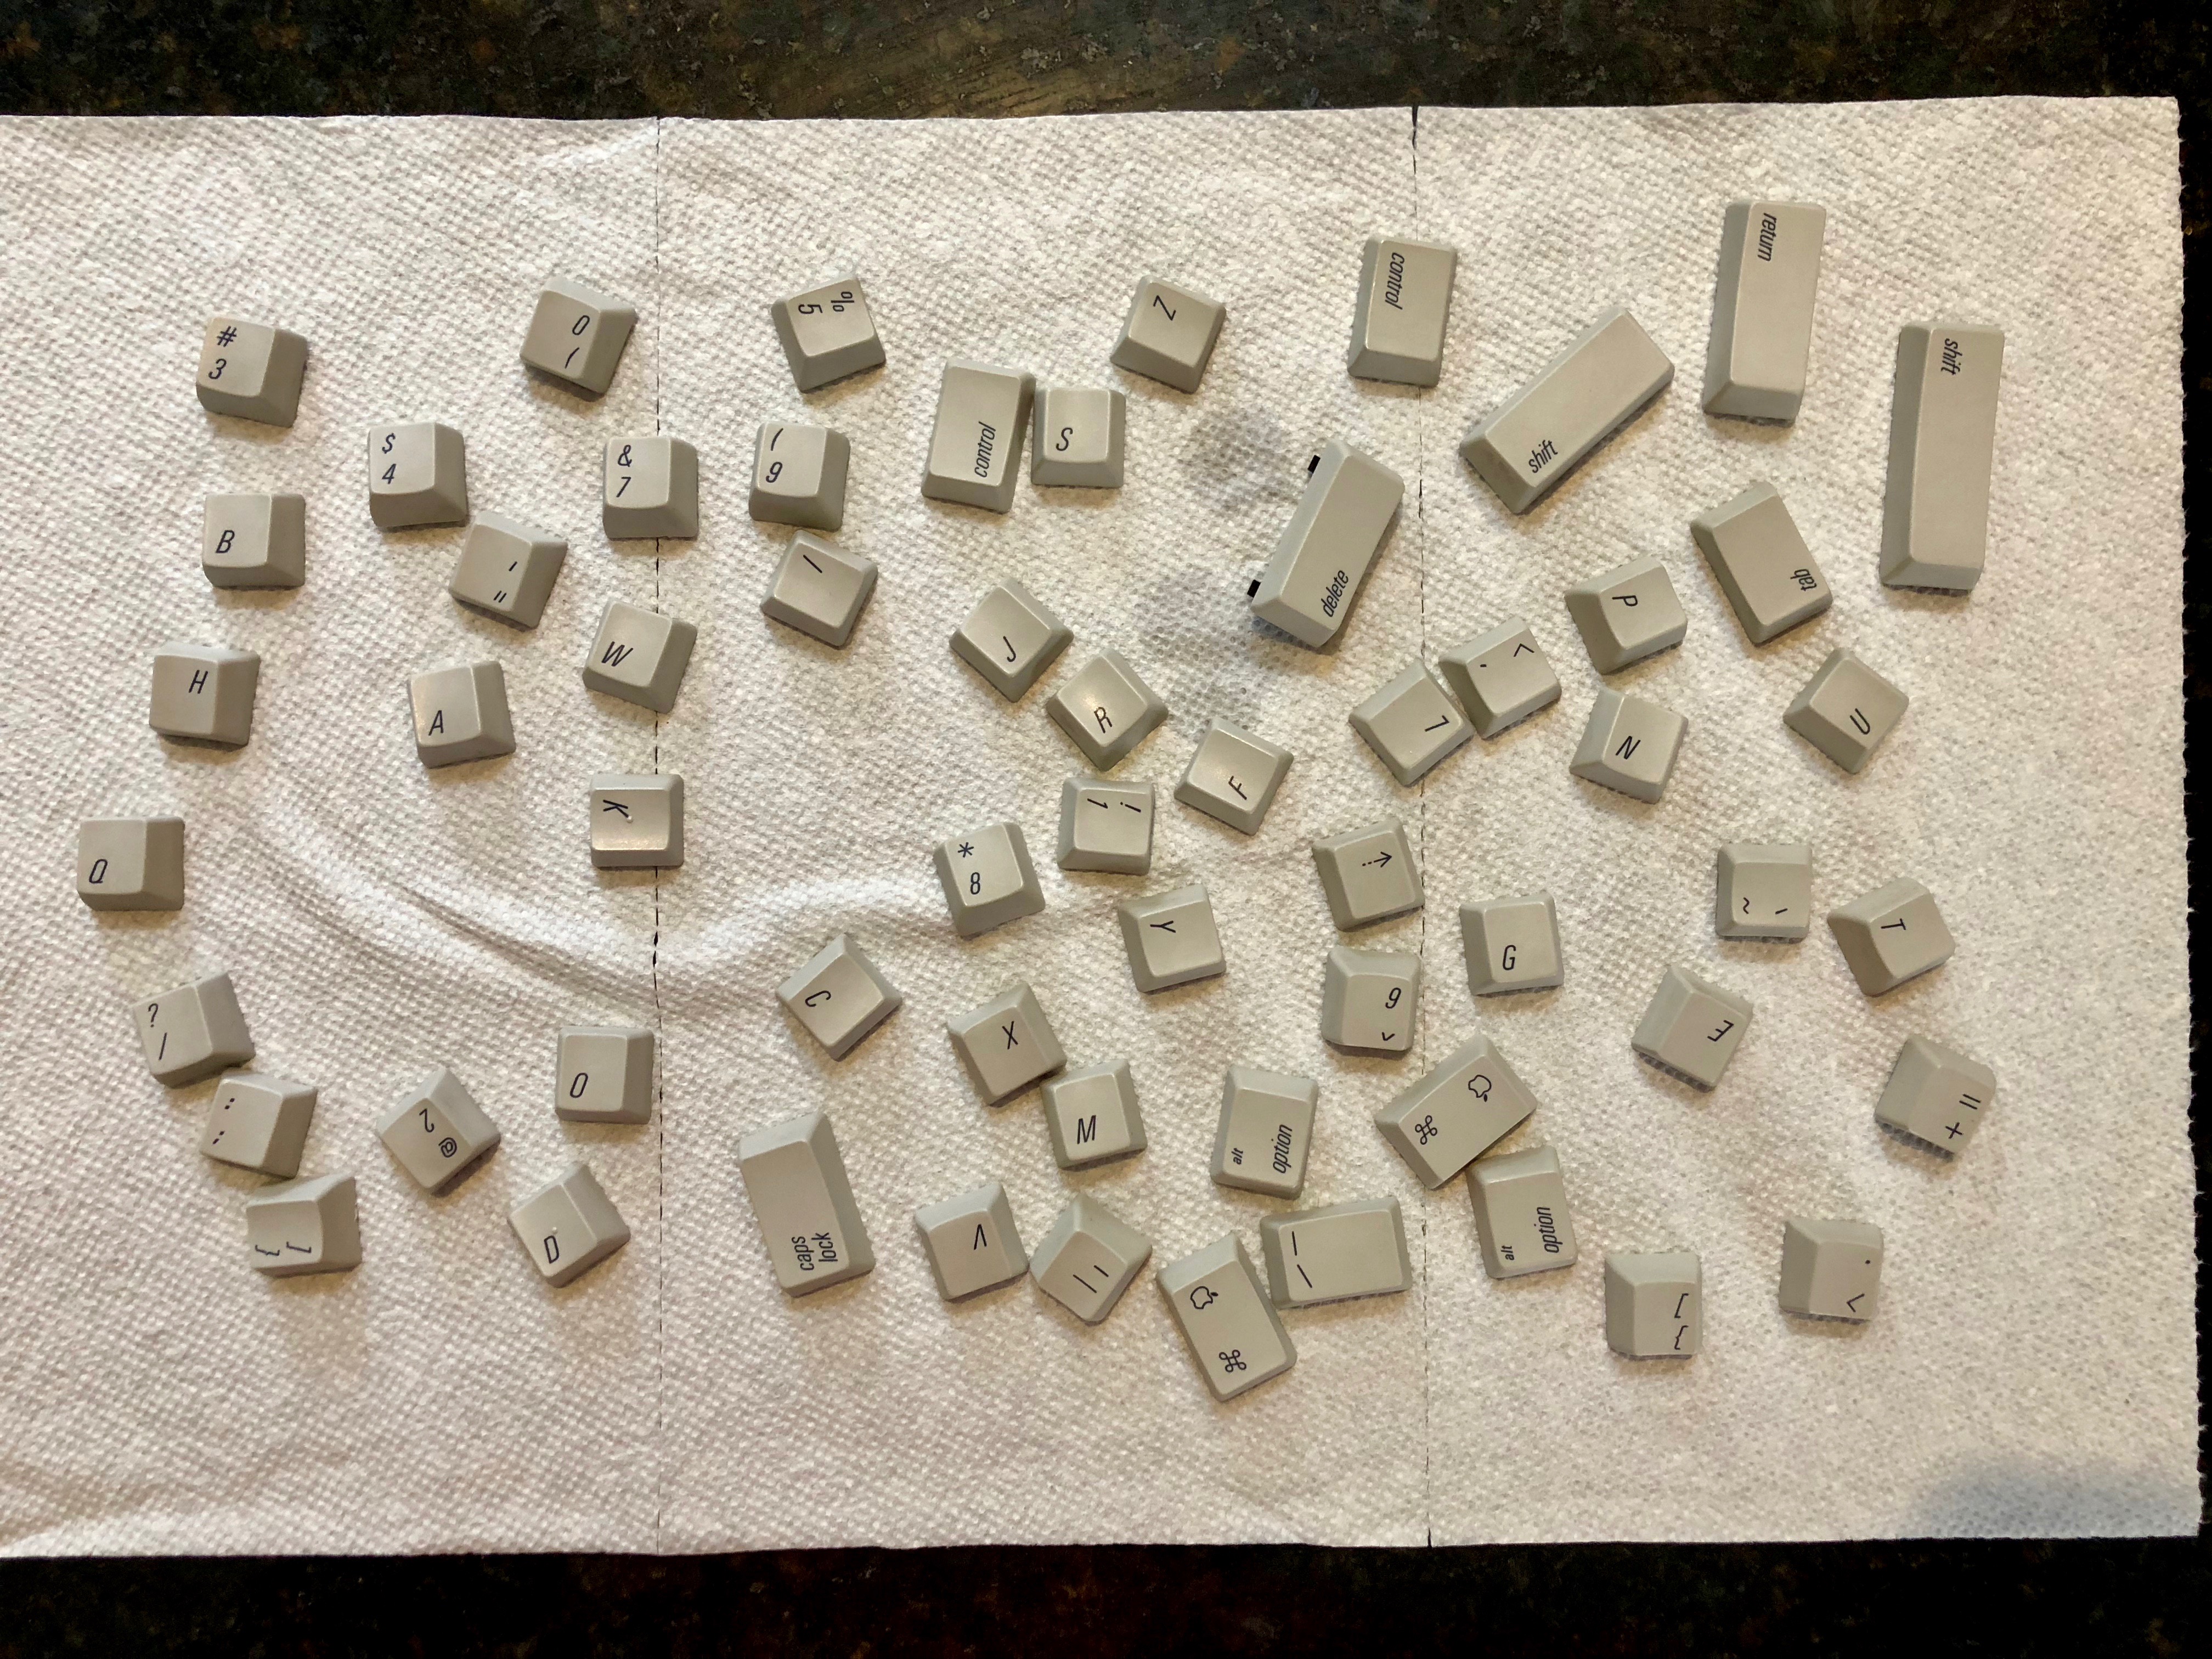
Once I had those keycaps off, it was obvious they were filthy. Threw them in a big, quart-sized Mason jar with some dish washing liquid and warm water, screwed the lid on, and put them through the gentle cycle. If your keyboard’s keycaps are removable, do yourself a favor and clean them once in a while. Your fingertips will thank you. The spacebar keycap is made of ADP rather than PBT, so it yellows over time, just like the case. I could apply retr0bright, but I think I’ll just let it be for the time being.
Folding and soldering diodes
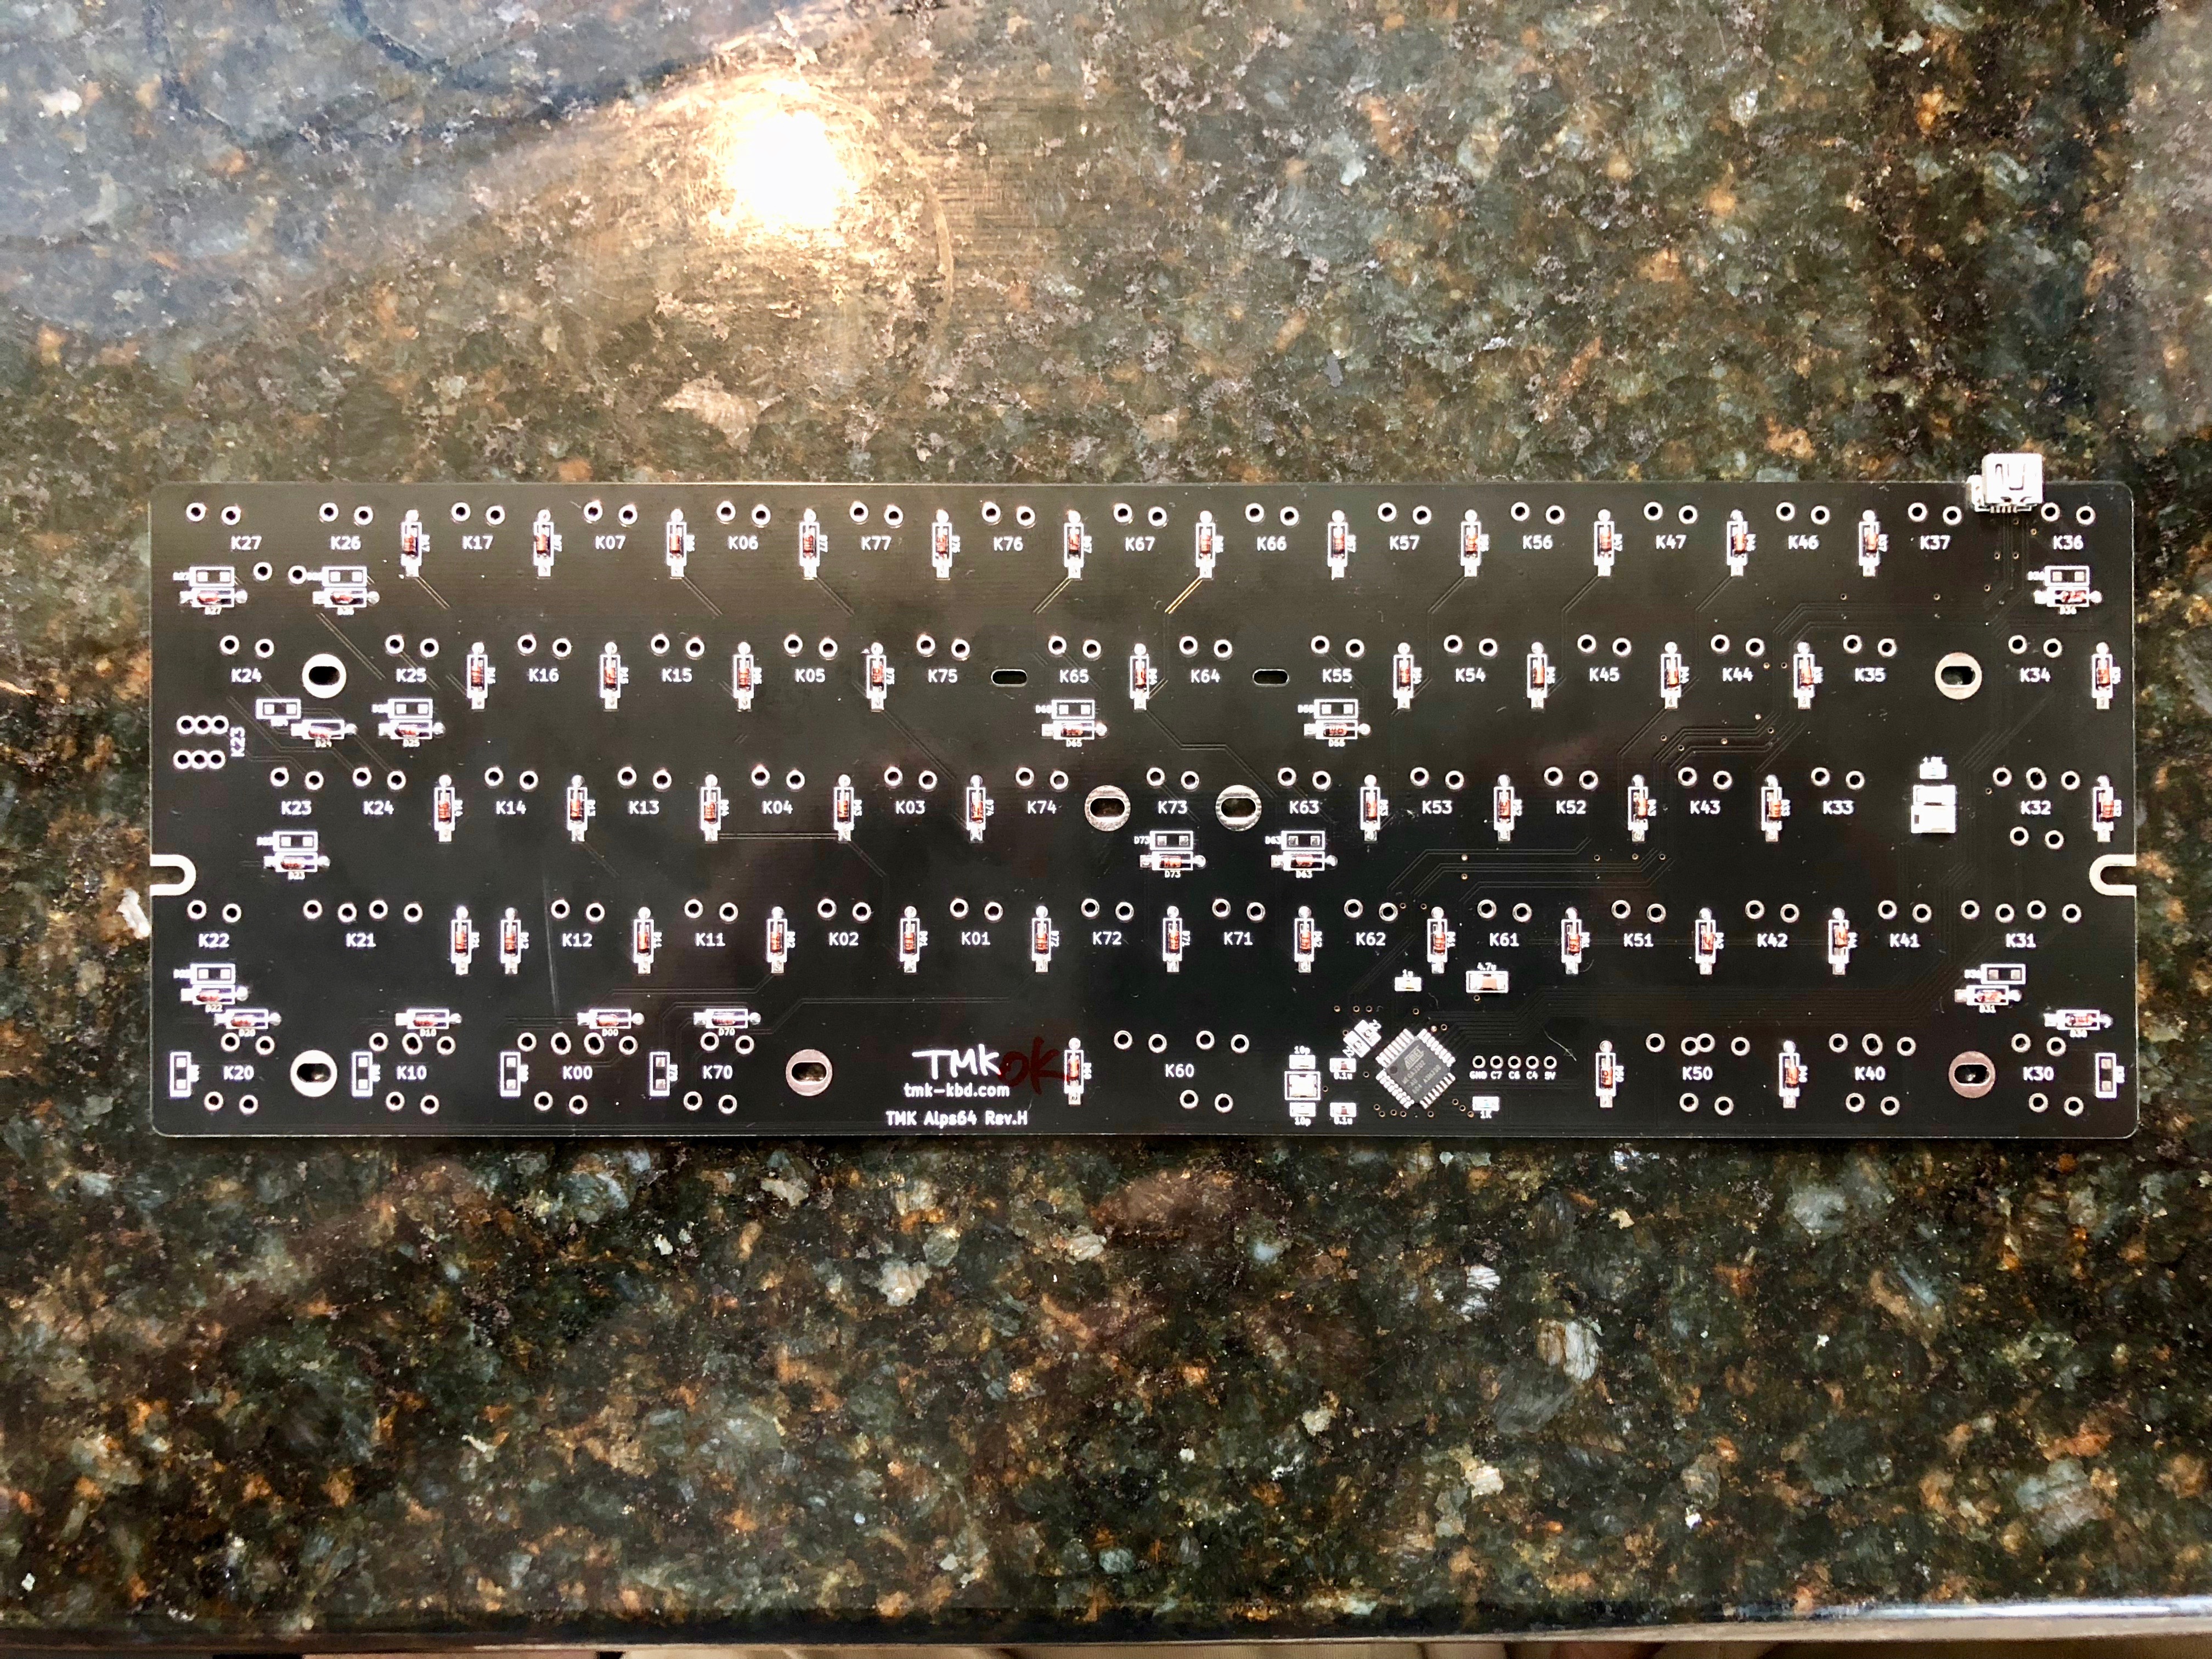
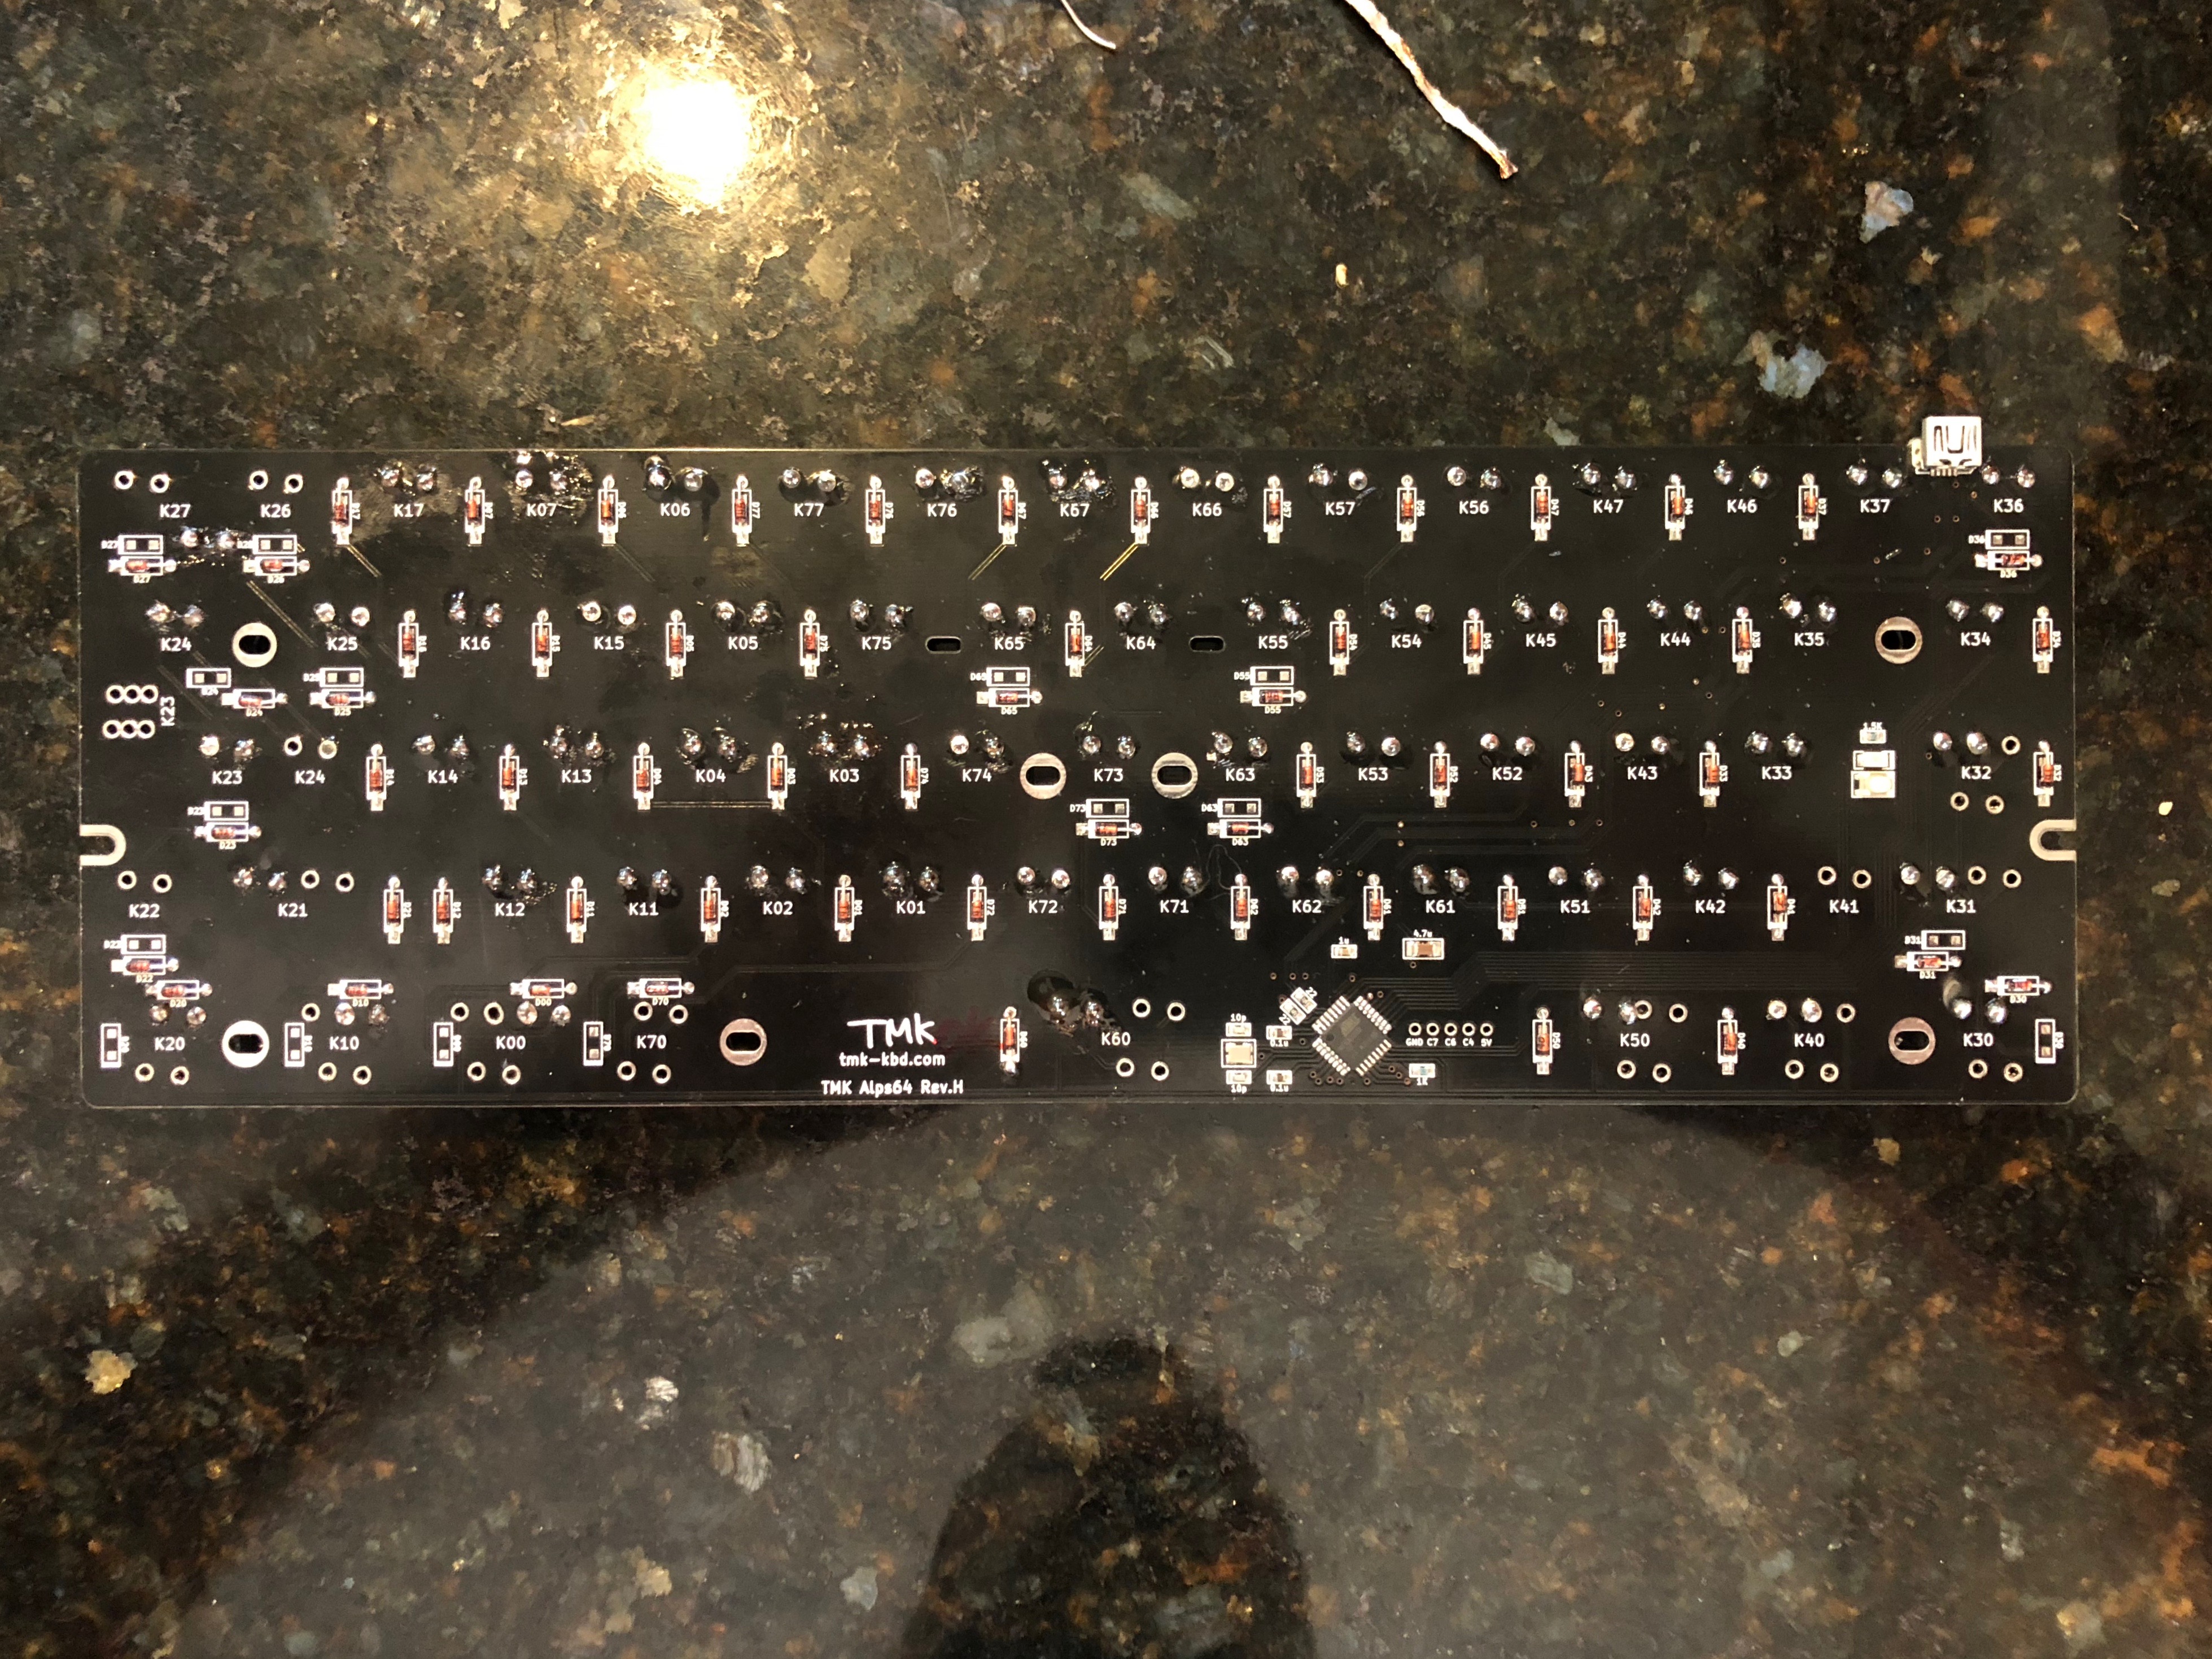
When you order the Alps64 board from Hasu, it requires some assembly. He includes a strip of diodes that need to be soldered to the board. I suppose he does this because the board also includes SMT pads if you are crazy and want to surface mount your own diodes. I opted to fold (using the included little tool!) each and every one, and aligning them properly (line side goes to the square pad), solder them all in place. For future reference: use flux and more solder than you think. I’m pretty sure I’ve got decent connections (I’m typing this on the keyboard now), but it seemed pretty clear to me that the solder is really only on one side of the PCB. It’s not that big a deal, but if I were to do it again, I’d be a bit more generous with the solder and make that connection as solid as possible.
Soldering switches
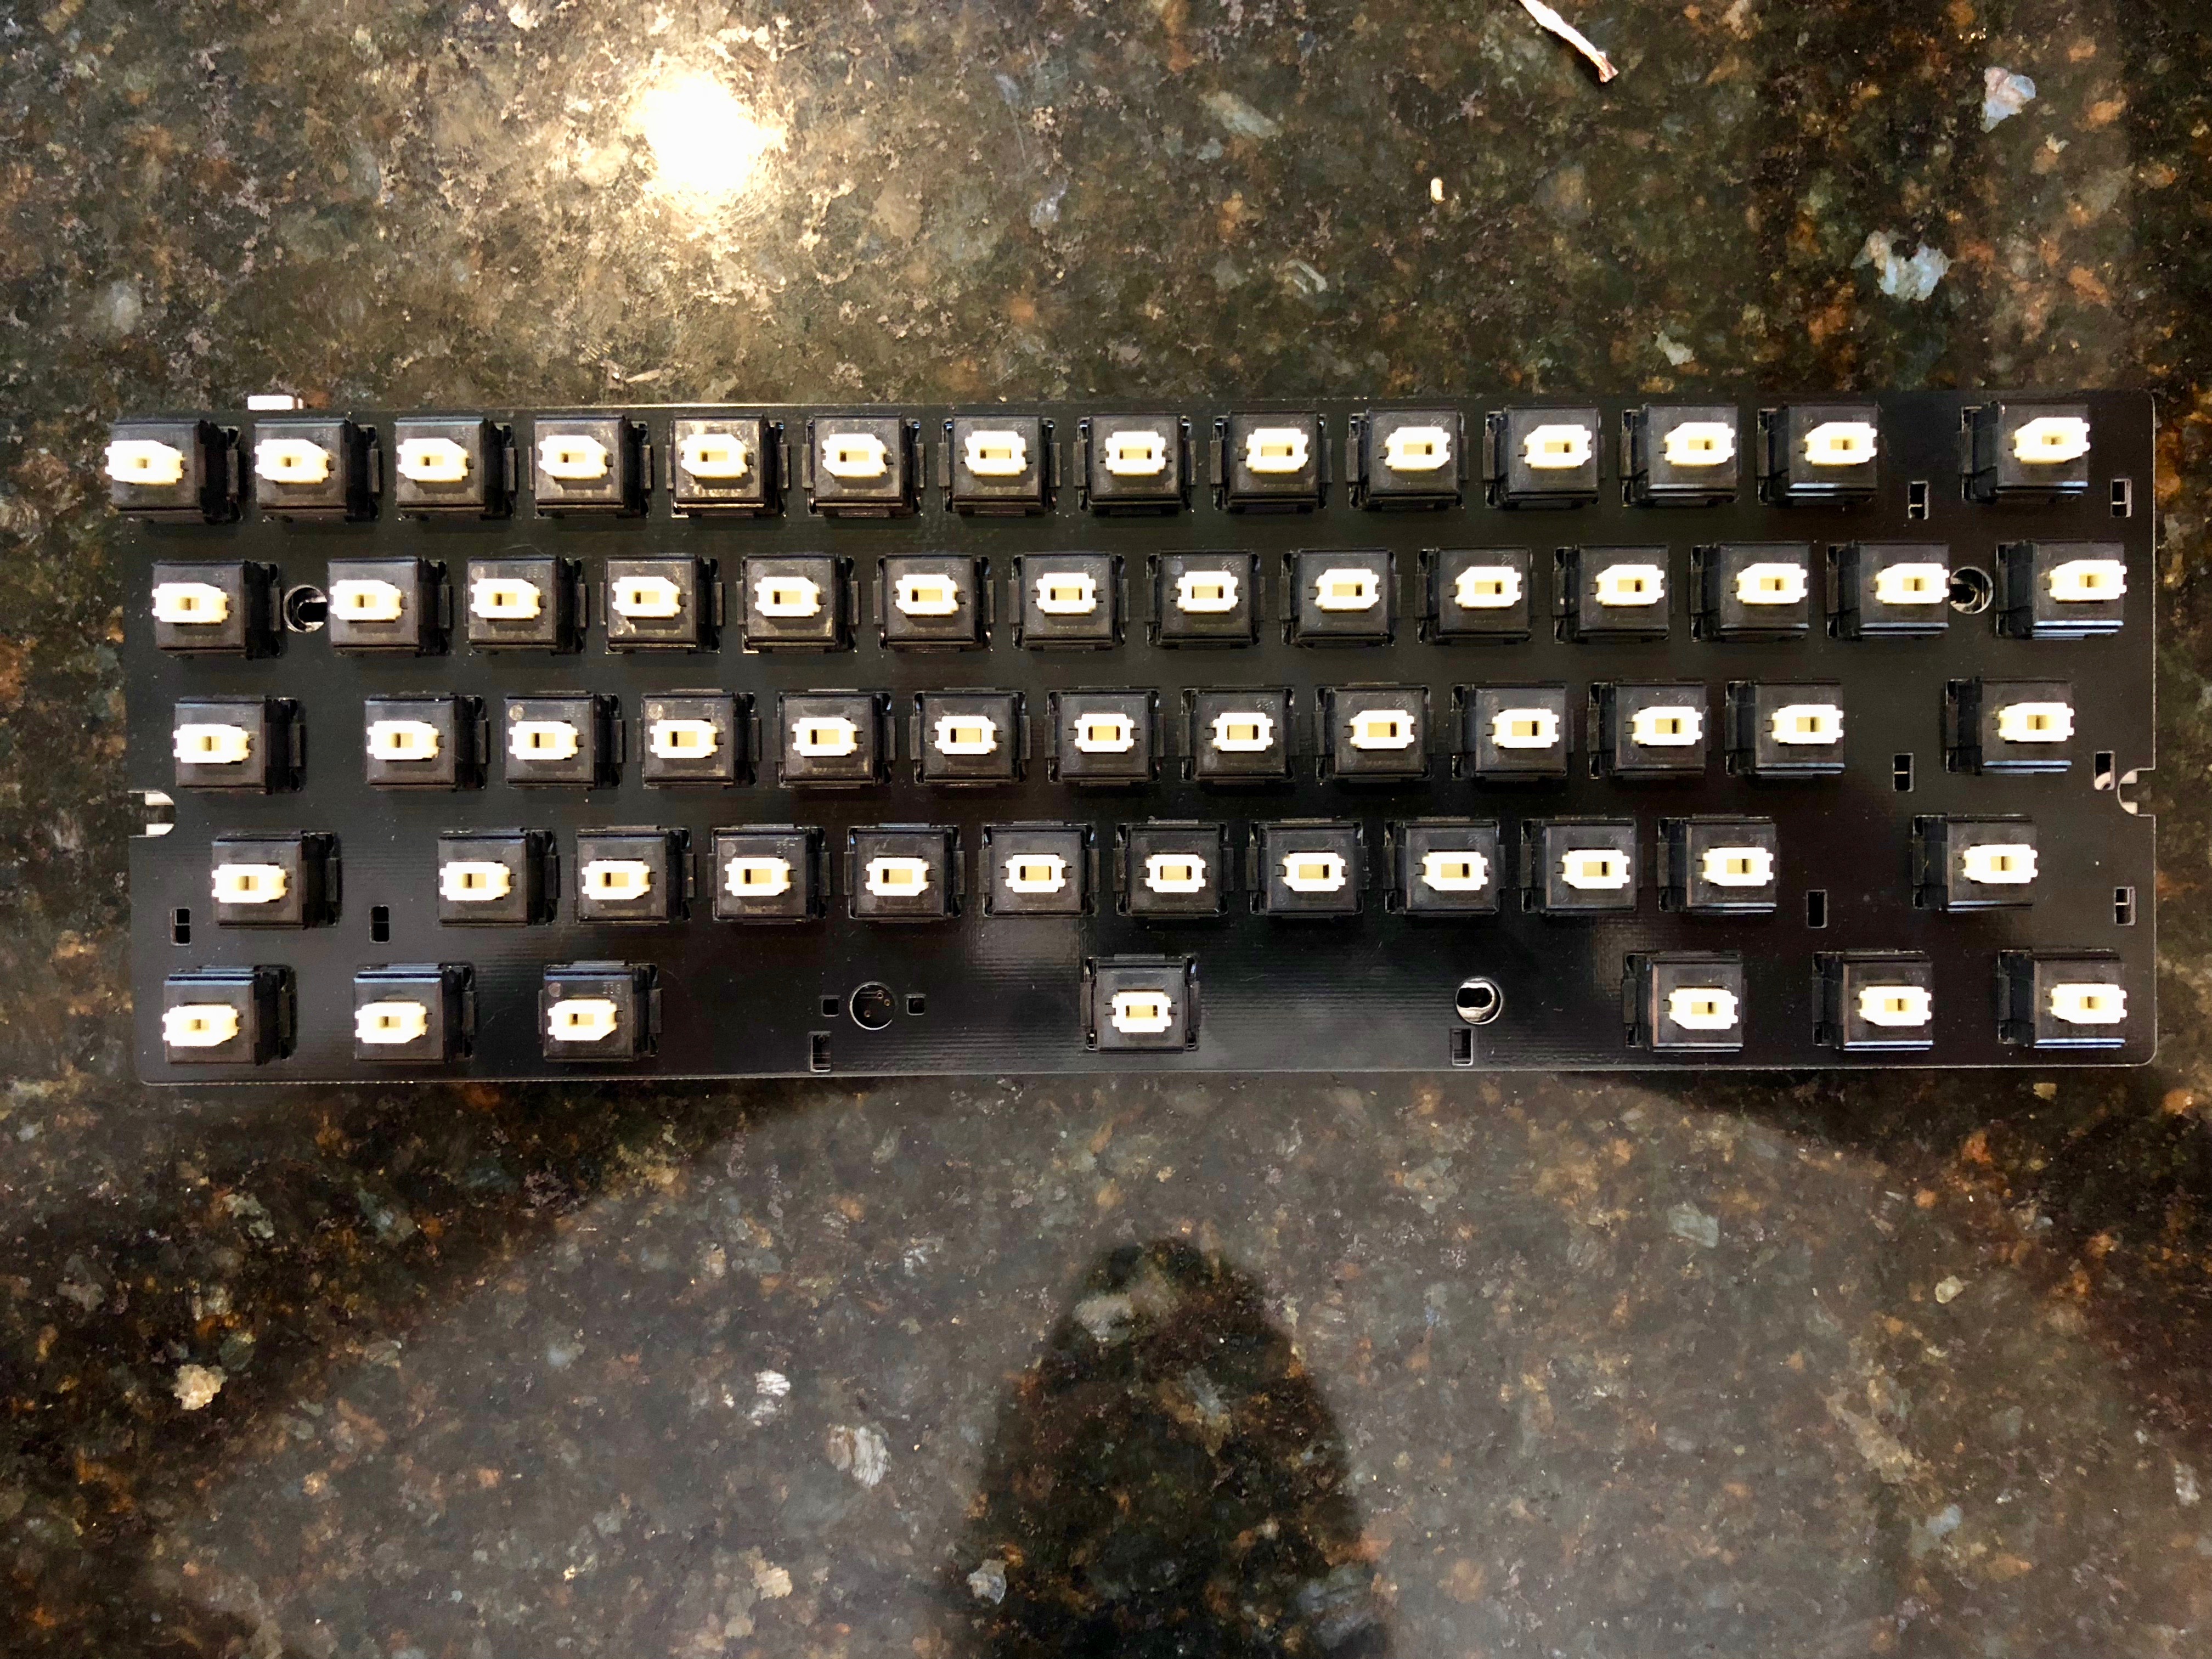
The diodes live on the underside of the PCB, hidden from view, so you need to do them first. Once attached, the switches will sandwich the top plate down and obscure the top of the PCB. So, you’ll also want to ensure that the leads are clipped as close as comfortably possible. At this point in the project, I was actually running low on solder, so I placed the switches, and soldered the four corners plus the space bar. After acquiring more, it was a simple job to apply flux to the leads and solder them one row at a time. I tested as I went: hook up the keyboard, launch TextEdit, and press switches, when you see characters appearing, you’ve got a good, solid connection. Once I had everything done, I noticed a few switches weren’t registering. I tested the PCB by bridging the switch pads with the accompanying diodes with tweezers and seeing characters typed in TextEdit, so I deduced the switches must be bad. Luckily, going from a 104-key keyboard to a 60-key means you have a reserve supply. I desoldered three more switches and tested each before fixing them in place.
Installing the PCB and plate
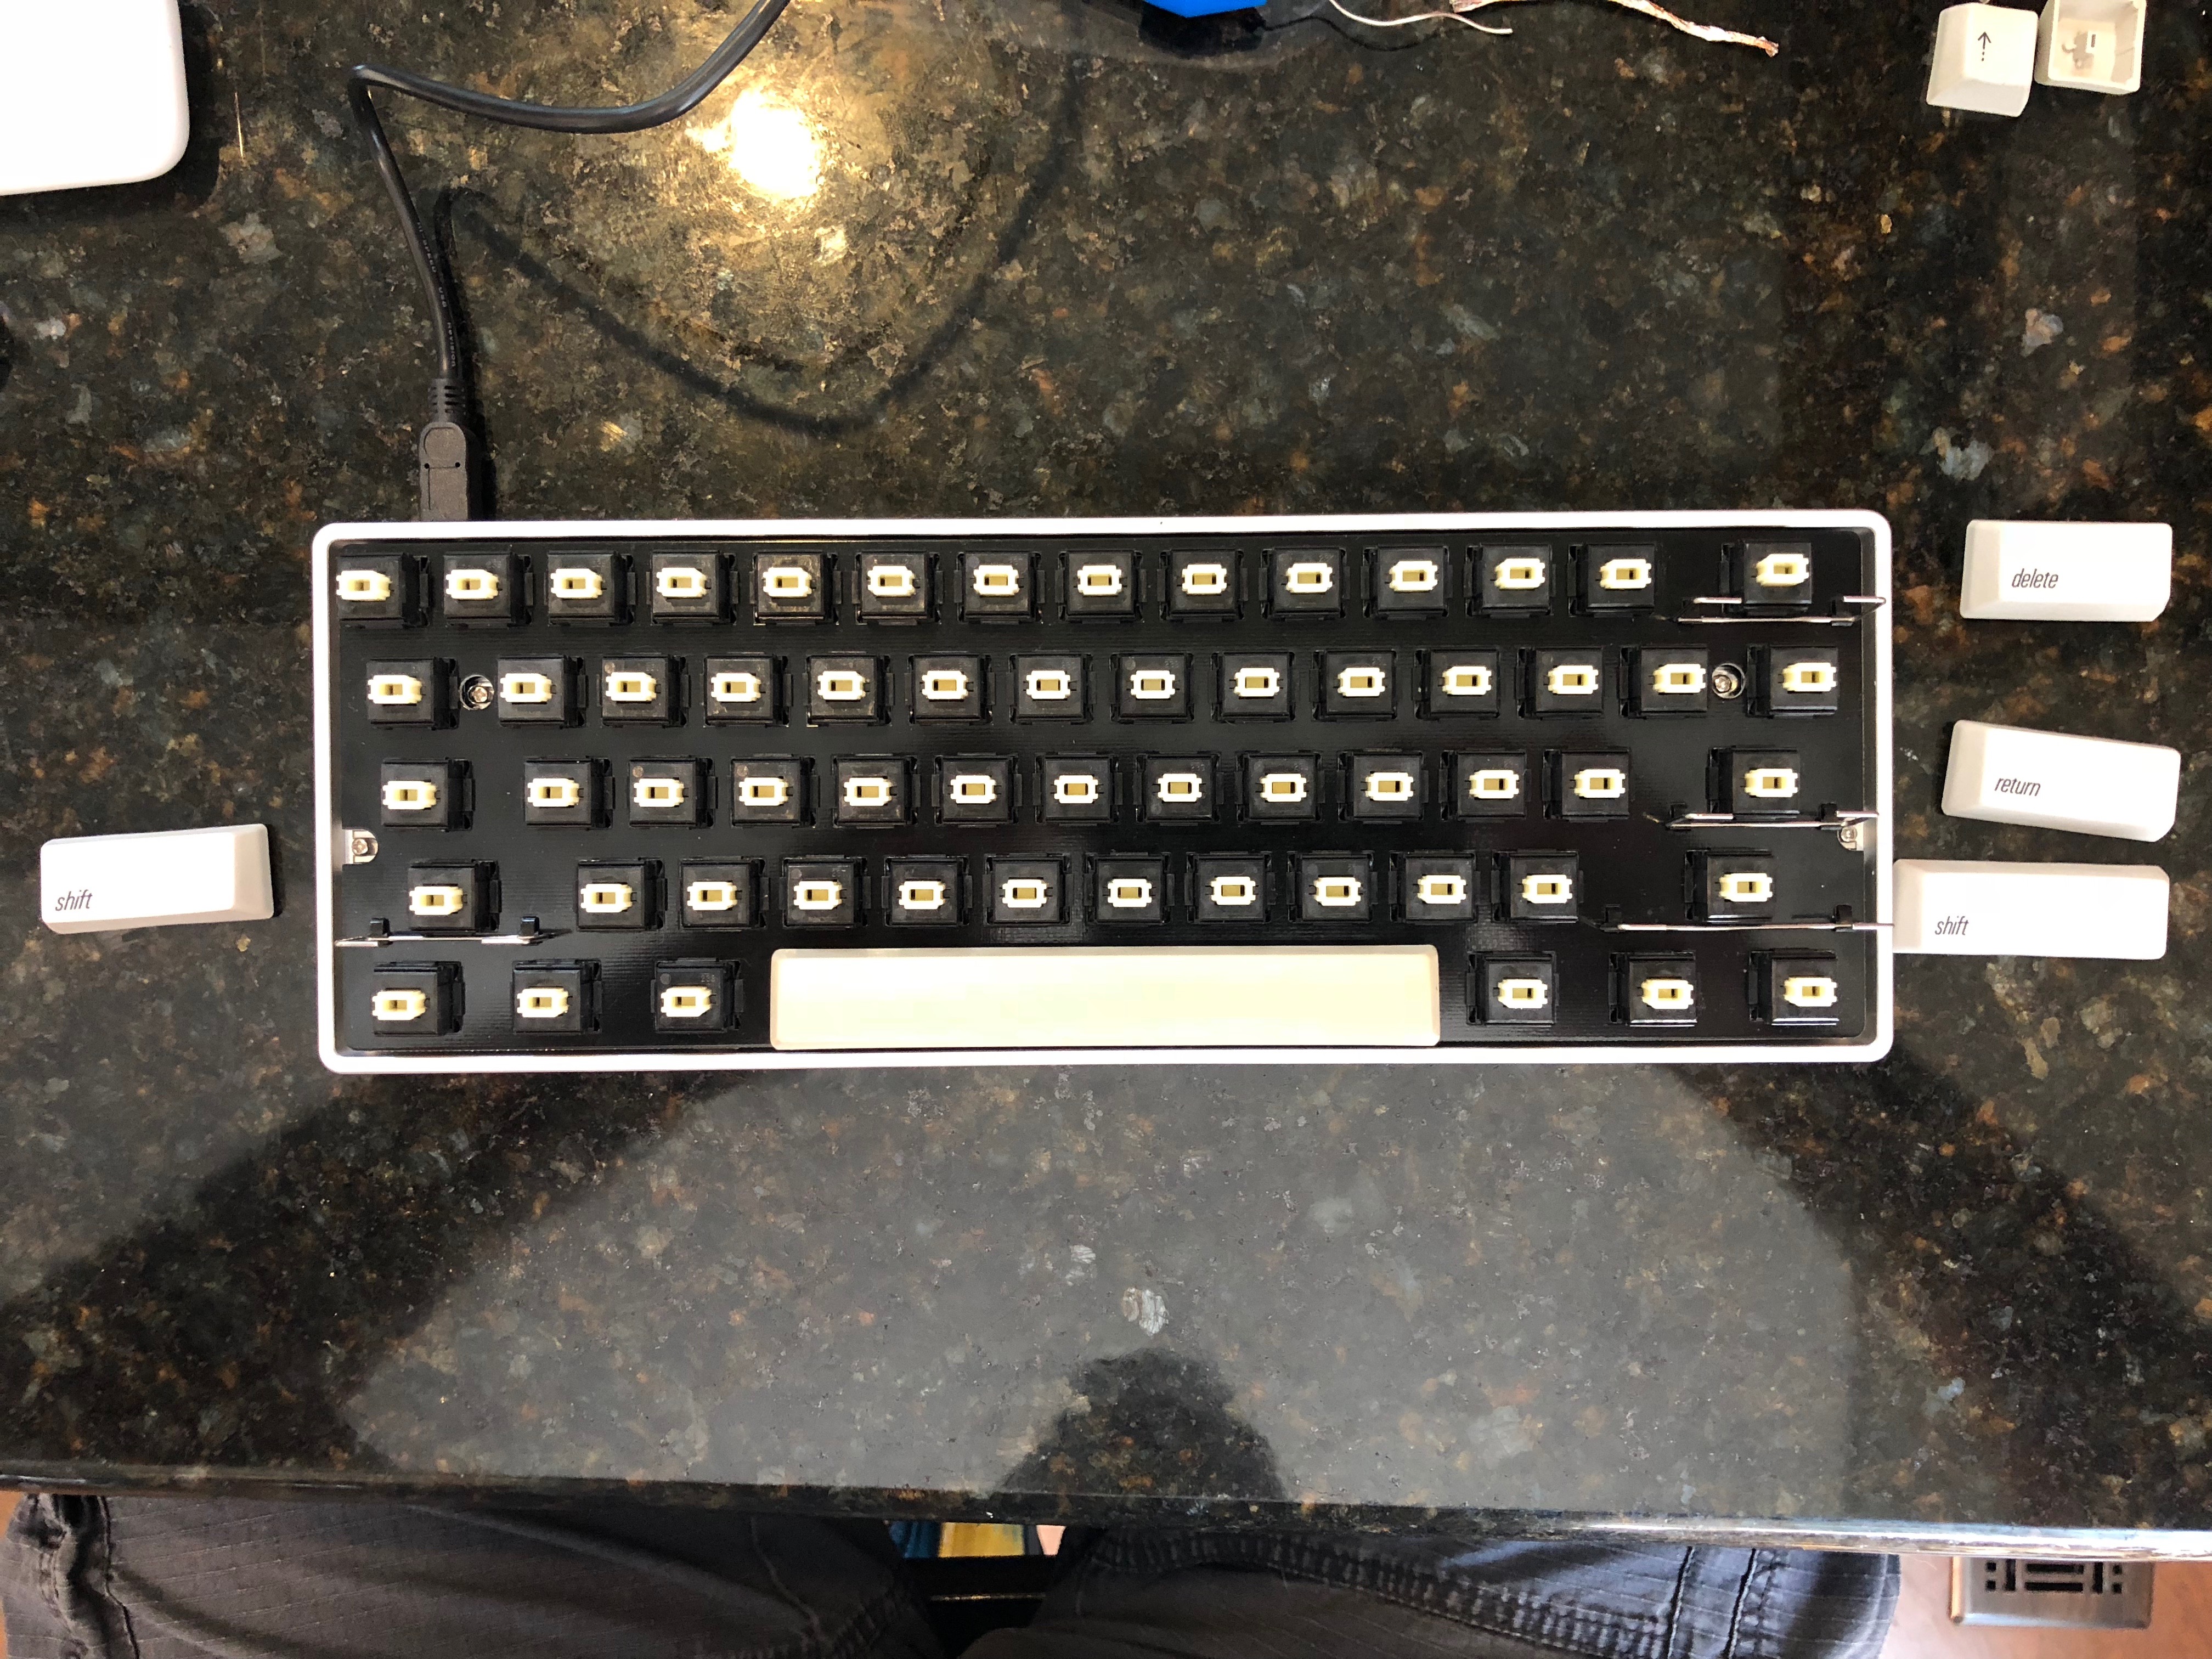
At this point, all the switches were working with the default onboard keymapping, so I attached the PCB to the case with screws and tested and retested and retested (a lot of testing). I set all the stabilizers back in, and attached the largest keycaps first, starting with the space bar.
Installing keycaps
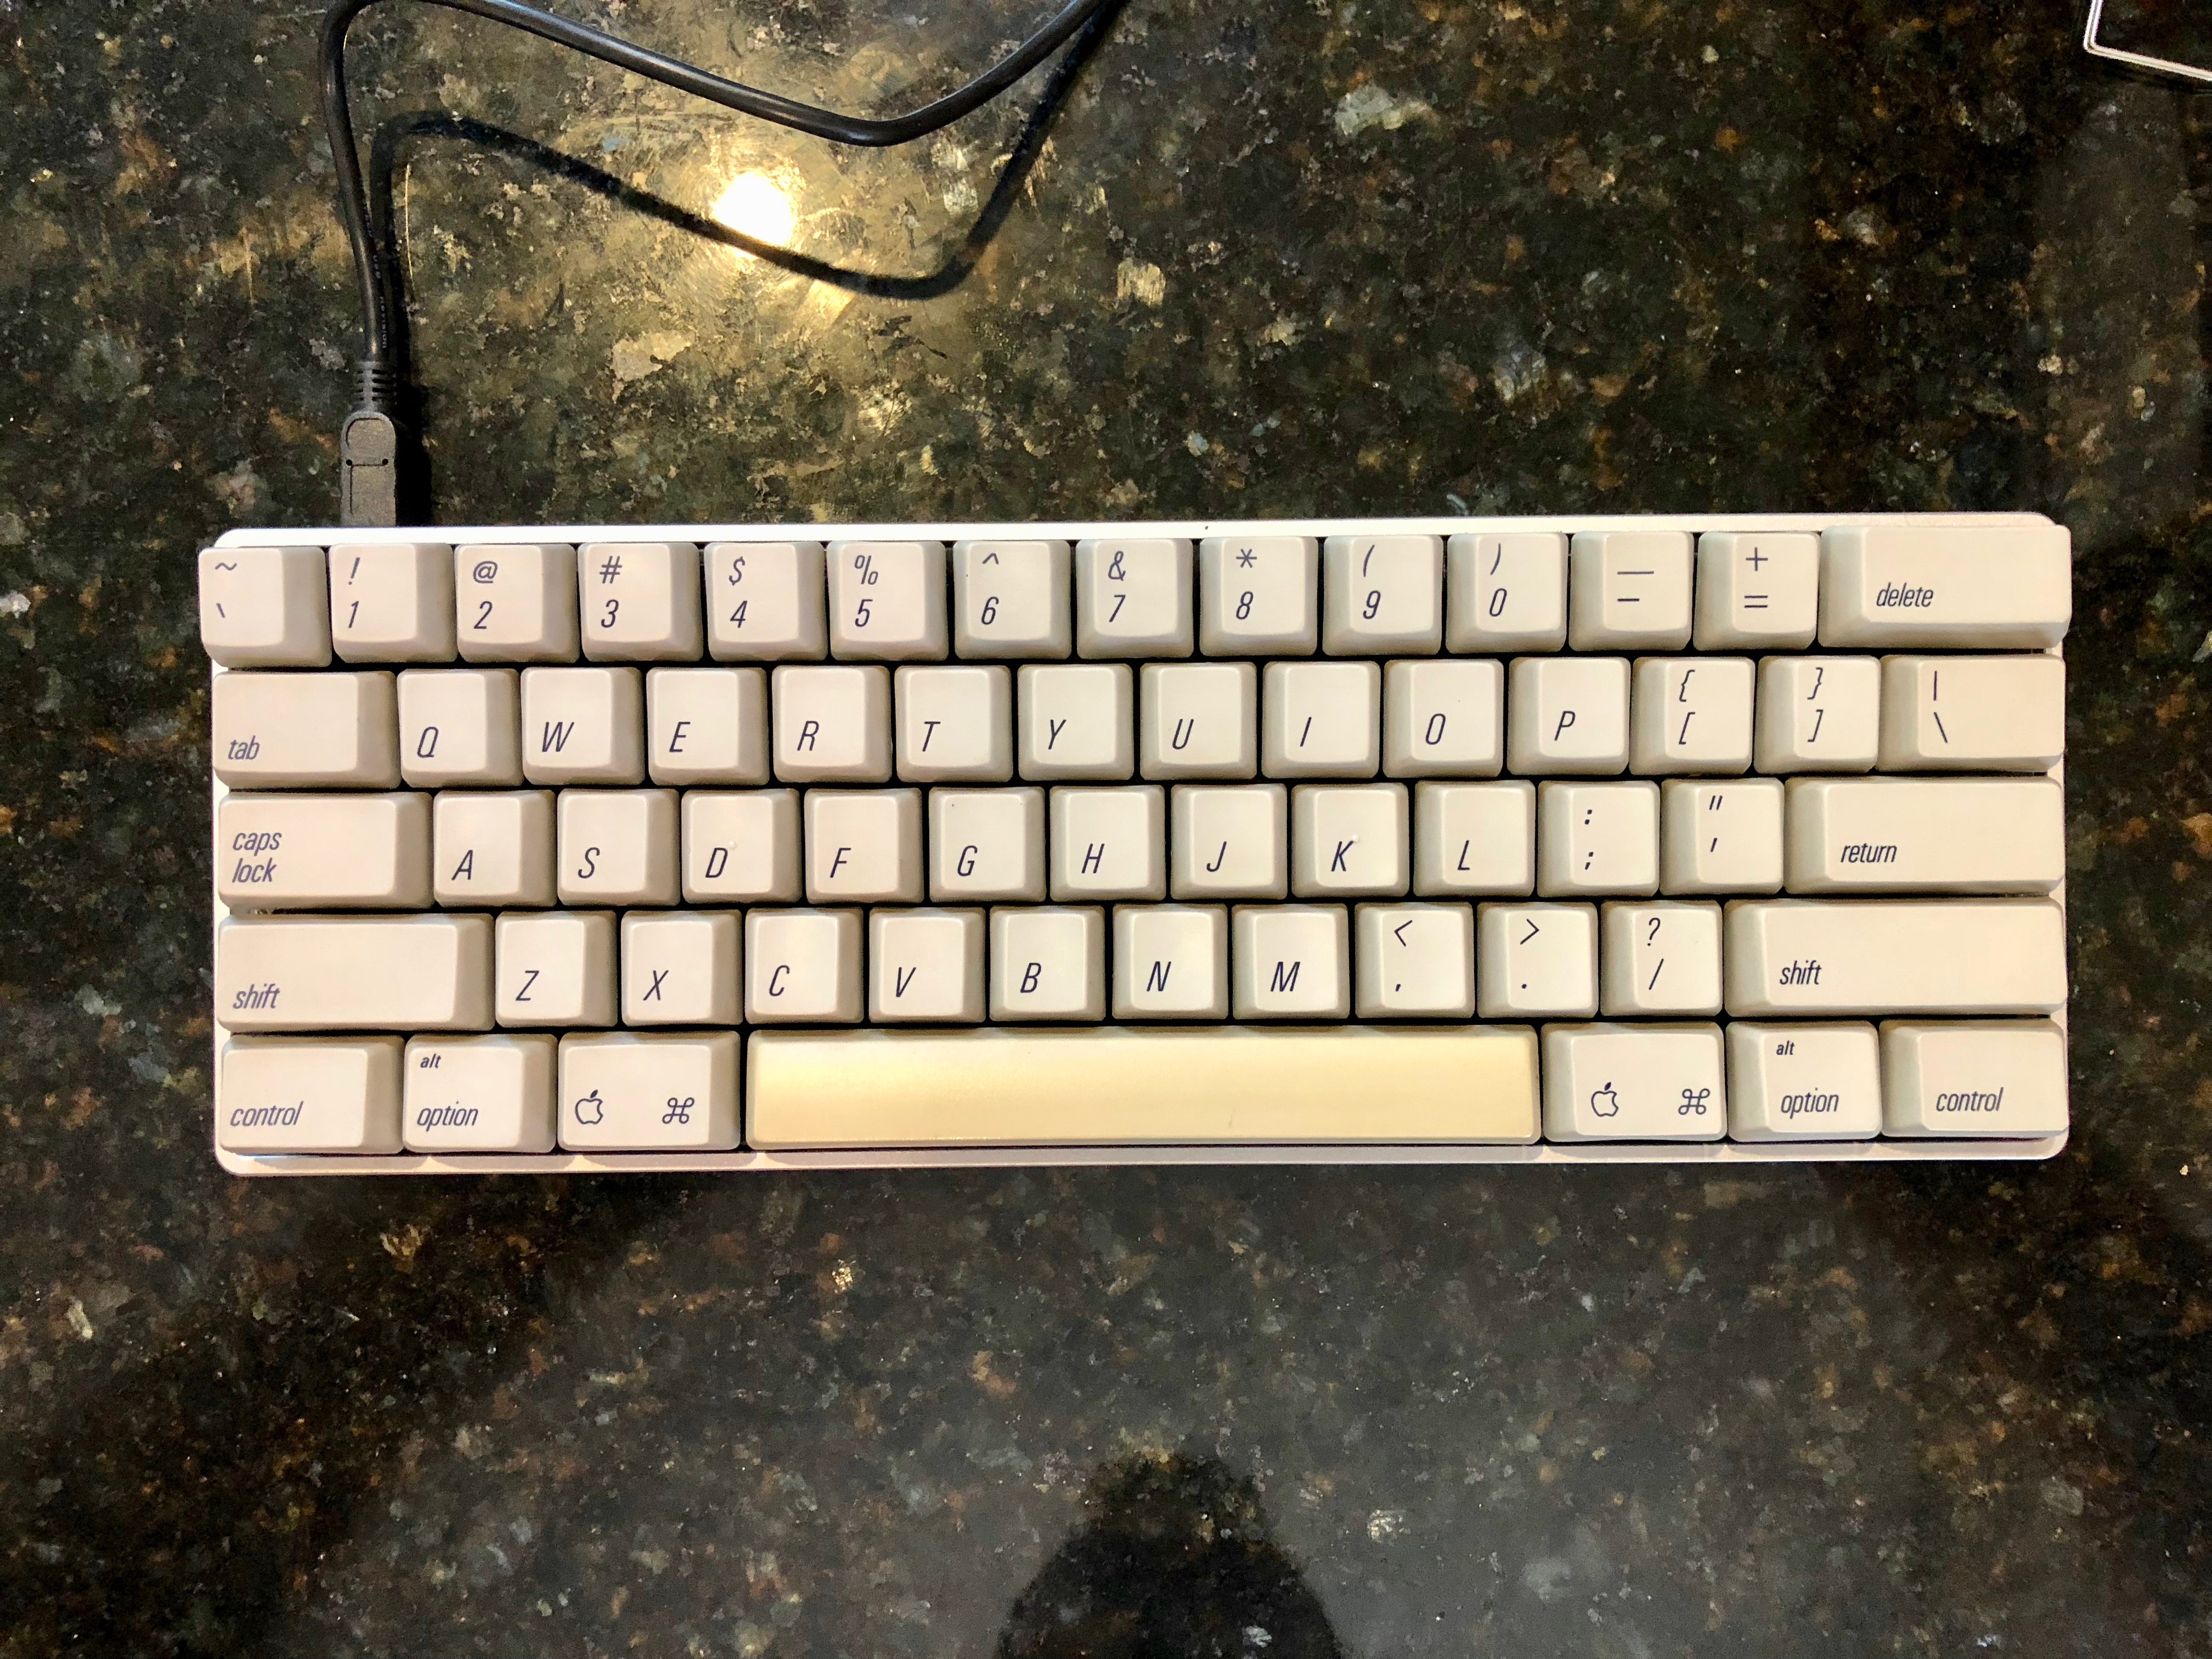
The keycaps are simple enough to install by themselves: just place over the switch and push down with moderate force until it clicks. With no particular order to follow, it was kind of fun trying to match muscle memory with where keys went. When I wasn’t sure, I just looked at my Macbook Pro for confirmation. Muscles remember, but they don’t talk.
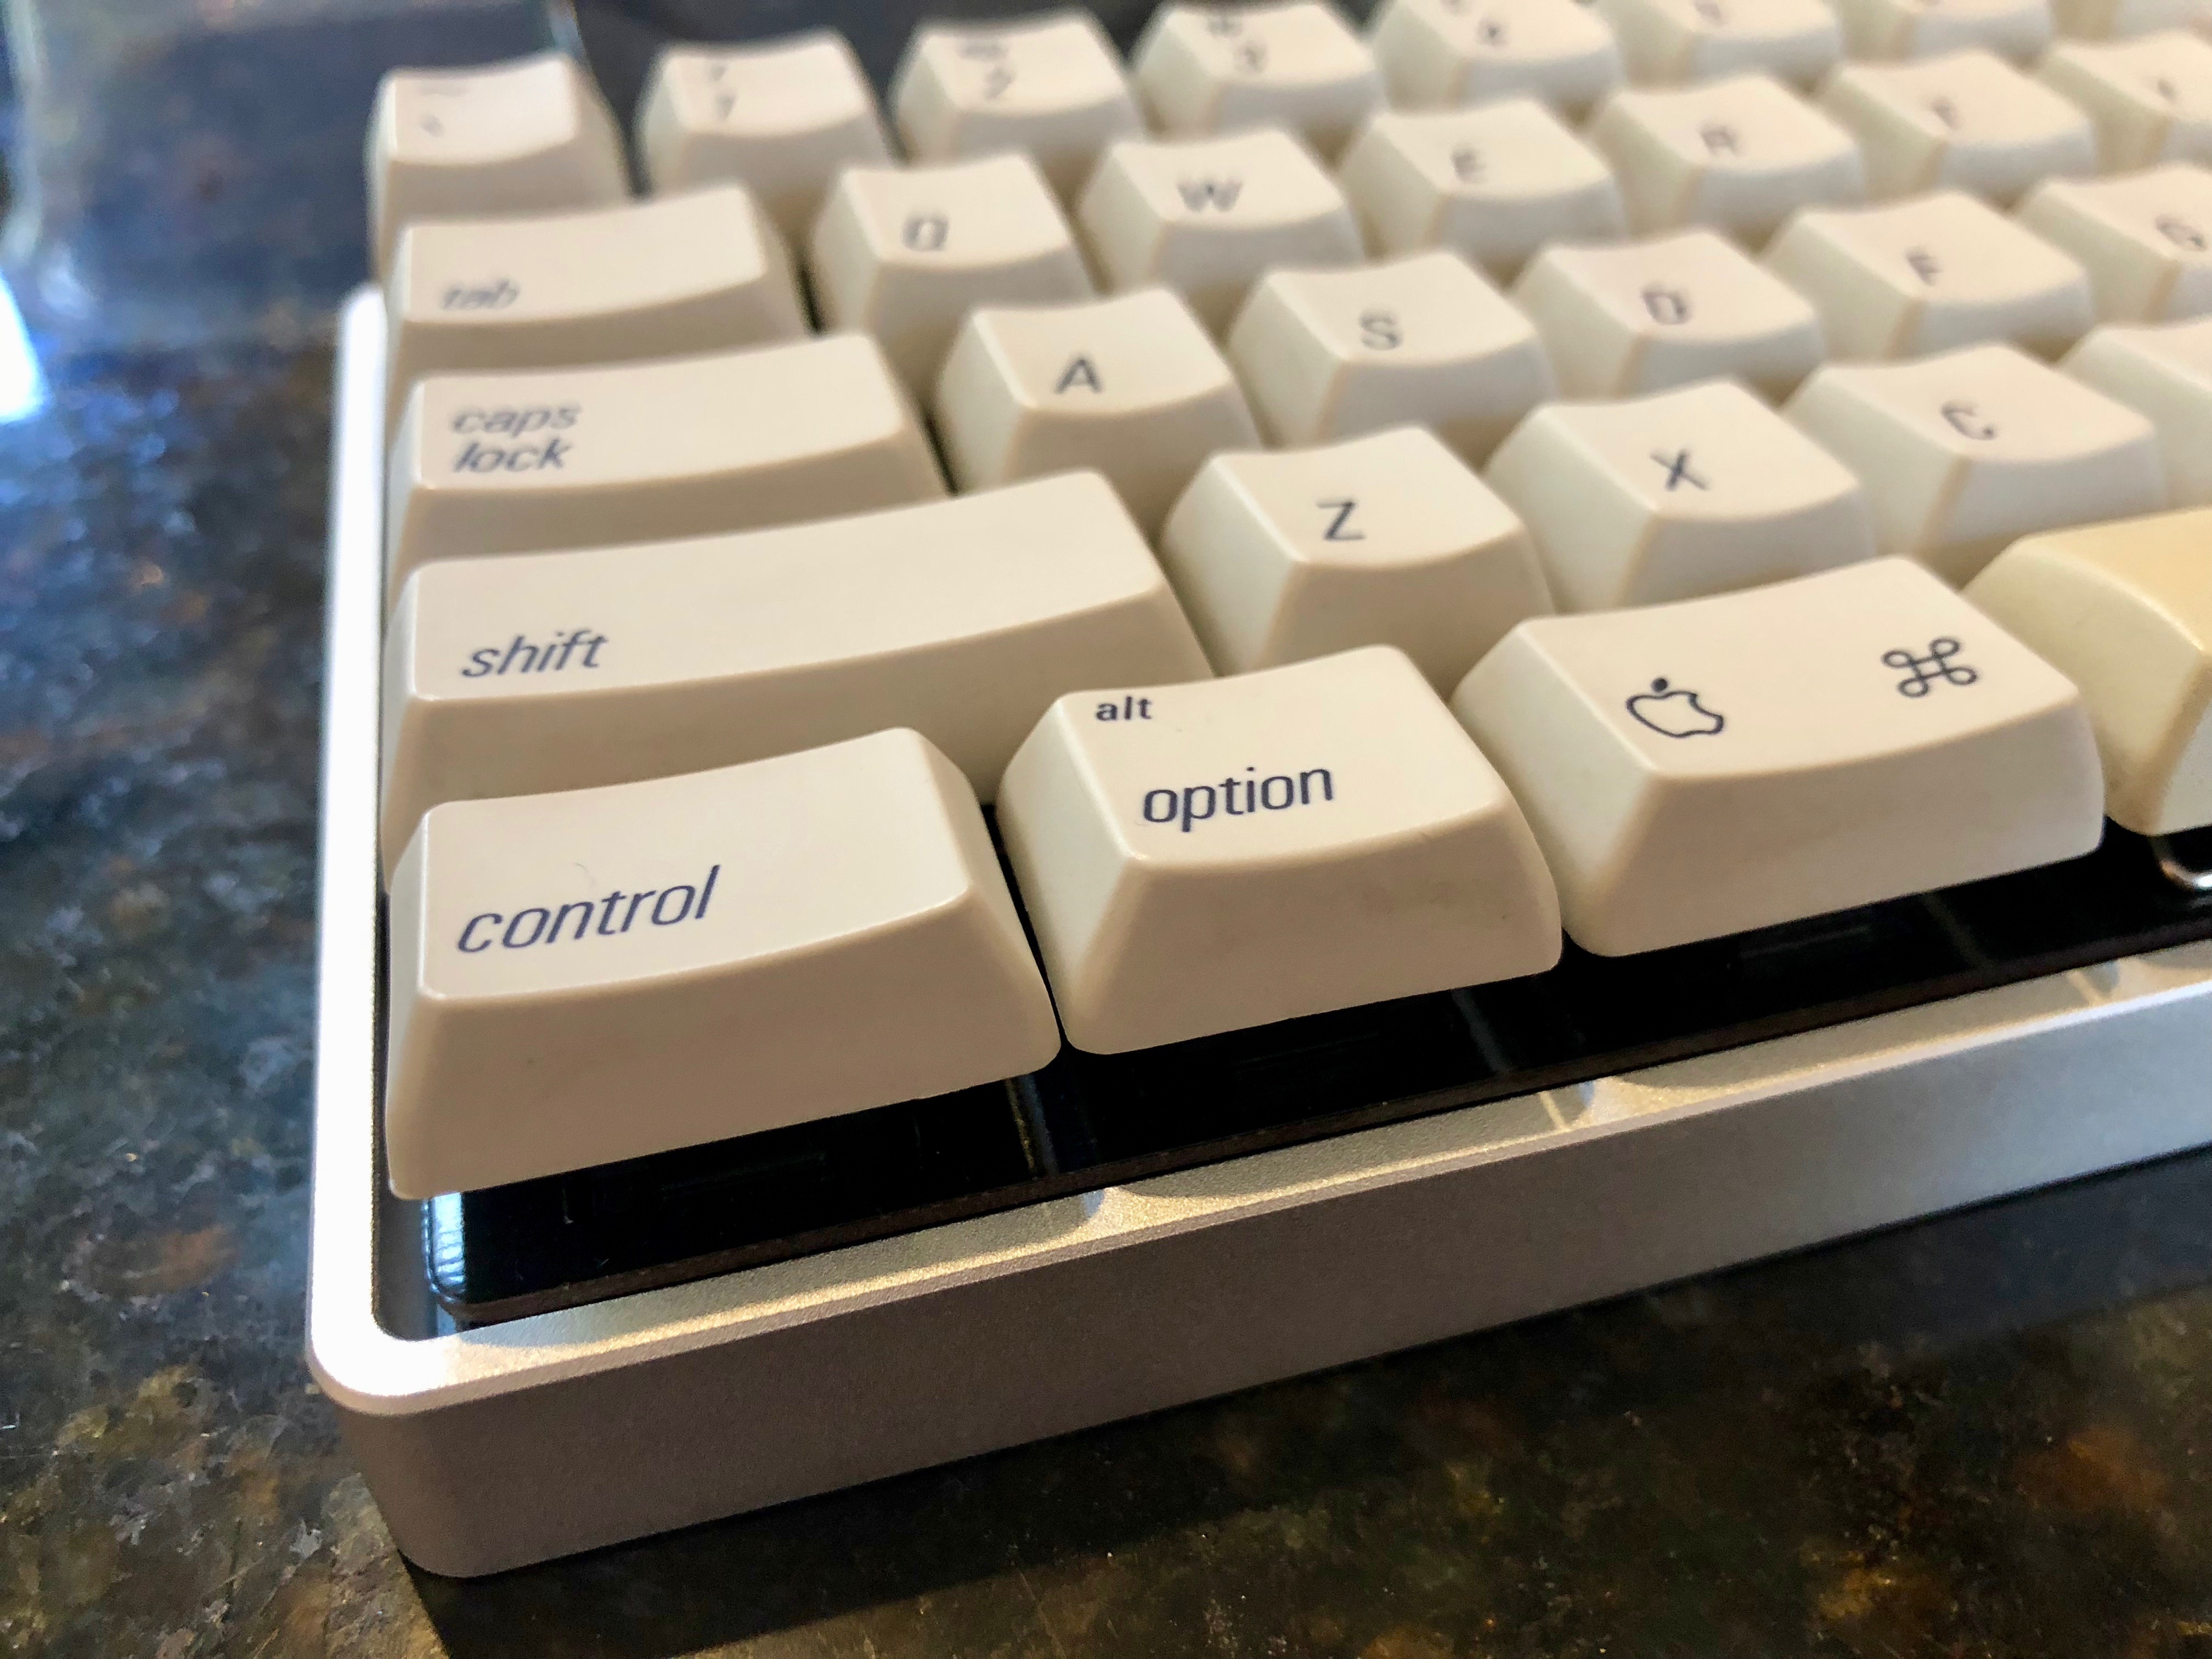
Test drive
I found the default key layout a little wanting. Luckily, the onboard chipset is completely programmable, and Hasu provides an online configurator to specify just exactly how your keyboard should act.
Configuring and flashing the firmware
I used Hasu’s TMK Keymap Editor to set up a few layers on my keyboard. It supports up to 7, but I haven’t explored more than the three I have so far:
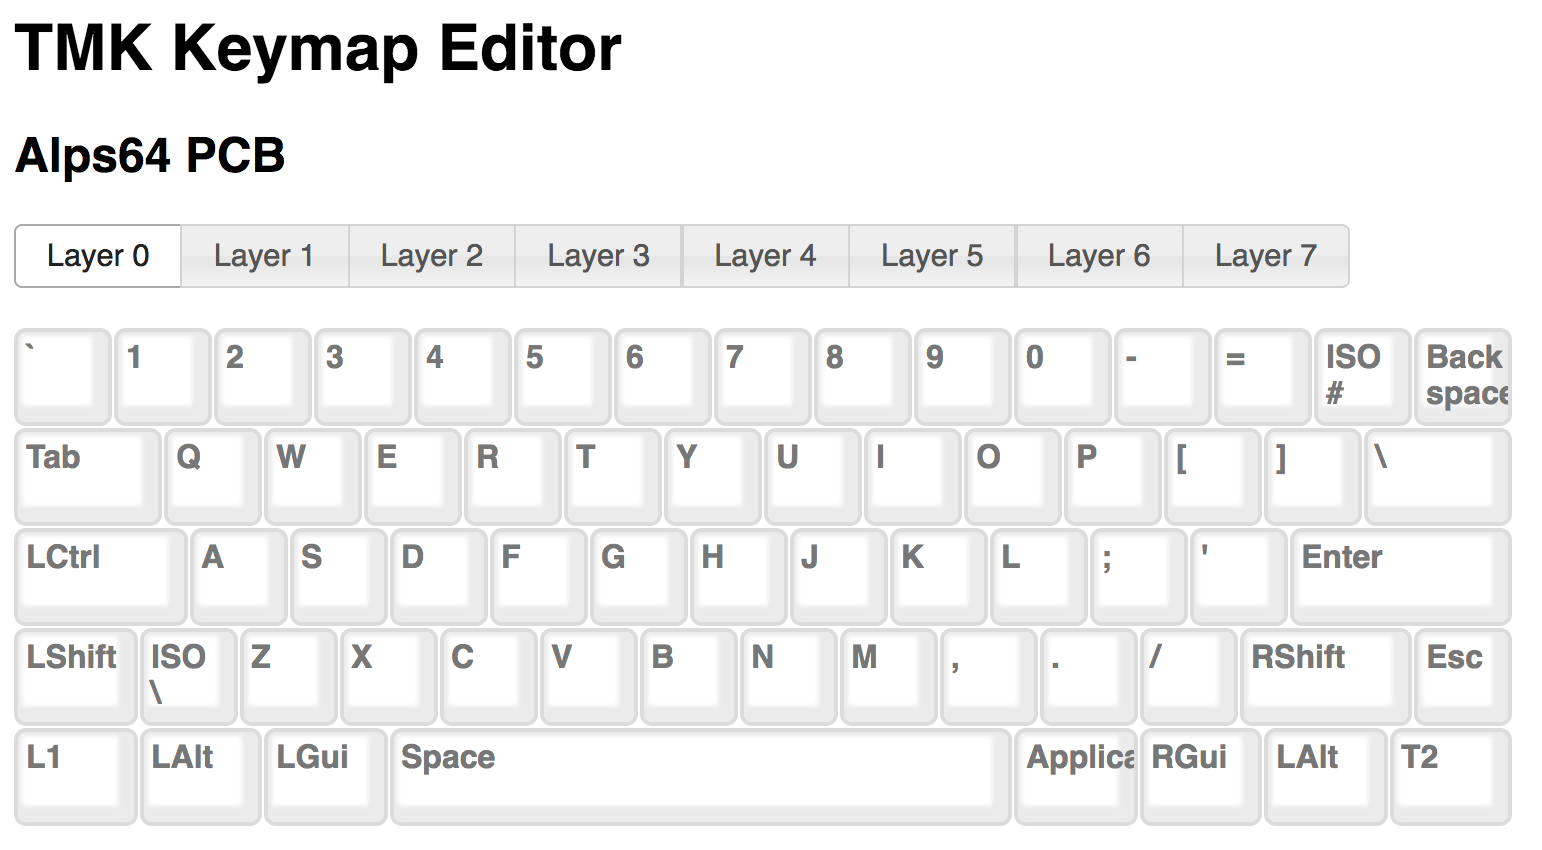
In the default layer, most everything is normal, with the exception of the two
controlkeys in the bottom row.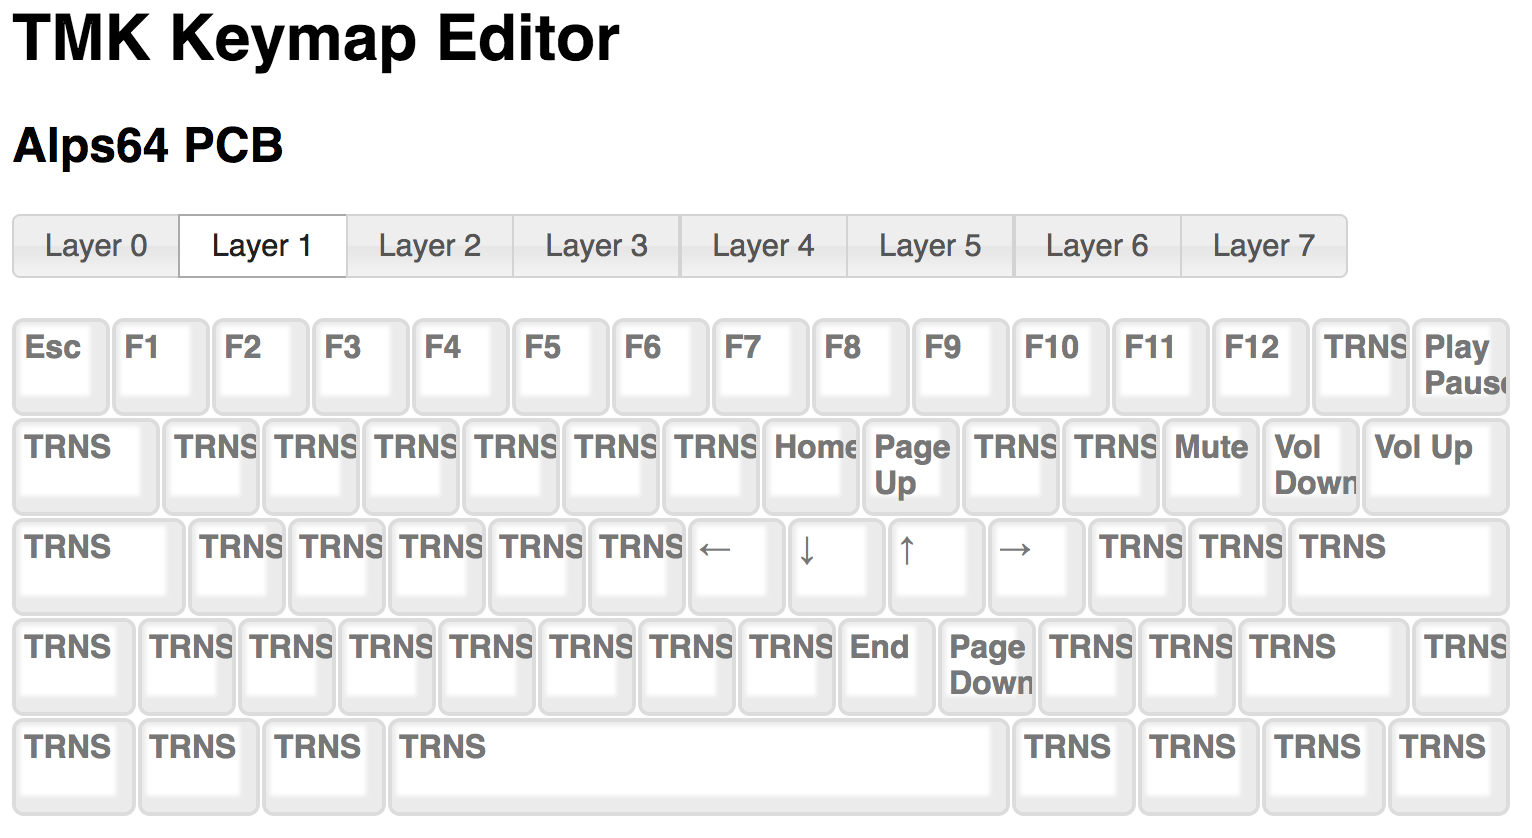
The left control key activates Layer 1, but only when held, making it a modifier to enable arrow keys, function keys, and media keys.
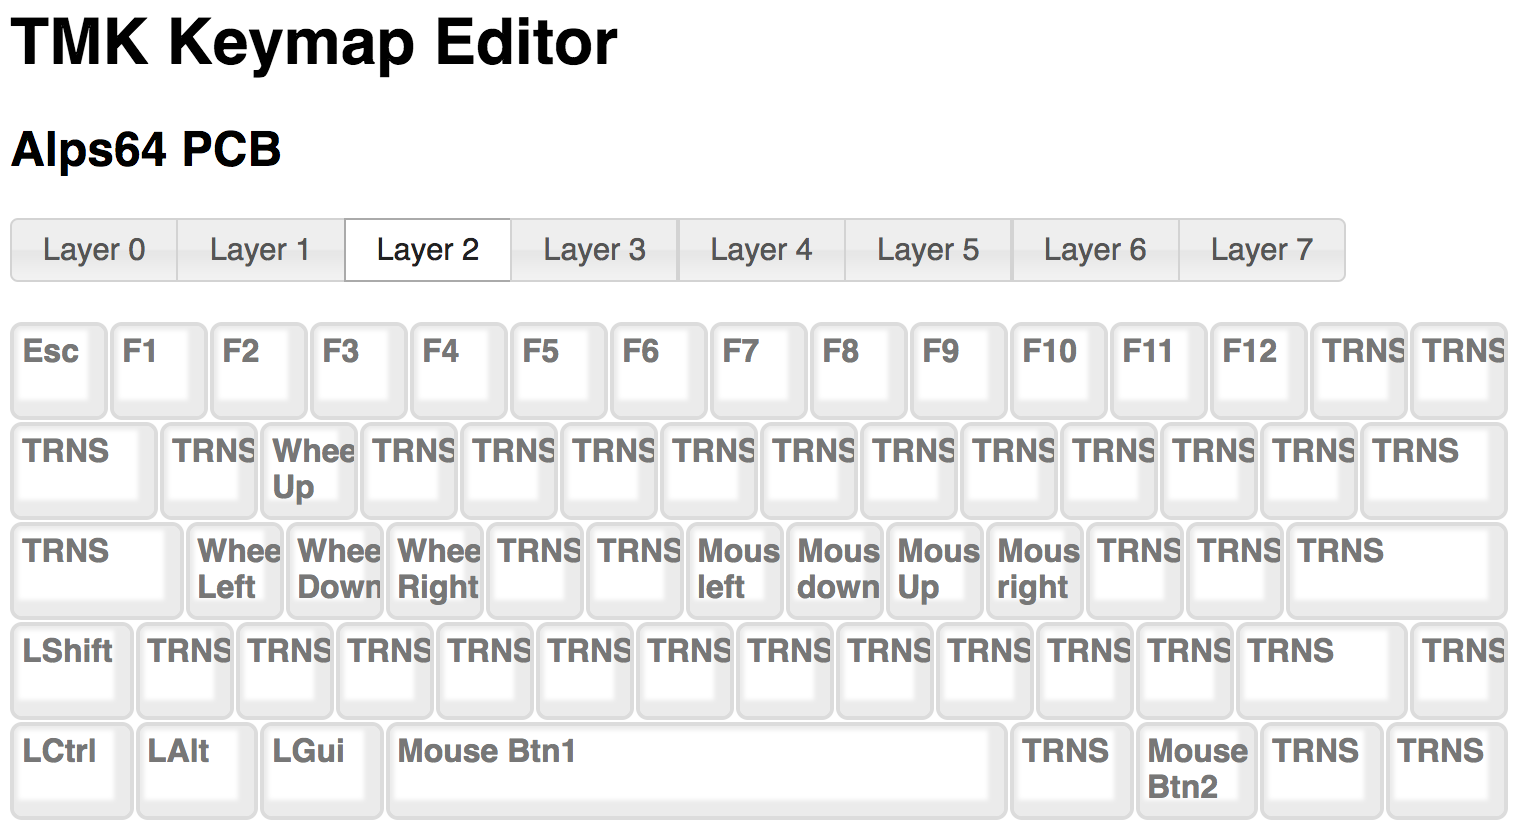
Press the right control key, however, and the entire keyboard switches into mouse mode. I’ve mapped the vim keys for
left,down,up, andrightto the corresponding mouse events, left, down, up, and right, and I’ve reused the standardWASDkeys for scrolling behavior. Space bar becomes mouse button 1, and the right Command key becomes mouse button 2. I now have a fully capable (if slow, and currently frustration-inducing) mouse mode.In use
So far, after a day of use, it’s becoming a bit more familiar, and a whole lot more intuitive. As a heavy vim user, I still get caught up in using the Esc key on layers 1 or 2. I’ve swapped it to be Esc on Layer 0, but it turns out I also make heavy use of the backtick and tilde! In the meanwhile, I’m quite enjoying the aestheic nature of my new keyboard, and the challenge involved in mastering yet another set of fingertip-driven conventions. With a pleasing click and a solid build, I’ll give it another 100 years.
Future Plans
There are a couple ideas I’m already exploring in my head:
- Bluetooth! There’s a writeup of adding a BT controller and battery inside the case. There should be enough room to make that happen, and there are a few other keyboard enthusiasts at work planning on just such a project for theirs.
- 3D printing a new case that doesn’t leave the top plate and switches so exposed.
-
Self Control
In response to my recent keyboard posts, Alpha Chen posed a really good question:
@zacbir Re: http://t.co/AmXWBktHHe Why not remap caps lock to control directly in the firmware instead of doing it in OS X?
— Alpha Chen (@kejadlen) January 18, 2015The answer to which is: *headslap* Of course!
I’ve modified my firmware again to map the key to LCTL, and now the keyboard converter will always send Control when that key is pressed, regardless of OS settings. In fact, it’ll send Control regardless of OS.
Thanks for the dose of obvious, Alpha Chen!
Current keymap file:
download #include "keymap_common.h" const uint8_t PROGMEM keymaps[][MATRIX_ROWS][MATRIX_COLS] = { KEYMAP_EXT_ANSI( ESC, F1, F2, F3, F4, F5, F6, F7, F8, F9, F10, F11, F12, FN0, SLCK,PAUS, PWR, GRV, 1, 2, 3, 4, 5, 6, 7, 8, 9, 0, MINS,EQL, BSPC, INS, HOME,PGUP, NLCK,PEQL,PSLS,PAST, TAB, Q, W, E, R, T, Y, U, I, O, P, LBRC,RBRC,BSLS, DEL, END, PGDN, P7, P8, P9, PMNS, LCTL,A, S, D, F, G, H, J, K, L, SCLN,QUOT, ENT, P4, P5, P6, PPLS, LSFT,Z, X, C, V, B, N, M, COMM,DOT, SLSH, RSFT, UP, P1, P2, P3, LCTL,LALT,LGUI, SPC, RALT,RCTL, LEFT,DOWN,RGHT, P0, PDOT,PENT ), KEYMAP_EXT_ANSI( ESC, F1, F2, F3, F4, F5, F6, MPRV,MPLY,MNXT,MUTE, VOLD,VOLU, FN0, SLCK,PAUS, PWR, GRV, 1, 2, 3, 4, 5, 6, 7, 8, 9, 0, MINS,EQL, BSPC, INS, HOME,PGUP, NLCK,PEQL,PSLS,PAST, TAB, Q, W, E, R, T, Y, U, I, O, P, LBRC,RBRC,BSLS, DEL, END, PGDN, P7, P8, P9, PMNS, LCTL,A, S, D, F, G, H, J, K, L, SCLN,QUOT, ENT, P4, P5, P6, PPLS, LSFT,Z, X, C, V, B, N, M, COMM,DOT, SLSH, RSFT, UP, P1, P2, P3, LCTL,LALT,LGUI, SPC, RALT,RCTL, LEFT,DOWN,RGHT, P0, PDOT,PENT ), }; const uint16_t PROGMEM fn_actions[] = { [0] = ACTION_LAYER_MOMENTARY(1), }; -
In Media Res
I realized that in my first post about my new keyboard, I didn’t really explain the process to build the firmware for the Teensy 2.0 microcontroller. Since then, I’ve modified my keymap to swap caps lock with control, and now I’ve added back in most of the media key functionality. I’ll show you how to do that now, and explain the compilation process.
Getting the Tools
There are two tools required for compiling and installing the firmware to the Teensy. The first is CrossPack by Objective Development. The tools are installed into /usr/local/CrossPack-AVR/bin/, so you’ll want to add that directory to your $PATH environment variable, either permanently or during compilation. The examples below will use the latter.
To install the resulting firmware code onto the Teensy, you’ll need the Teensy Loader application.
Both these tools predate the signing requirements to get past OS X’s quarantine, so you’ll need to open them via context menu in the Finder.
Getting the Code
You’ll need a copy of hasu’s tmk_keyboard project:
$ git clone git@github.com:tmk/tmk_keyboard.gitModifying the Keymap
We’ll start with the keymap_ansi.c file and modify it. The ANSI layout makes a very sensible default for the stock keyboard, since it uses the locking caps lock.
download #include "keymap_common.h" const uint8_t PROGMEM keymaps[][MATRIX_ROWS][MATRIX_COLS] = { KEYMAP_EXT_ANSI( ESC, F1, F2, F3, F4, F5, F6, F7, F8, F9, F10, F11, F12, PSCR,SLCK,PAUS, PWR, GRV, 1, 2, 3, 4, 5, 6, 7, 8, 9, 0, MINS,EQL, BSPC, INS, HOME,PGUP, NLCK,PEQL,PSLS,PAST, TAB, Q, W, E, R, T, Y, U, I, O, P, LBRC,RBRC,BSLS, DEL, END, PGDN, P7, P8, P9, PMNS, LCAP,A, S, D, F, G, H, J, K, L, SCLN,QUOT, ENT, P4, P5, P6, PPLS, LSFT,Z, X, C, V, B, N, M, COMM,DOT, SLSH, RSFT, UP, P1, P2, P3, LCTL,LALT,LGUI, SPC, RALT,RCTL, LEFT,DOWN,RGHT, P0, PDOT,PENT ), }; const uint16_t PROGMEM fn_actions[] = { };$ cd tmk_keyboard/converter/adb_usb/ $ cp keymap_ansi.c keymap_zbir.cTo create media keys, we’ll need to add another keyboard layer to our keymap. We can duplicate the base layer, and change one key’s code to be FN0. In my case, I’ve chosen the Print Screen key. I’ve designated its action to be ACTION_LAYER_MOMENTARY to switch to layer 1, which has the media keys assigned to F7 through F12.
download #include "keymap_common.h" const uint8_t PROGMEM keymaps[][MATRIX_ROWS][MATRIX_COLS] = { KEYMAP_EXT_ANSI( ESC, F1, F2, F3, F4, F5, F6, F7, F8, F9, F10, F11, F12, FN0, SLCK,PAUS, PWR, GRV, 1, 2, 3, 4, 5, 6, 7, 8, 9, 0, MINS,EQL, BSPC, INS, HOME,PGUP, NLCK,PEQL,PSLS,PAST, TAB, Q, W, E, R, T, Y, U, I, O, P, LBRC,RBRC,BSLS, DEL, END, PGDN, P7, P8, P9, PMNS, CAPS,A, S, D, F, G, H, J, K, L, SCLN,QUOT, ENT, P4, P5, P6, PPLS, LSFT,Z, X, C, V, B, N, M, COMM,DOT, SLSH, RSFT, UP, P1, P2, P3, LCTL,LALT,LGUI, SPC, RALT,RCTL, LEFT,DOWN,RGHT, P0, PDOT,PENT ), KEYMAP_EXT_ANSI( ESC, F1, F2, F3, F4, F5, F6, MPRV,MPLY,MNXT,MUTE, VOLD,VOLU, FN0, SLCK,PAUS, PWR, GRV, 1, 2, 3, 4, 5, 6, 7, 8, 9, 0, MINS,EQL, BSPC, INS, HOME,PGUP, NLCK,PEQL,PSLS,PAST, TAB, Q, W, E, R, T, Y, U, I, O, P, LBRC,RBRC,BSLS, DEL, END, PGDN, P7, P8, P9, PMNS, CAPS,A, S, D, F, G, H, J, K, L, SCLN,QUOT, ENT, P4, P5, P6, PPLS, LSFT,Z, X, C, V, B, N, M, COMM,DOT, SLSH, RSFT, UP, P1, P2, P3, LCTL,LALT,LGUI, SPC, RALT,RCTL, LEFT,DOWN,RGHT, P0, PDOT,PENT ), }; const uint16_t PROGMEM fn_actions[] = { [0] = ACTION_LAYER_MOMENTARY(1), };Compiling the Firmware
By default, with nothing specified, the Makefile will compile keymap_ansi.c. You can specify a KEYMAP parameter to
maketo choose an alternate. It matches the part of the filename like this:keymap_{KEYMAP}.c. Remember to include the CrossPack AVR location in your $PATH:$ set PATH /usr/local/CrossPack-AVR/bin $PATH; make KEYMAP=zbirThis will create a number of output files, but we’re interested in
adb_usb_lufa.hex, as that’s the file format Teensy Loader will install.Installing the Firmware
Launch the Teensy app. It’s just one little window. Isn’t it cute? Four little buttons along the top. Press the reset button on the Teensy itself to start the conversation. Click the first button to locate your .hex file. Click the second to erase the Teensy and install the new firmware. Click the third button to reboot the Teensy. Don’t bother with Automatic Mode.
You’re done! If you use a layout like mine, pressing Print Screen and F8 will play/pause iTunes. And since it’s part of the firmware, it works and sends the same commands no matter what computer you plug the keyboard into (or if you use a virtual KV like Teleport, no matter which computer is receiving the keyboard and mouse events).
-
Getting Control over Caps Lock
So, one of the first things I wanted to do with my newly resurrected Apple Extended Keyboard II was to return to the “proper” behavior with respect to the horribly misplaced Caps Lock key.
As a developer, I make extensive use of OS X’s built-in text editing features, many of which have origins in UNIX. I use a lot of Control key shortcuts: Control-A to go to the beginning of a line, Control-E to go to the end, Control-N to advance to the next line, Control-P to go to the previous line, and so on… I don’t know the whole history of keyboard hardware development, but I’m sure there was some reason why Caps Lock got the placement it did, wrong as it was. Personally, I find using Control works much better situated next to the ‘A’ key.
Normally, OS X makes it very easy to change the behavior of the Caps Lock key (as we’ll see below). However, Apple’s mechanical keyboards use locking Alps key switches, which behave as a key-down-key-up with each press, rather than as a momentary key-down like other modifier keys. This means the OS can’t simply treat it as it does a non-locking switch (like on Apple’s new keyboards). These locking switches are easily modifiable though, as I’ll explain.
There are three parts to upgrading your Caps Lock to Control: One mechanical, one in the firmware of the adapter, and one in the OS.
[Edit 2015-01-19]: Actually, you don’t even need to fiddle with the OS. You can just change the firmware
Mechanical
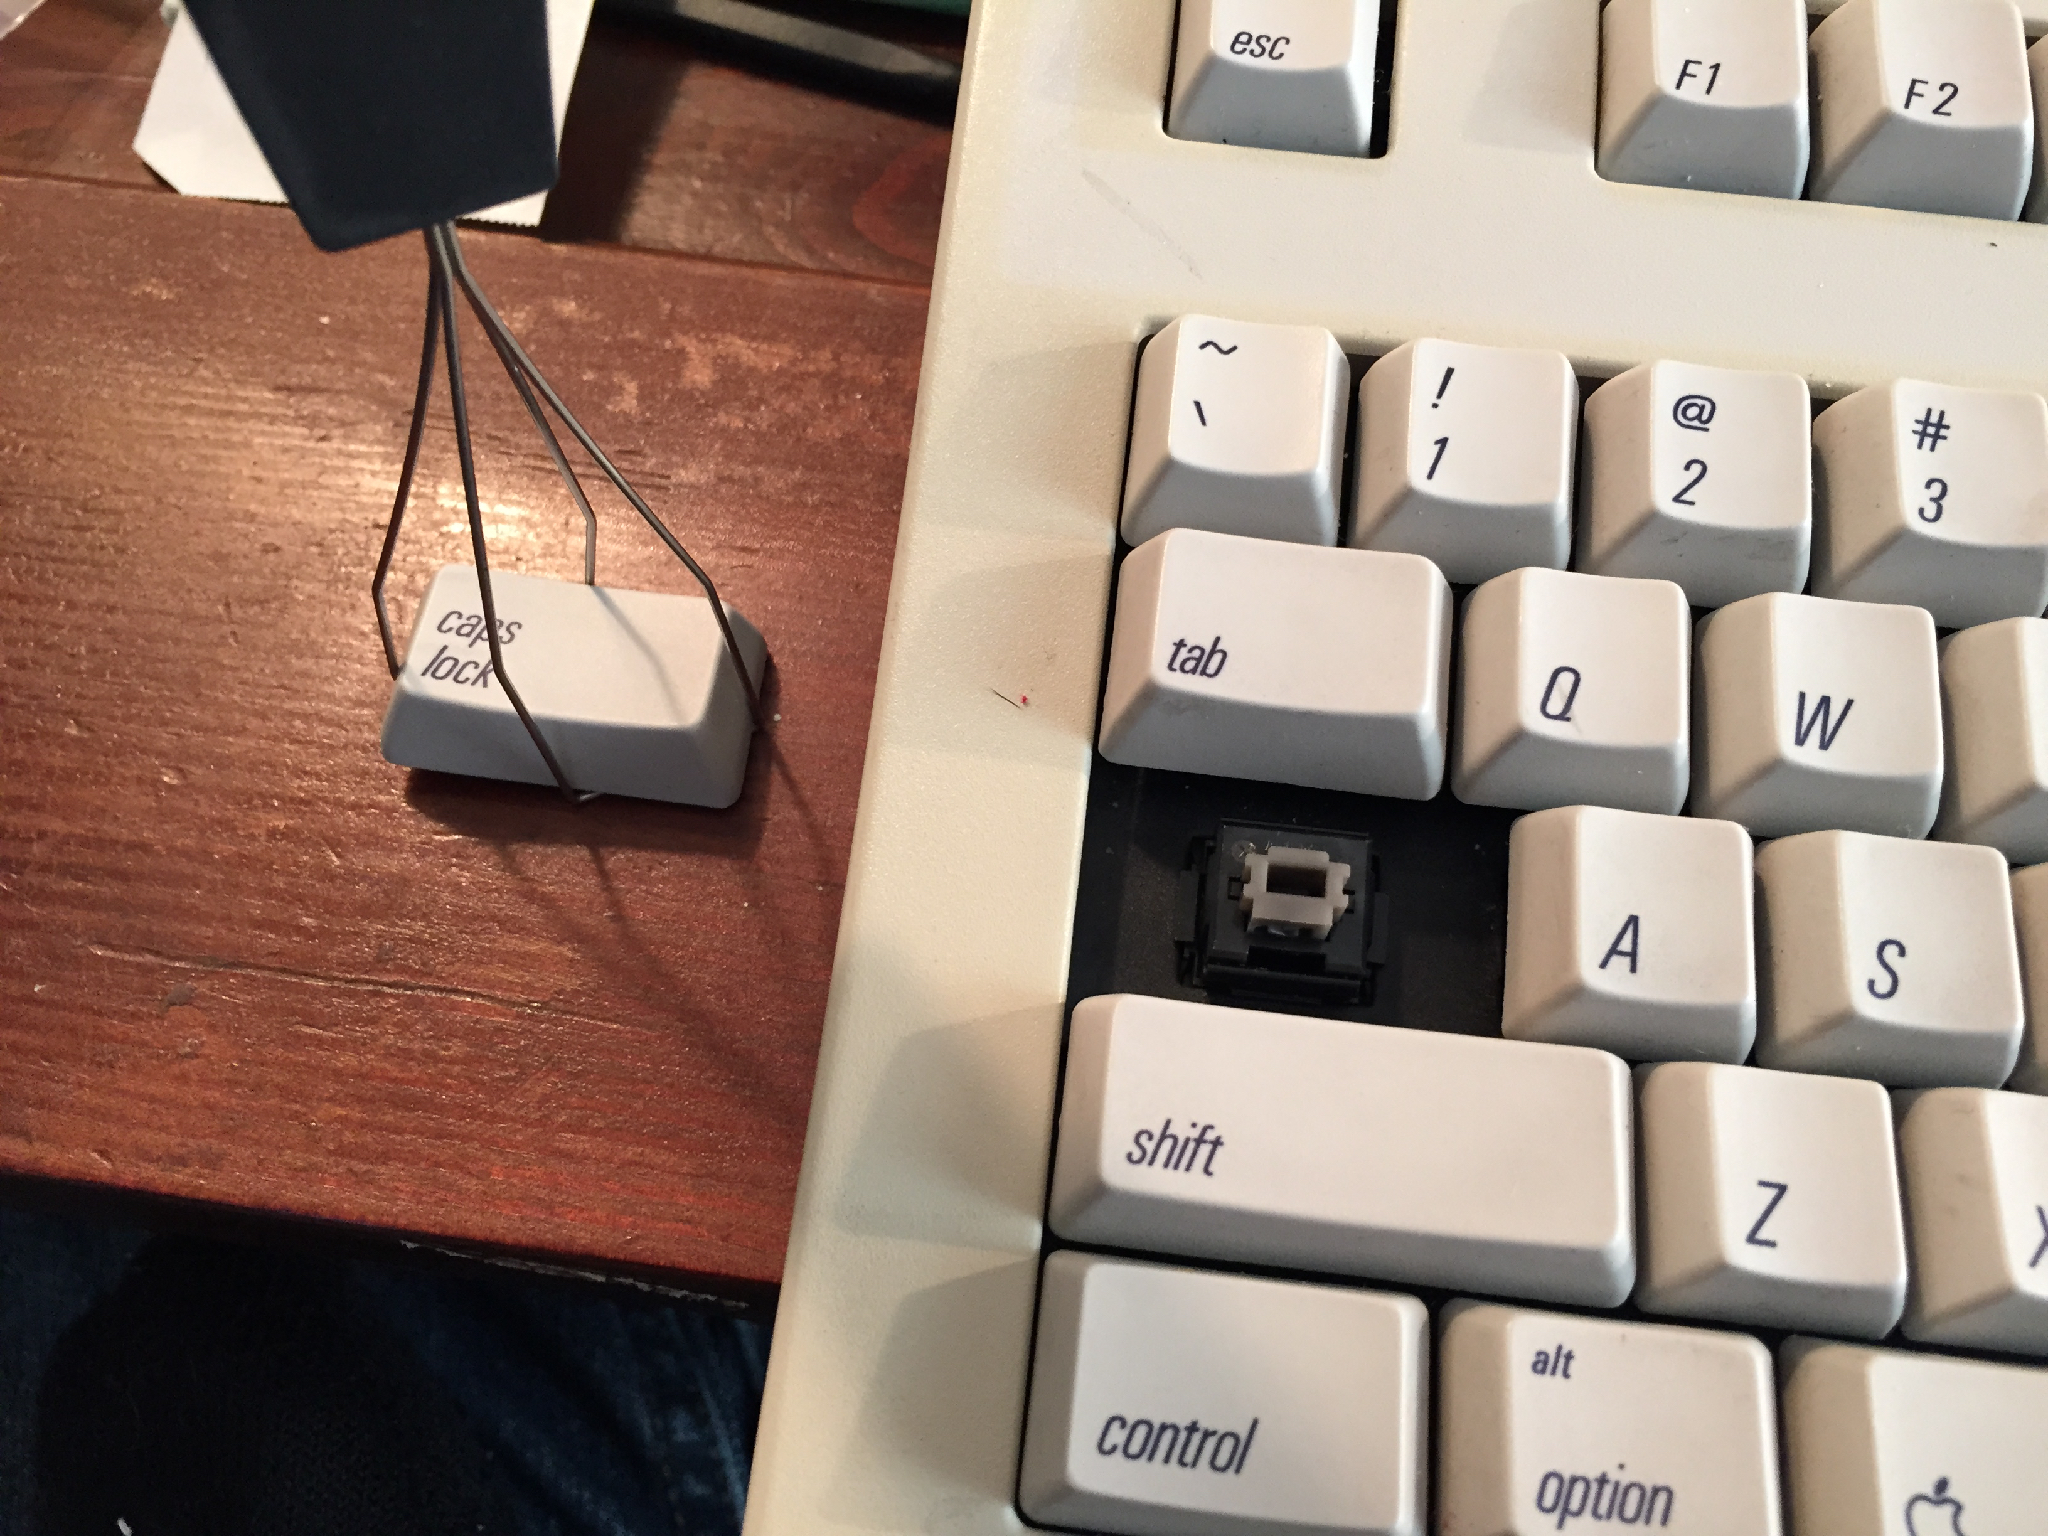
- You’ll need to remove the keycap of the Caps Lock key. I have a wire keycap
puller, but if you exhibit a bit of care, you can gently pry the keycaps
off.
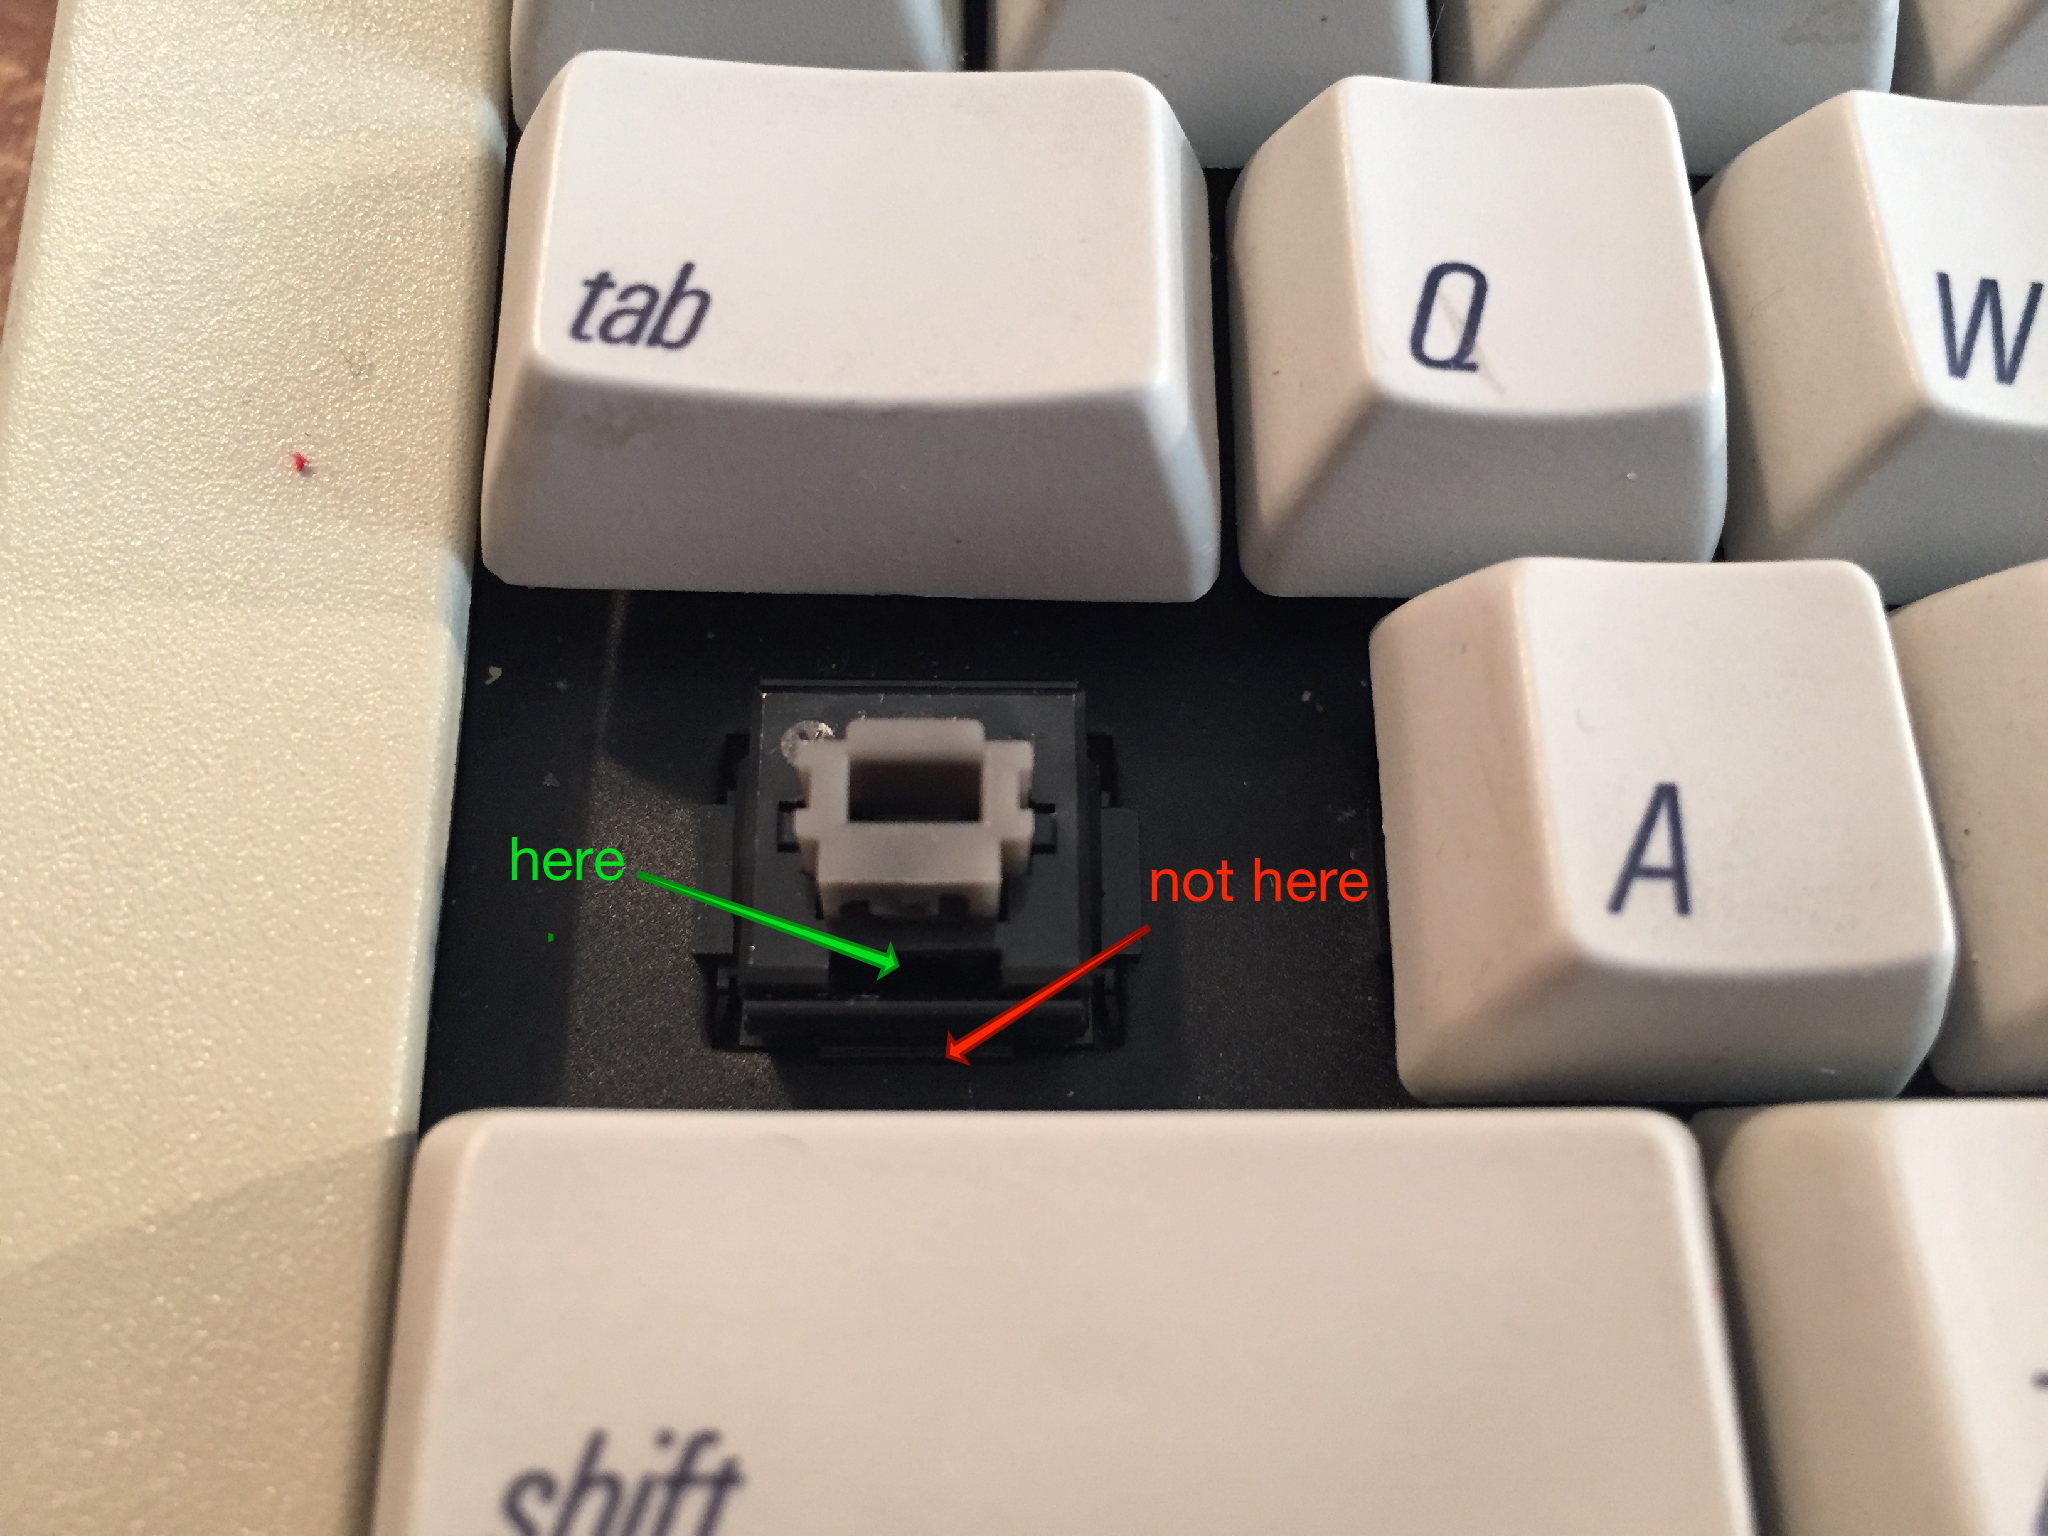
- You’ll need to gently remove the inner sleeve of the key switch. Watch
this video to see the process
in action. This is the housing where you’ll be able to remove the locking pin.
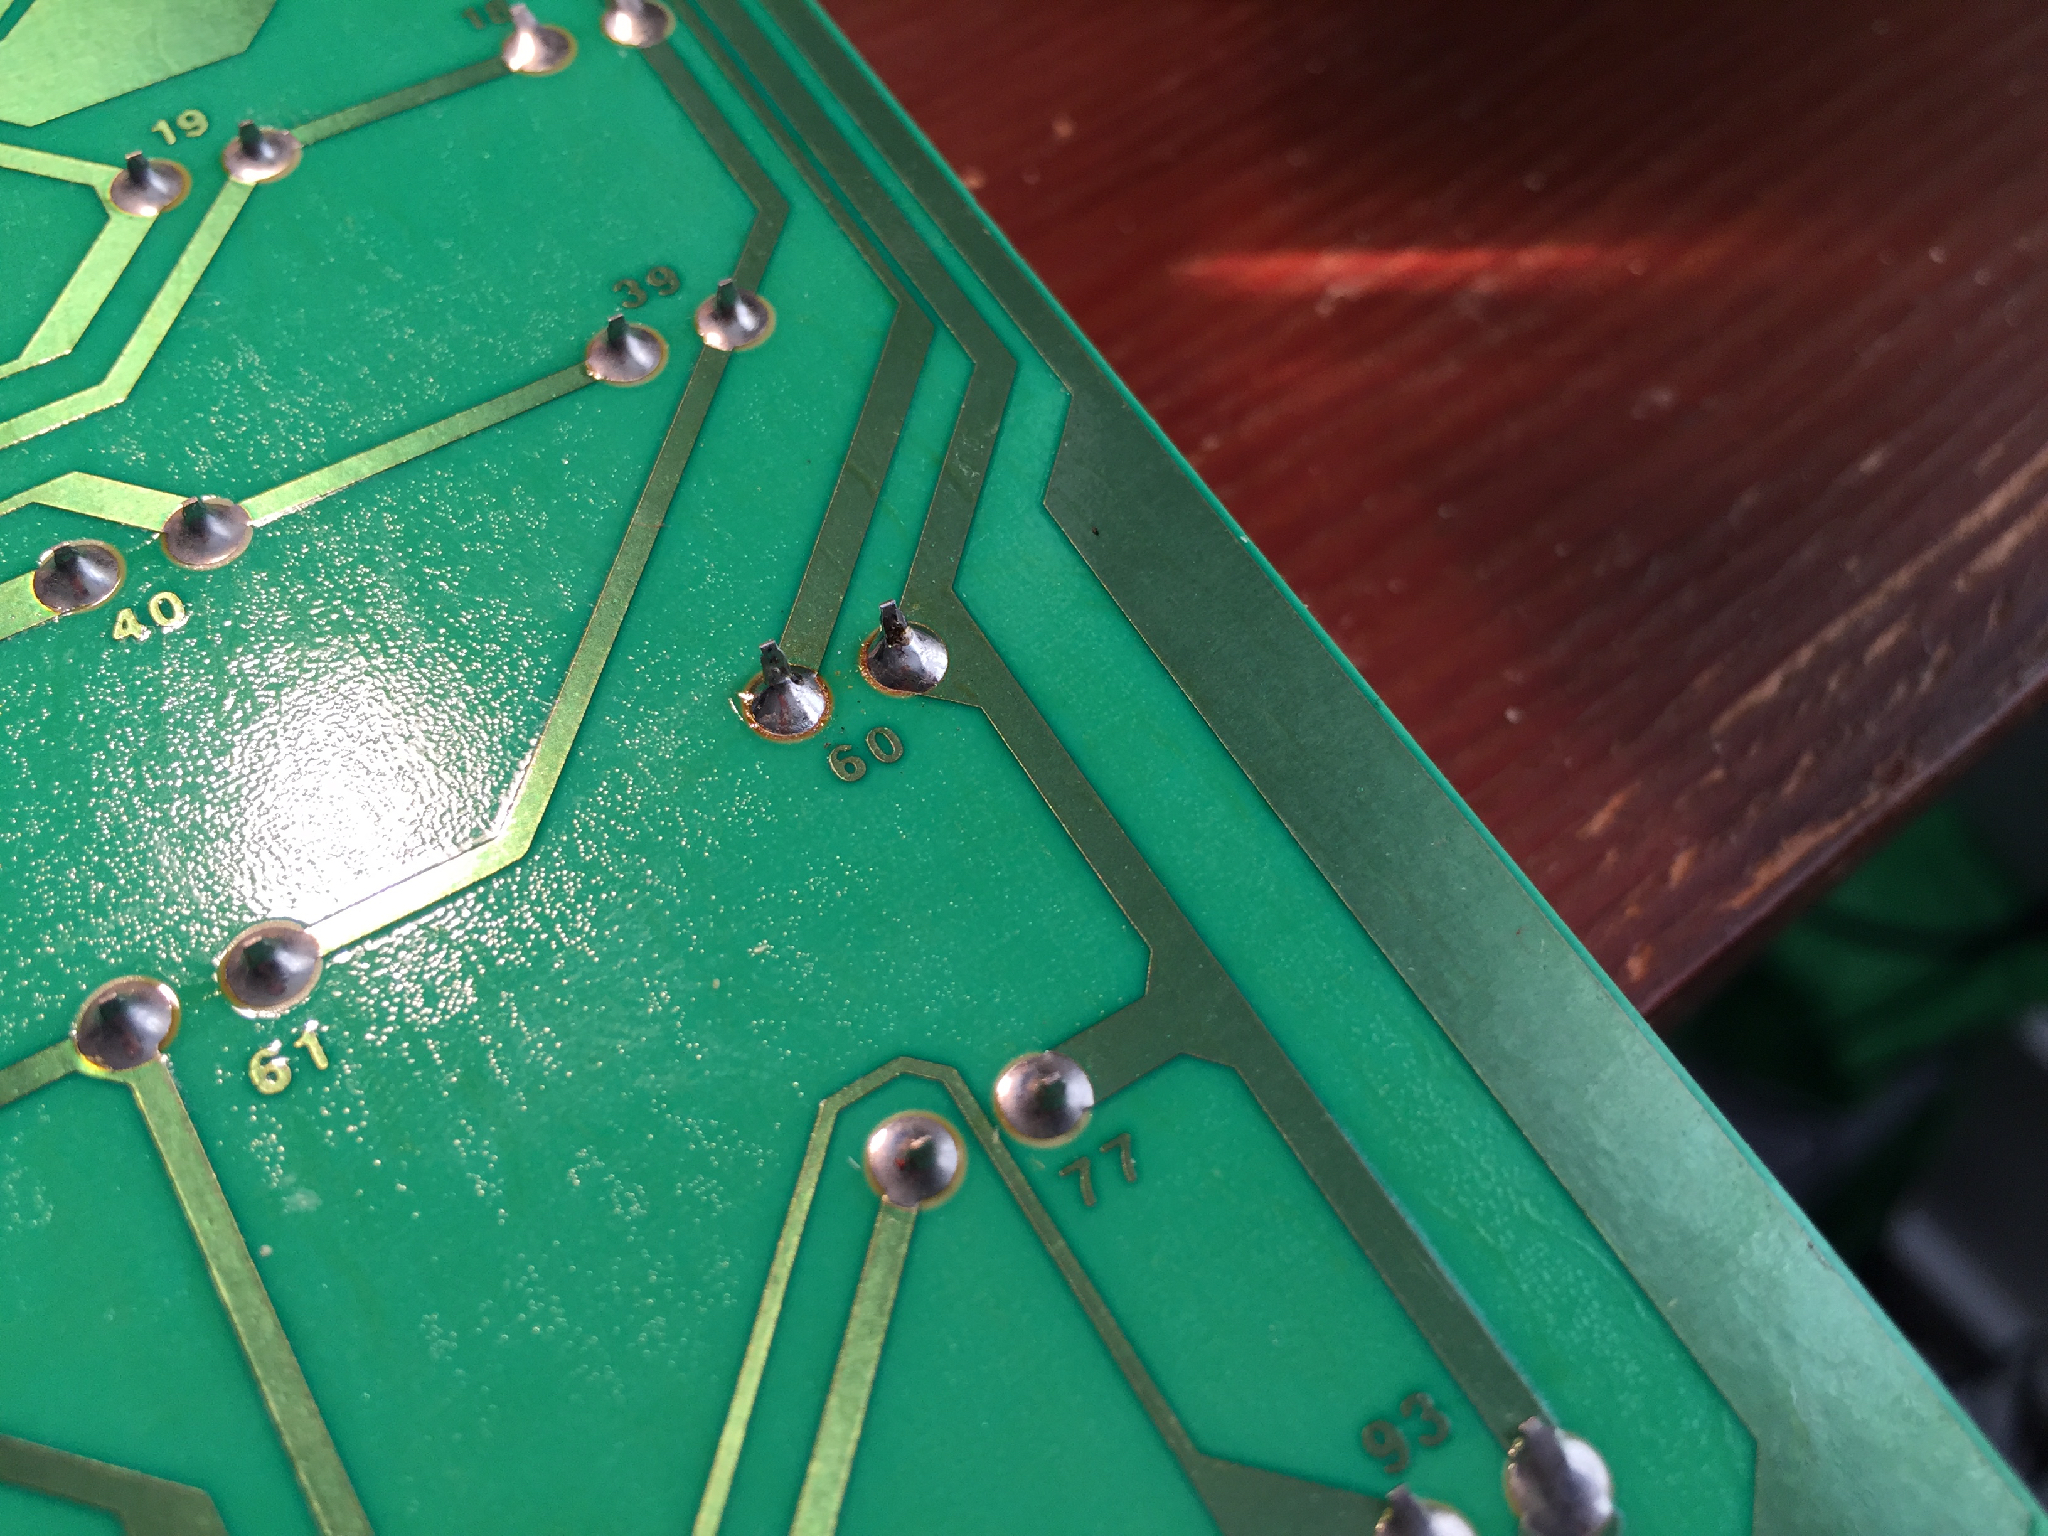
If you accidentally pry out the entire switch, like I did, the best that will
happen is you’ll break the soldering connection on the board, like I did, and
have to clean it up, and re-solder, or you’ll damage the switch, possibly
irrevocably. I was not too thrilled about prying out the entire switch, but I
managed to reseat it, and get it cleanly soldered again.
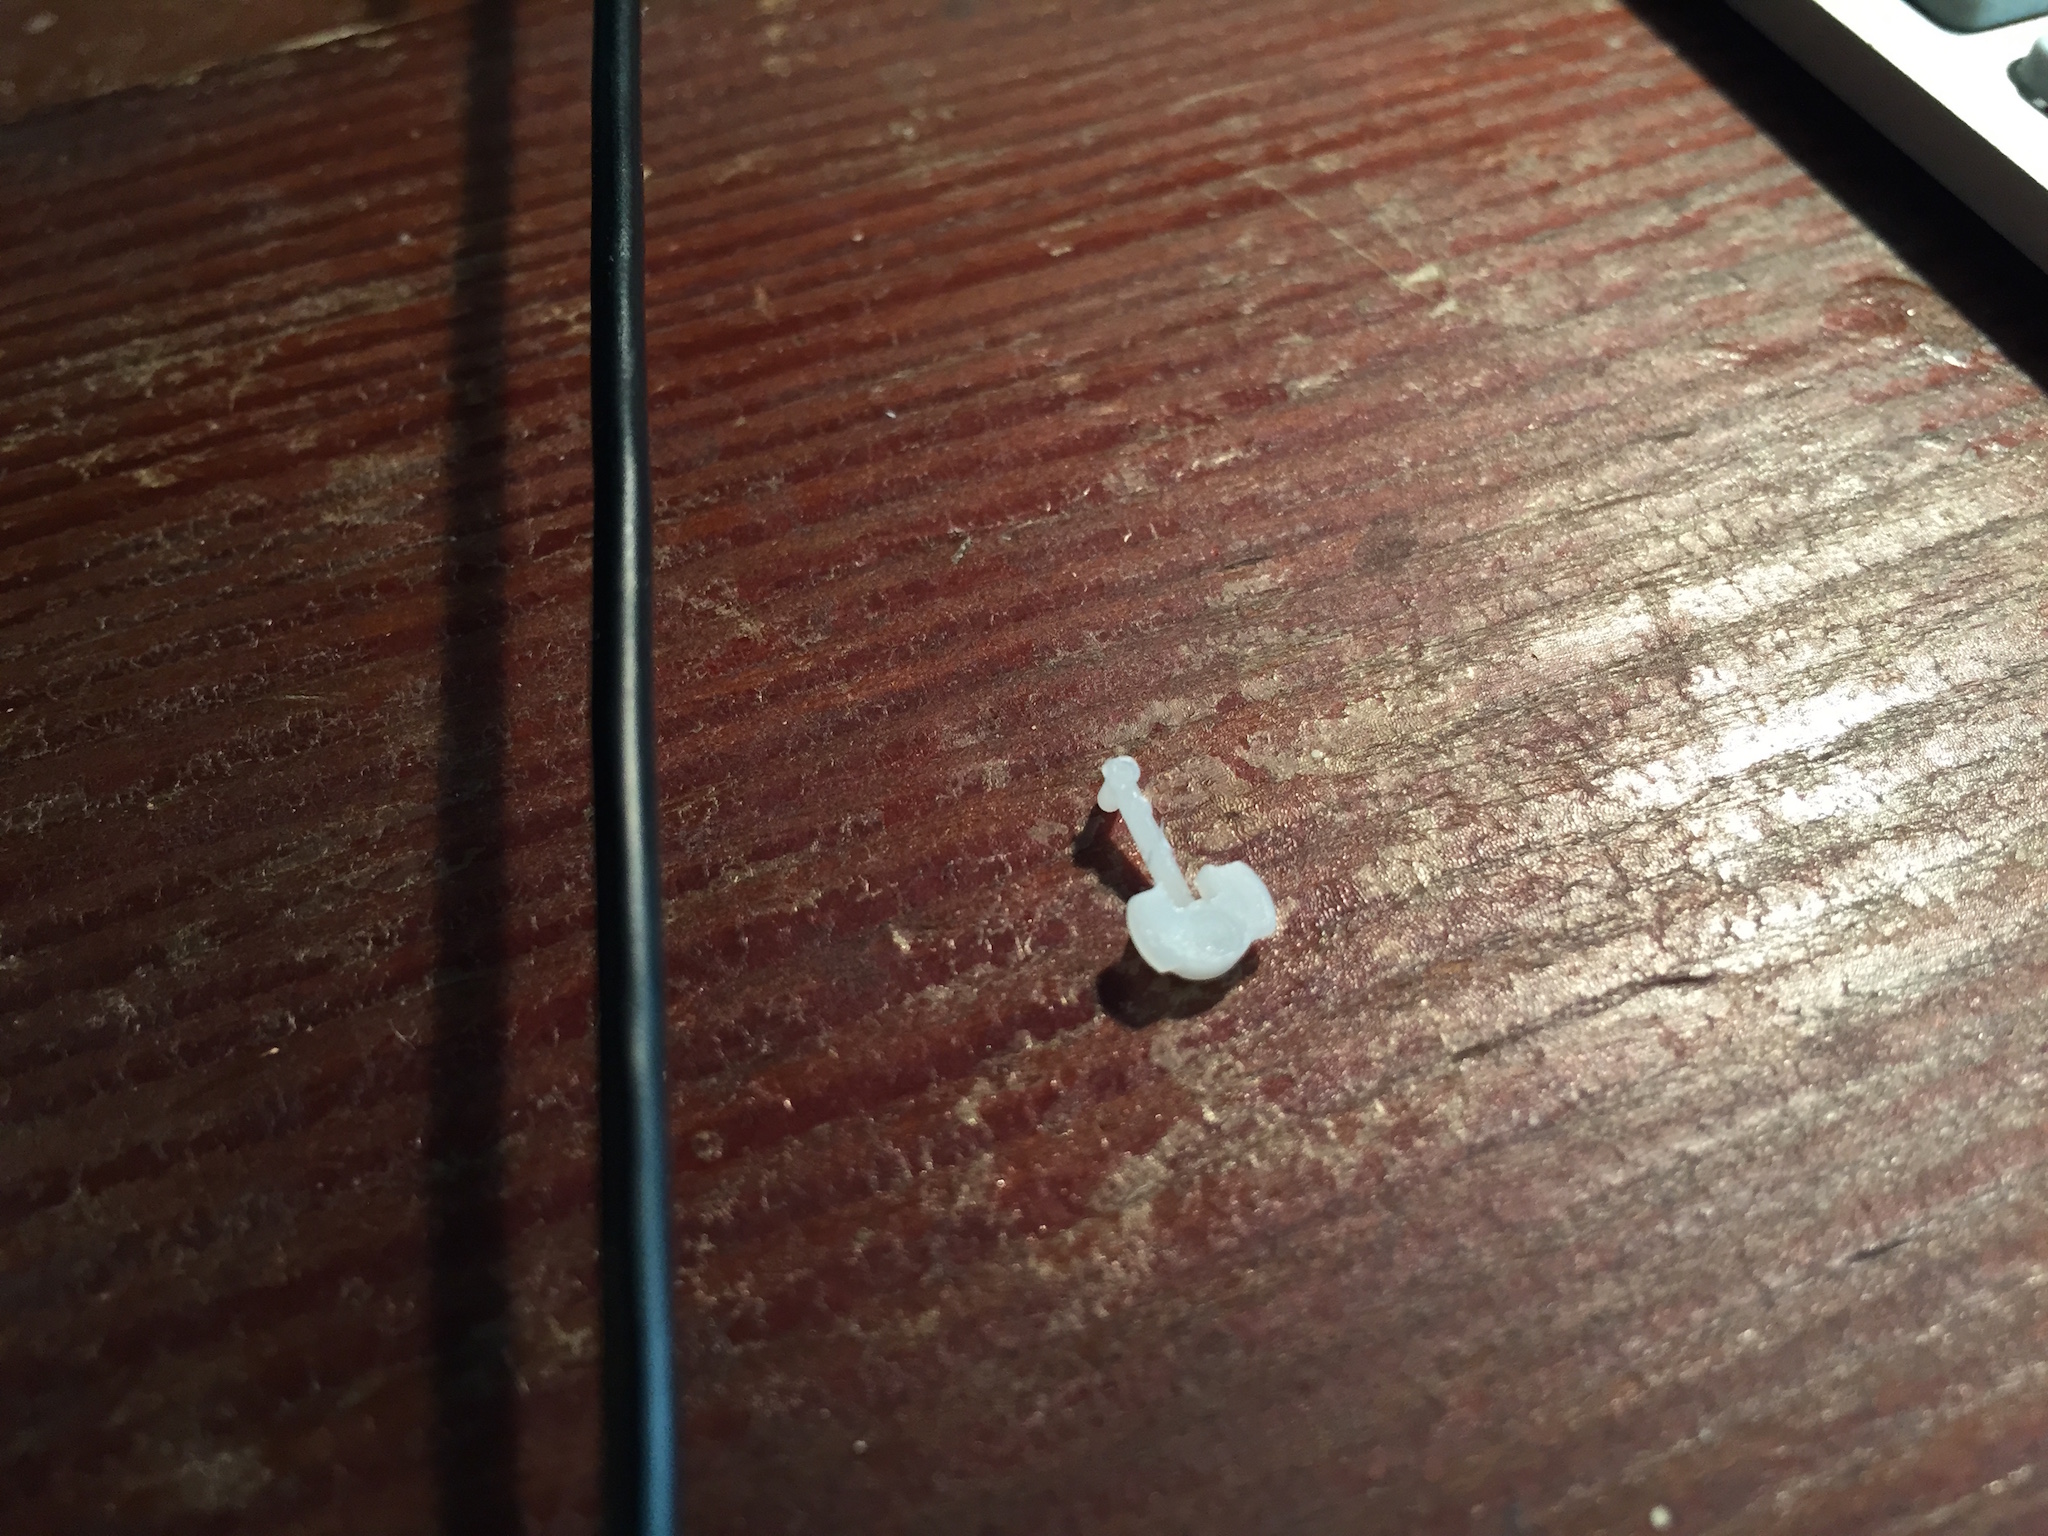
- With the inner housing removed, use tweezers to remove the small, plastic
locking pin. Now you have a regular switch. Gently replace the housing in
the switch, and replace the keycap. I saved the pin because reasons.
Firmware
All you need to change in Hasu’s tmk code is the keymap code for the Caps Lock key in keymap_ansi.c:
download --- a/converter/adb_usb/keymap_ansi.c +++ b/converter/adb_usb/keymap_ansi.c @@ -6,7 +6,7 @@ const uint8_t PROGMEM keymaps[][MATRIX_ROWS][MATRIX_COLS] = { ESC, F1, F2, F3, F4, F5, F6, F7, F8, F9, F10, F11, F12, PSCR,SLCK,PAUS, PWR, GRV, 1, 2, 3, 4, 5, 6, 7, 8, 9, 0, MINS,EQL, BSPC, INS, HOME,PGUP, NLCK,PEQL,PSLS,PAST, TAB, Q, W, E, R, T, Y, U, I, O, P, LBRC,RBRC,BSLS, DEL, END, PGDN, P7, P8, P9, PMNS, - LCAP,A, S, D, F, G, H, J, K, L, SCLN,QUOT, ENT, P4, P5, P6, PPLS, + CAPS,A, S, D, F, G, H, J, K, L, SCLN,QUOT, ENT, P4, P5, P6, PPLS, LSFT,Z, X, C, V, B, N, M, COMM,DOT, SLSH, RSFT, UP, P1, P2, P3, LCTL,LALT,LGUI, SPC, RALT,RCTL, LEFT,DOWN,RGHT, P0, PDOT,PENT ),Apply this change, recompile, reinstall the firmware, and reboot your Teensy.
Operating System
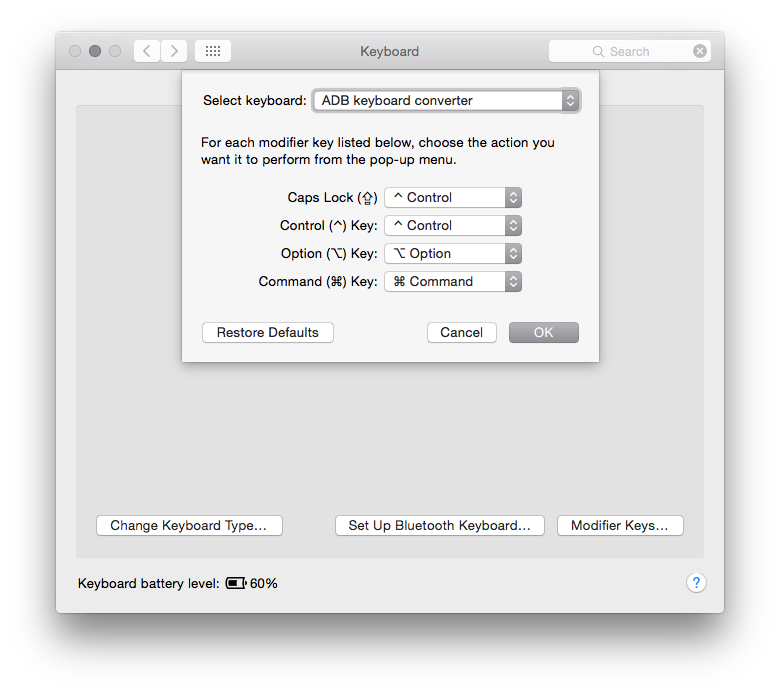
Open your Keyboard preference pane, select the “ADB keyboard converter” keyboard, and set Caps Lock to “^ Control”.
Now you have a Control key where it belongs.
- You’ll need to remove the keycap of the Caps Lock key. I have a wire keycap
puller, but if you exhibit a bit of care, you can gently pry the keycaps
off.
-
Nimitz Alive!
Mechanical keyboards. I love mechanical keyboards. I’ve owned several in the past, but between moves and an admitted amount of fickleness, I haven’t had one for about a decade. Now, that’s changed. I’m writing this on an Apple Extended Keyboard II. It’s stock, and is connected to my iMac via a homebuilt USB adapter.
Background
In the run-up to reintroducing a mechanical keyboard to my setup, I did plenty of research, and I looked back on my past experiences with both the IBM Model M and the Apple Extended Keyboard II. I considered new mechanicals made by WASD (both the stock v2 and Jeff Atwood’s CODE) and Unicomp. I quickly came to the realization that the Model M and the CODE were right out. The Model M because of its 101-key layout. I didn’t want to have to do too much training to figure out where and how I’d fit in an affordance for the Option key, and the CODE, while ostensibly supporting a Mac layout via DIP switches, felt a little bit like capitulating to a default-Windows-world. I quite like the WASD v2 with the available Mac layout (and I encourage you to play with their online keyboard designer. Colored keycaps! Fonts! Layouts!), but the price was a bit off-putting. I looked (very) briefly at the Unicomp, and quickly closed my browser tab. The aesthetics left more than a little to be desired. So I found myself back in the 90’s, looking for an Apple Extended Keyboard II. After reading an article about making your own USB adapter for the AEKII, the bug was planted, and the deal was sealed.
Start scouting eBay, and you’re bound to find some in good-enough condition. When looking at AEKIIs, you’ll discover that although all are Family Number M3501, some were manufactured in Japan, with Mitsumi key switches, while those made in the US and elsewhere had Alps key switches. Among aficionados, the Mitsumi switches are inferior to the Alps. You can verify the presence of Alps by checking place of manufacture, or by checking the serial number. All Alps key switch keyboards will have a serial number ending in M0312. You can find more gory details here
Assembly
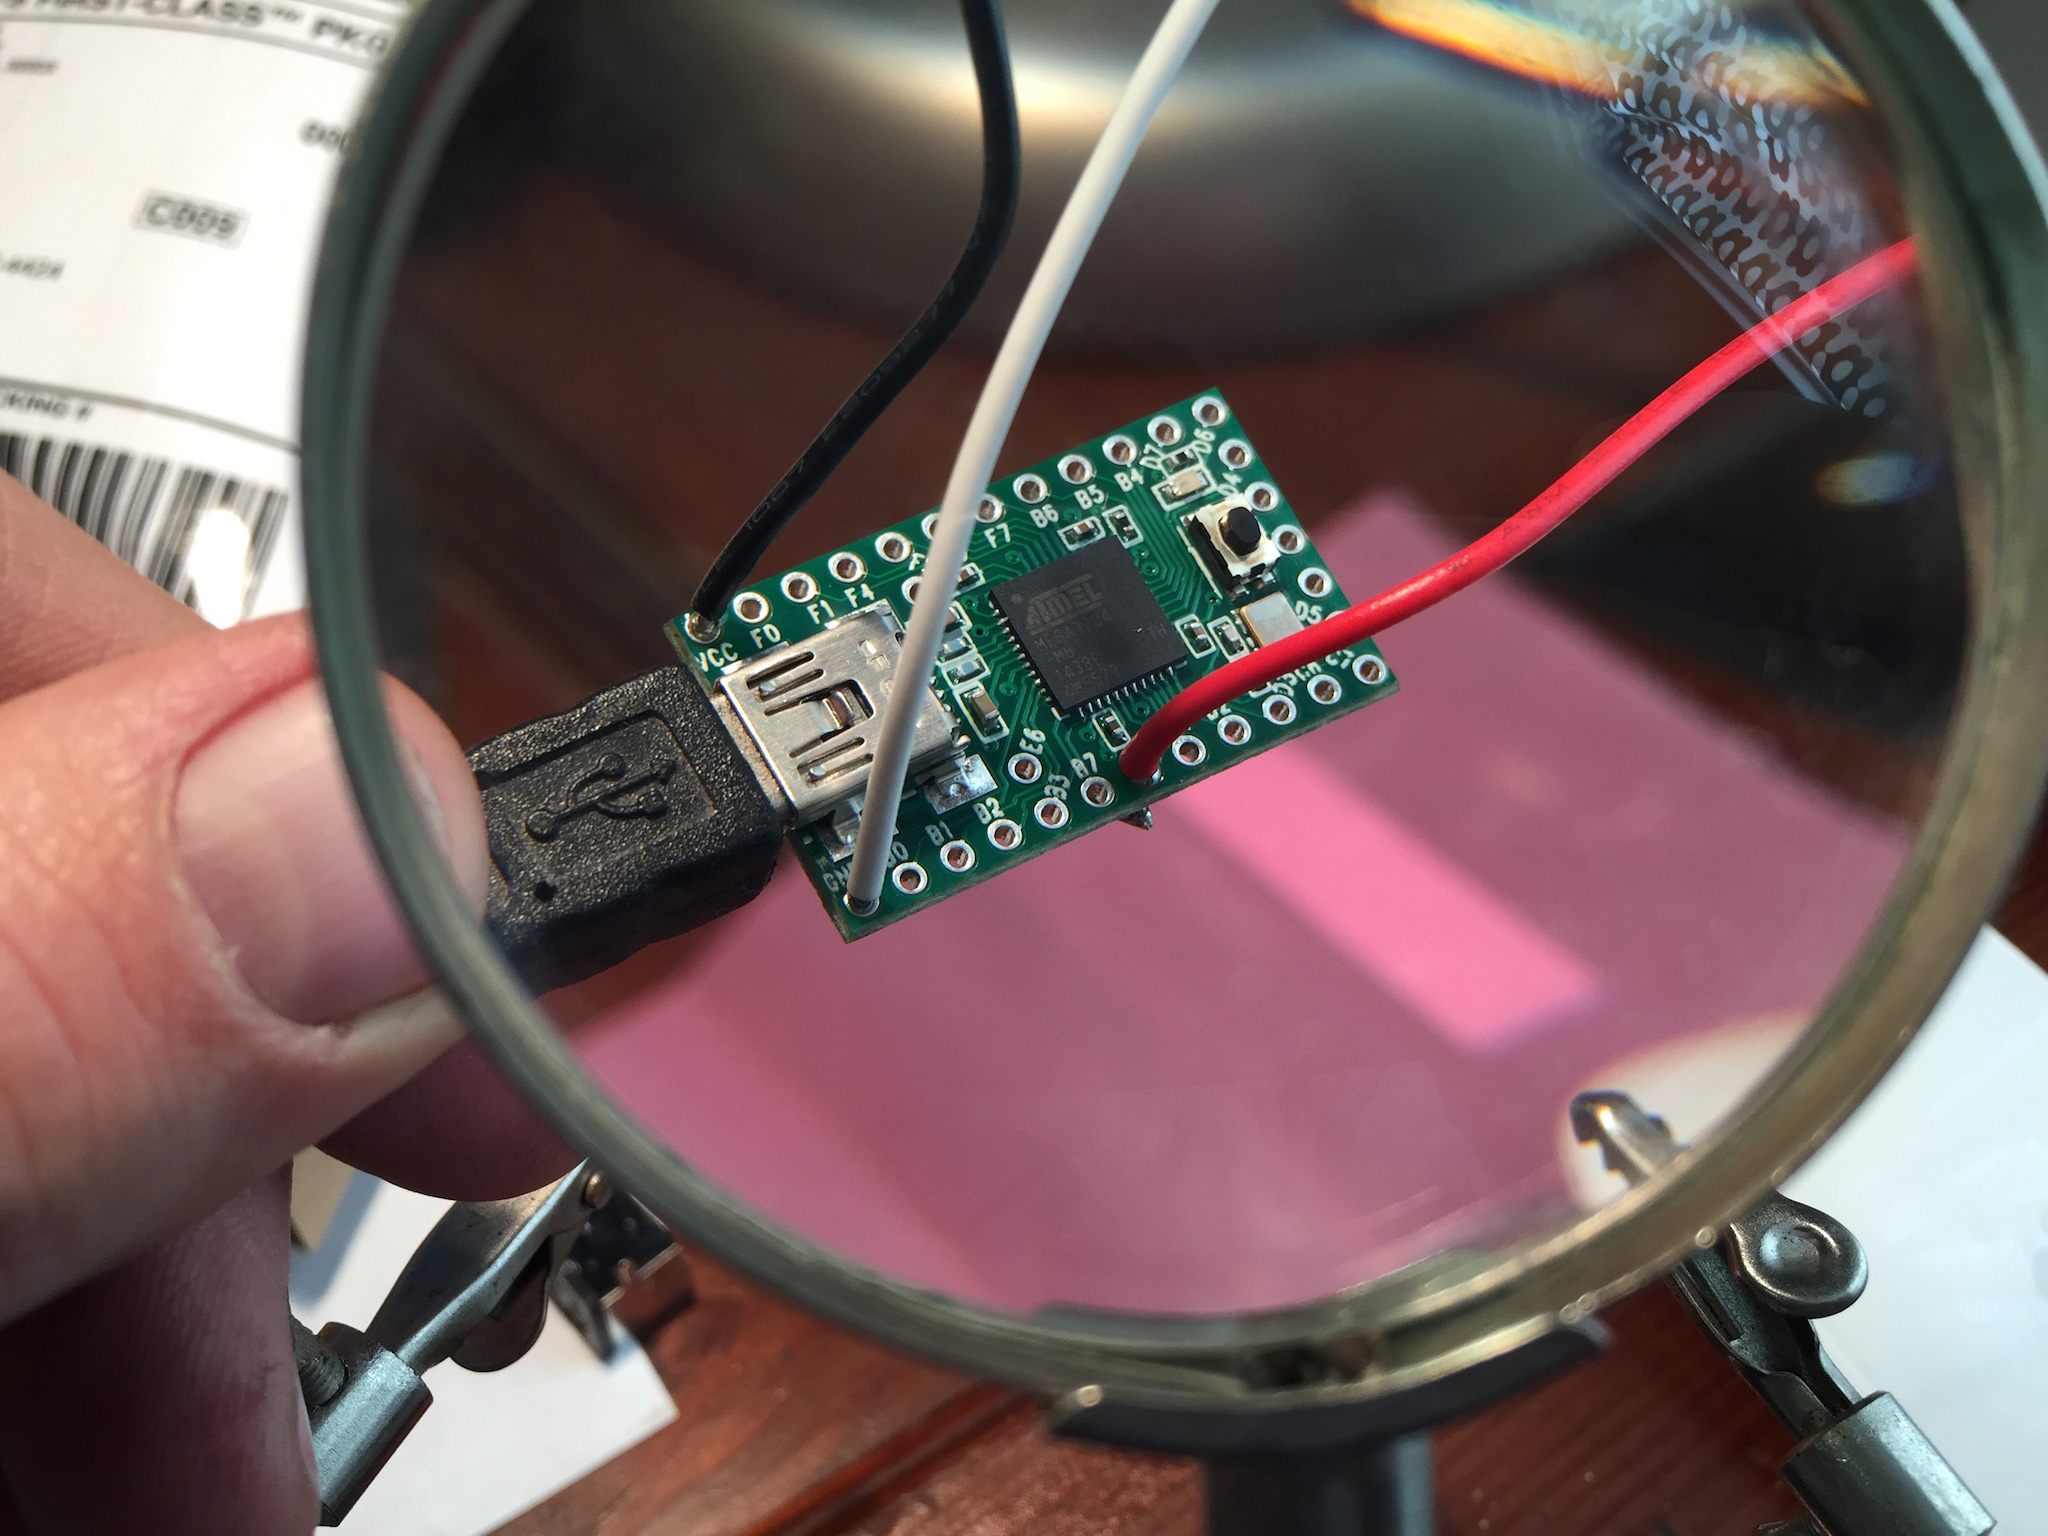
I found one seller with four separate listings, each at a decent price, bundled with a counterpart Apple one-button mouse. I asked whether he’d consider a discount if I unbundled the mouse or bought multiple keyboards. He wrote back and gave me a decent discount on all four keyboards, minus mice, with free shipping: $112. Done. I had the keyboards, but no cables. My options were to follow ScottV’s lead (internalize the adapter and use a USB cable) or find an ADB cable. I opted for the latter with an external adapter for three main reasons:
- I had three backup keyboards, which meant there would be a lot of work to fix or swap components from a stock keyboard to a modified keyboard.
- There isn’t a whole lot of space inside the keyboard case, and I don’t have that much experience with soldering and small electronics to feel comfortable working in an environment that cramped.
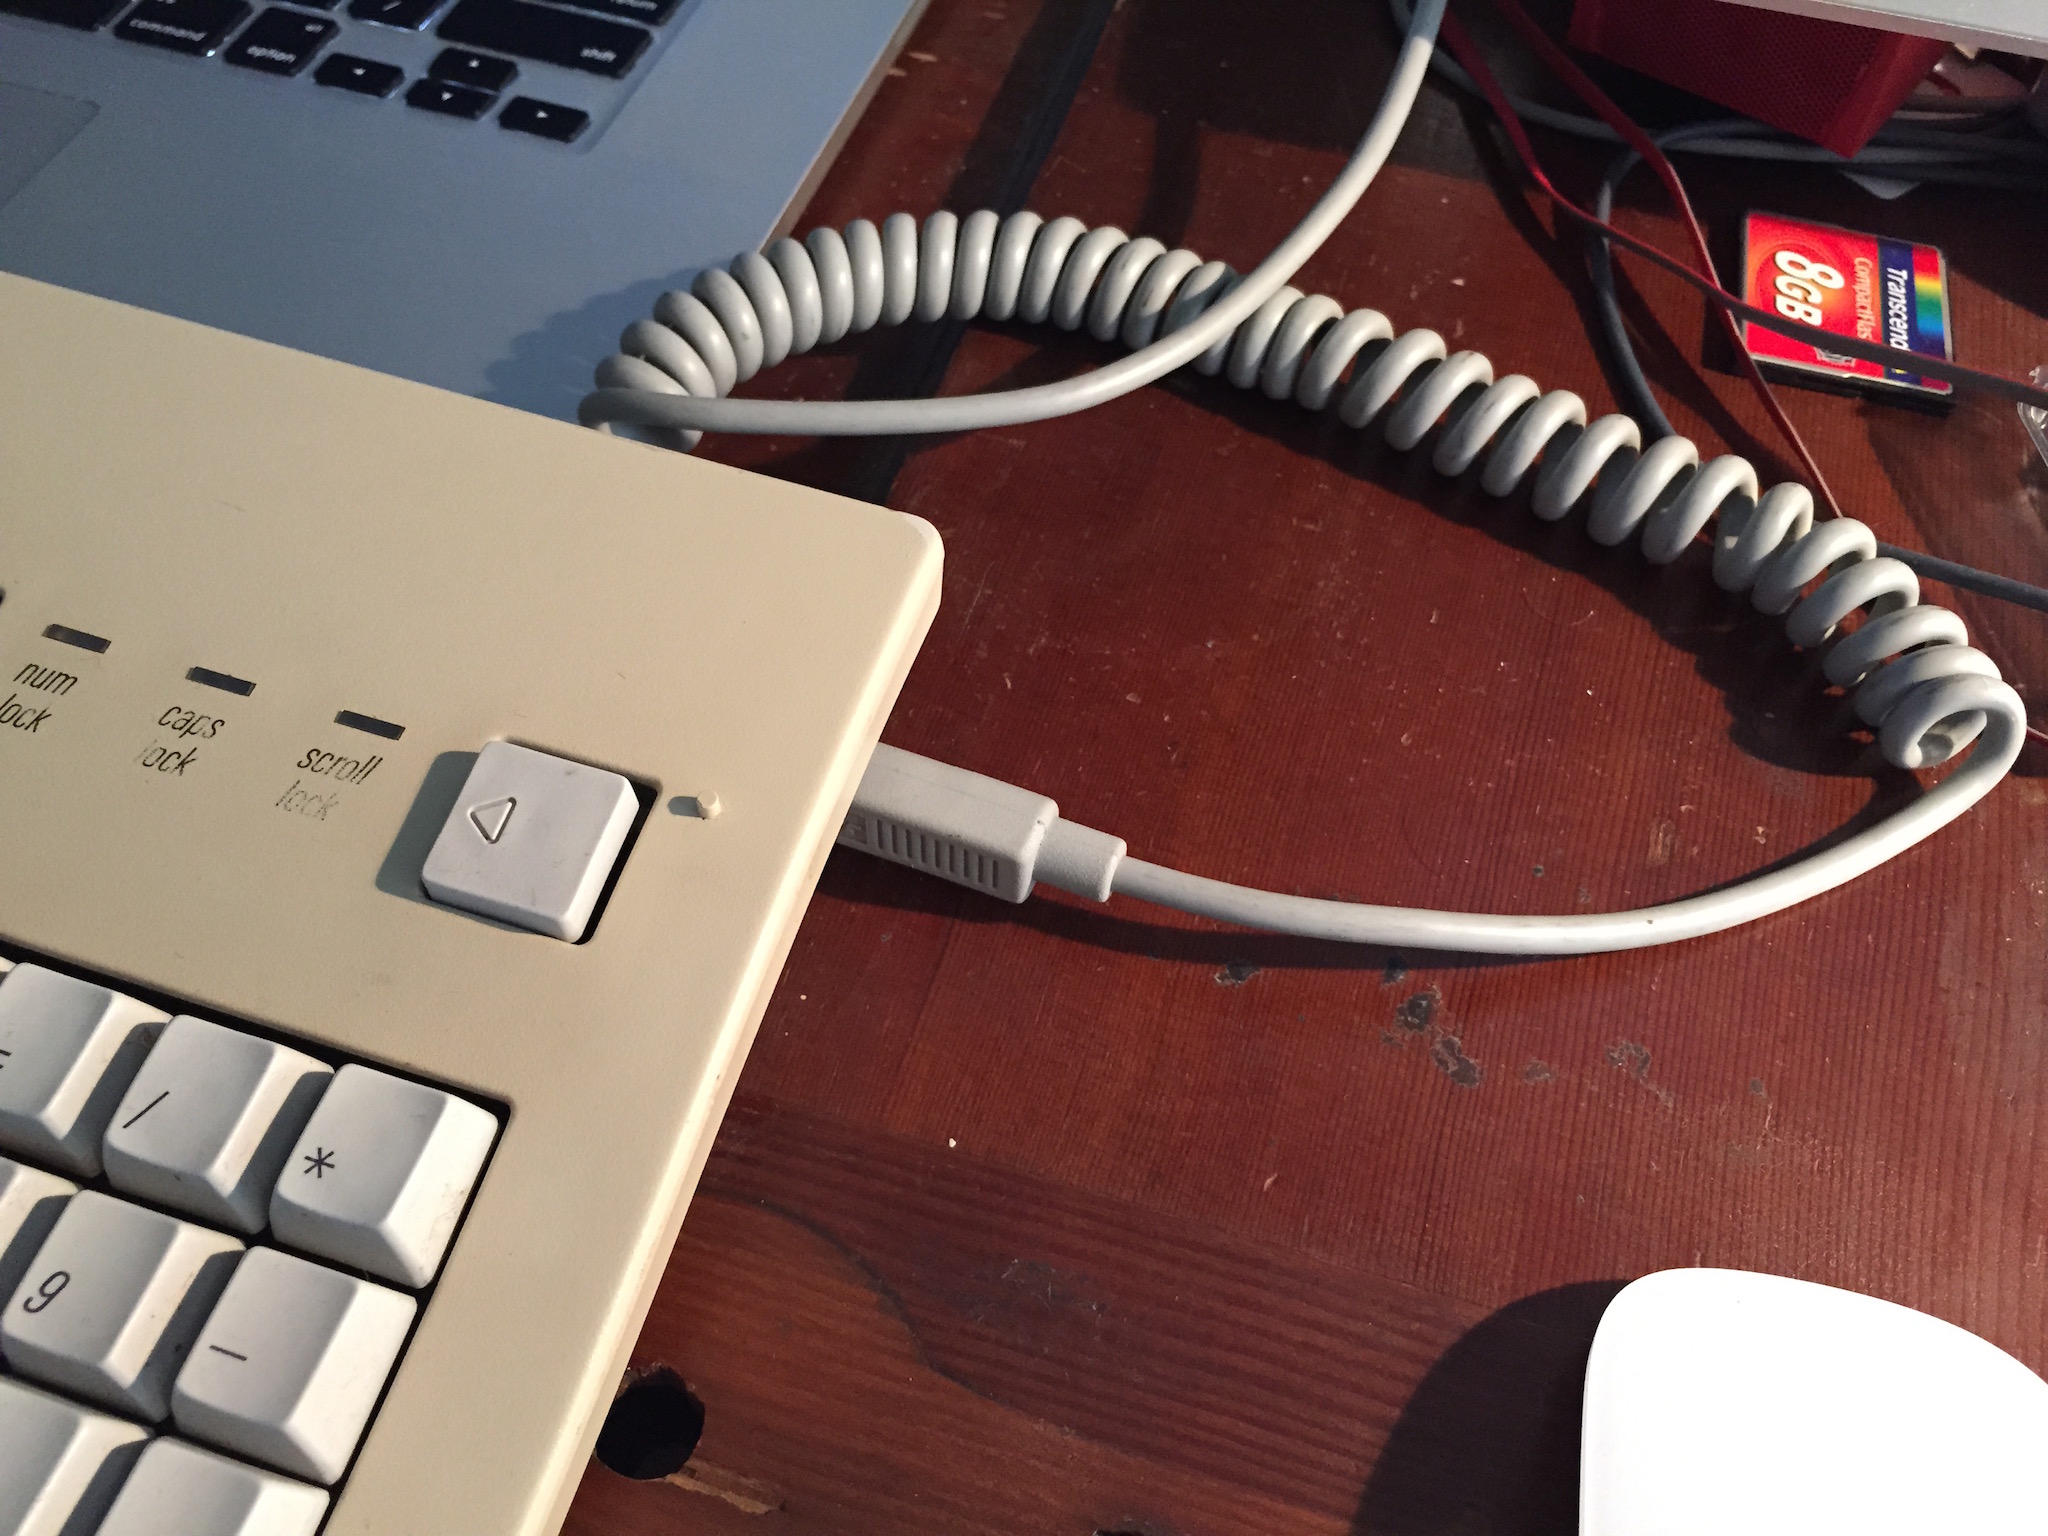
- That original coiled ADB cable! Turns out, you can also get standalone cables on eBay. I found two in good shape–one was NOS (New Old Stock), for about $5 each.
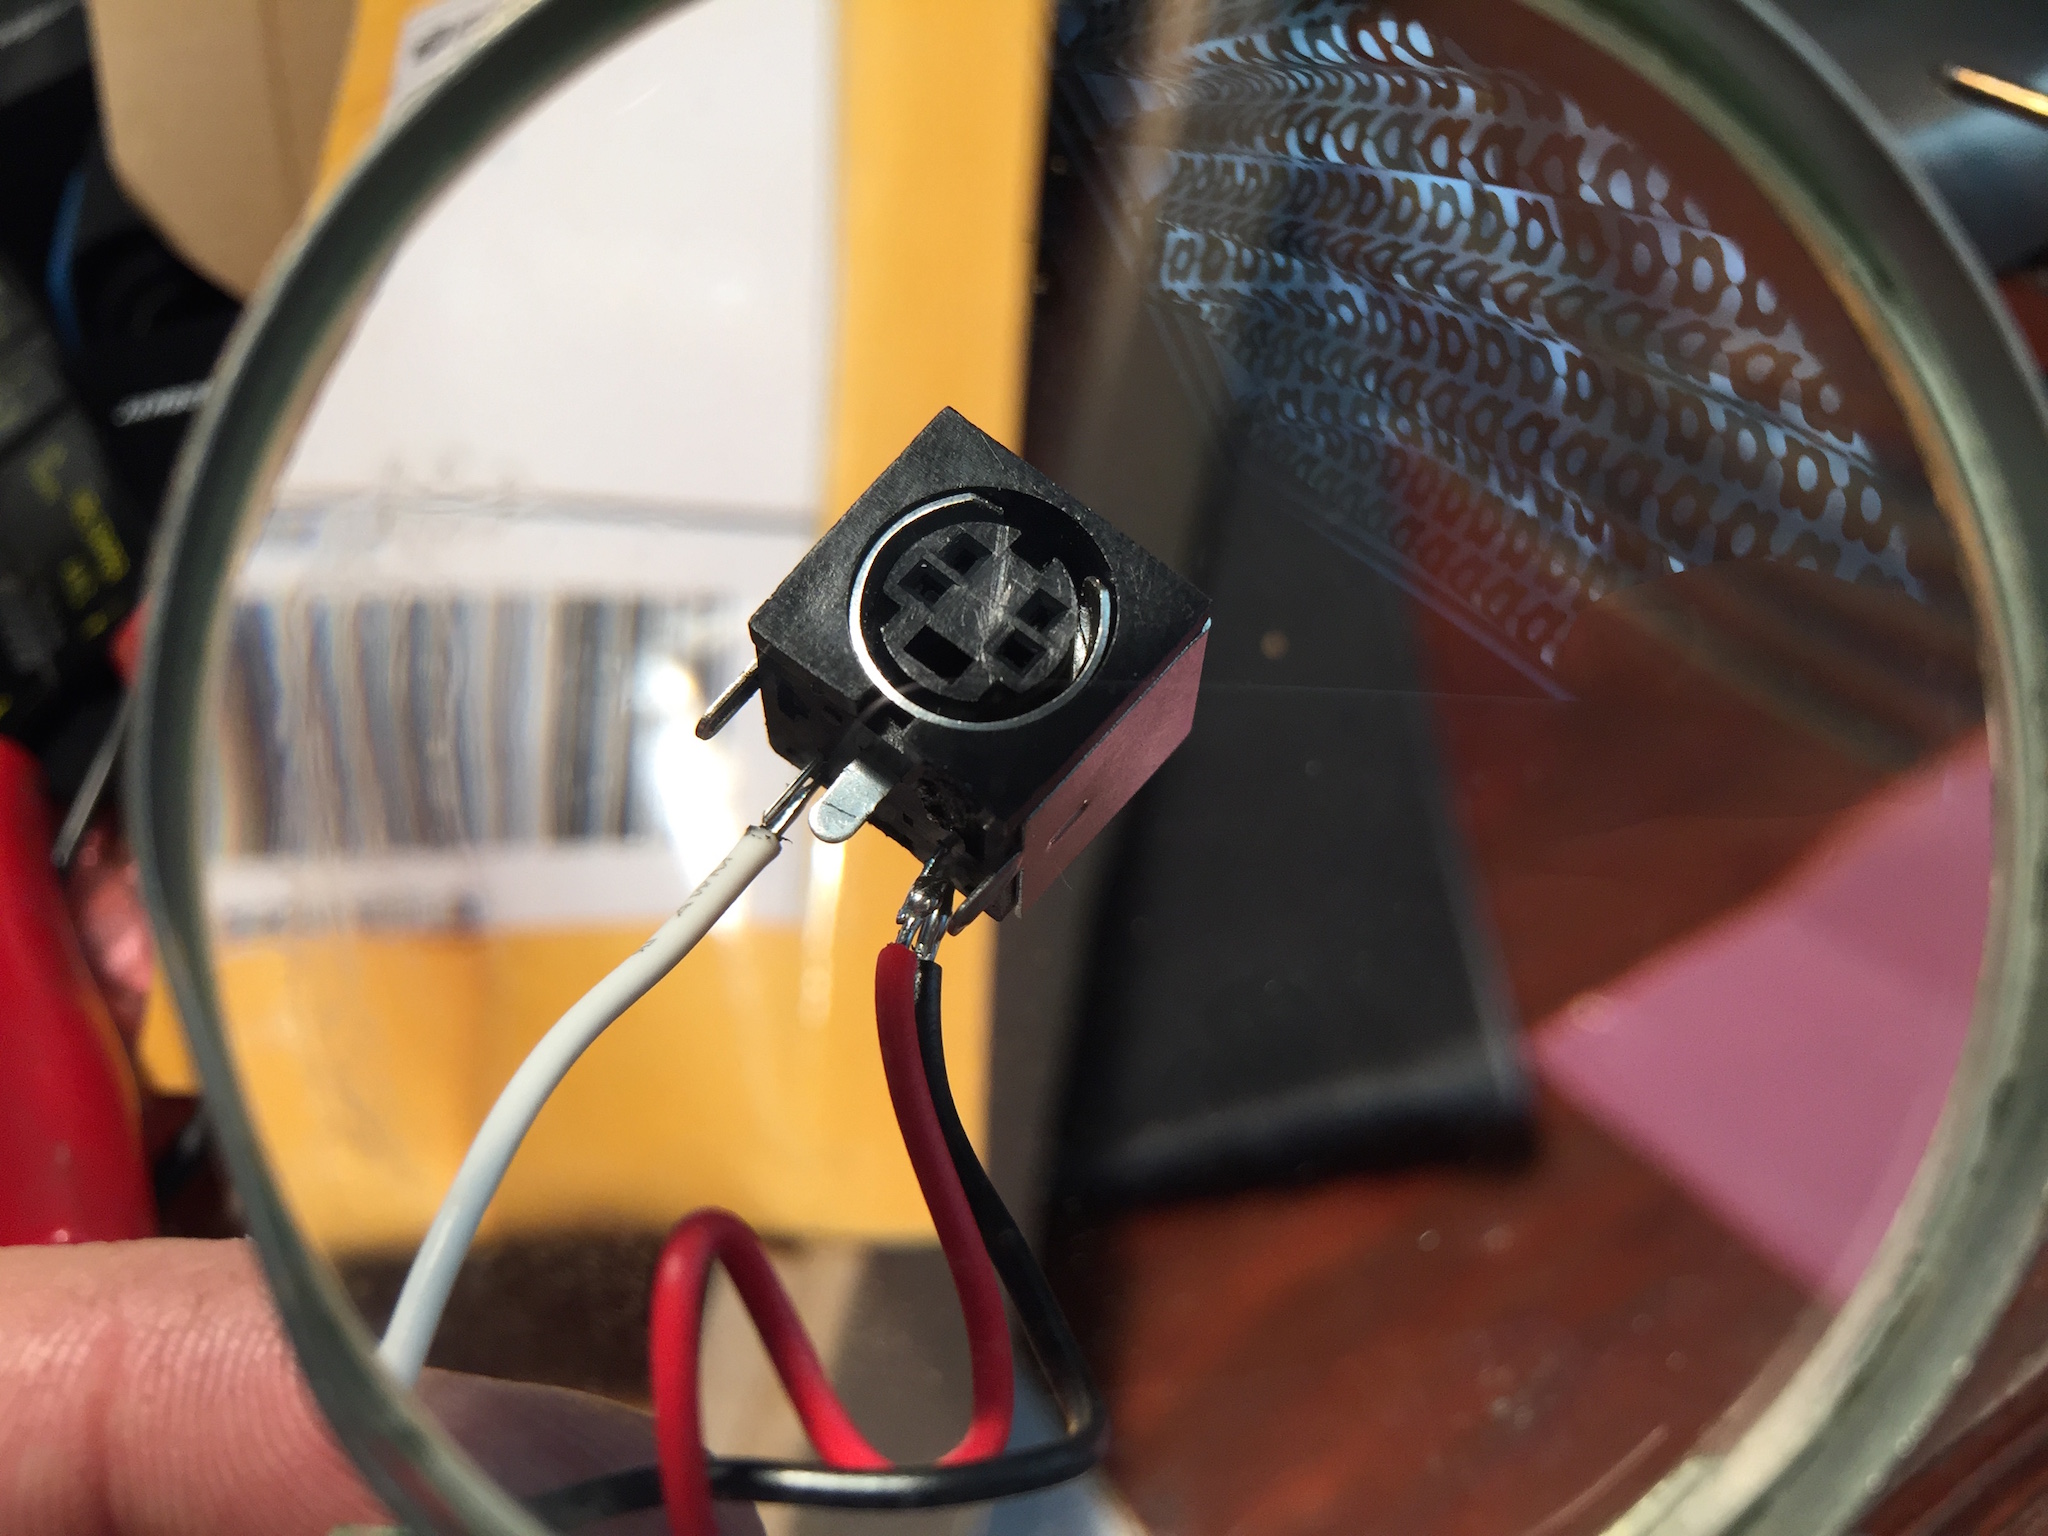
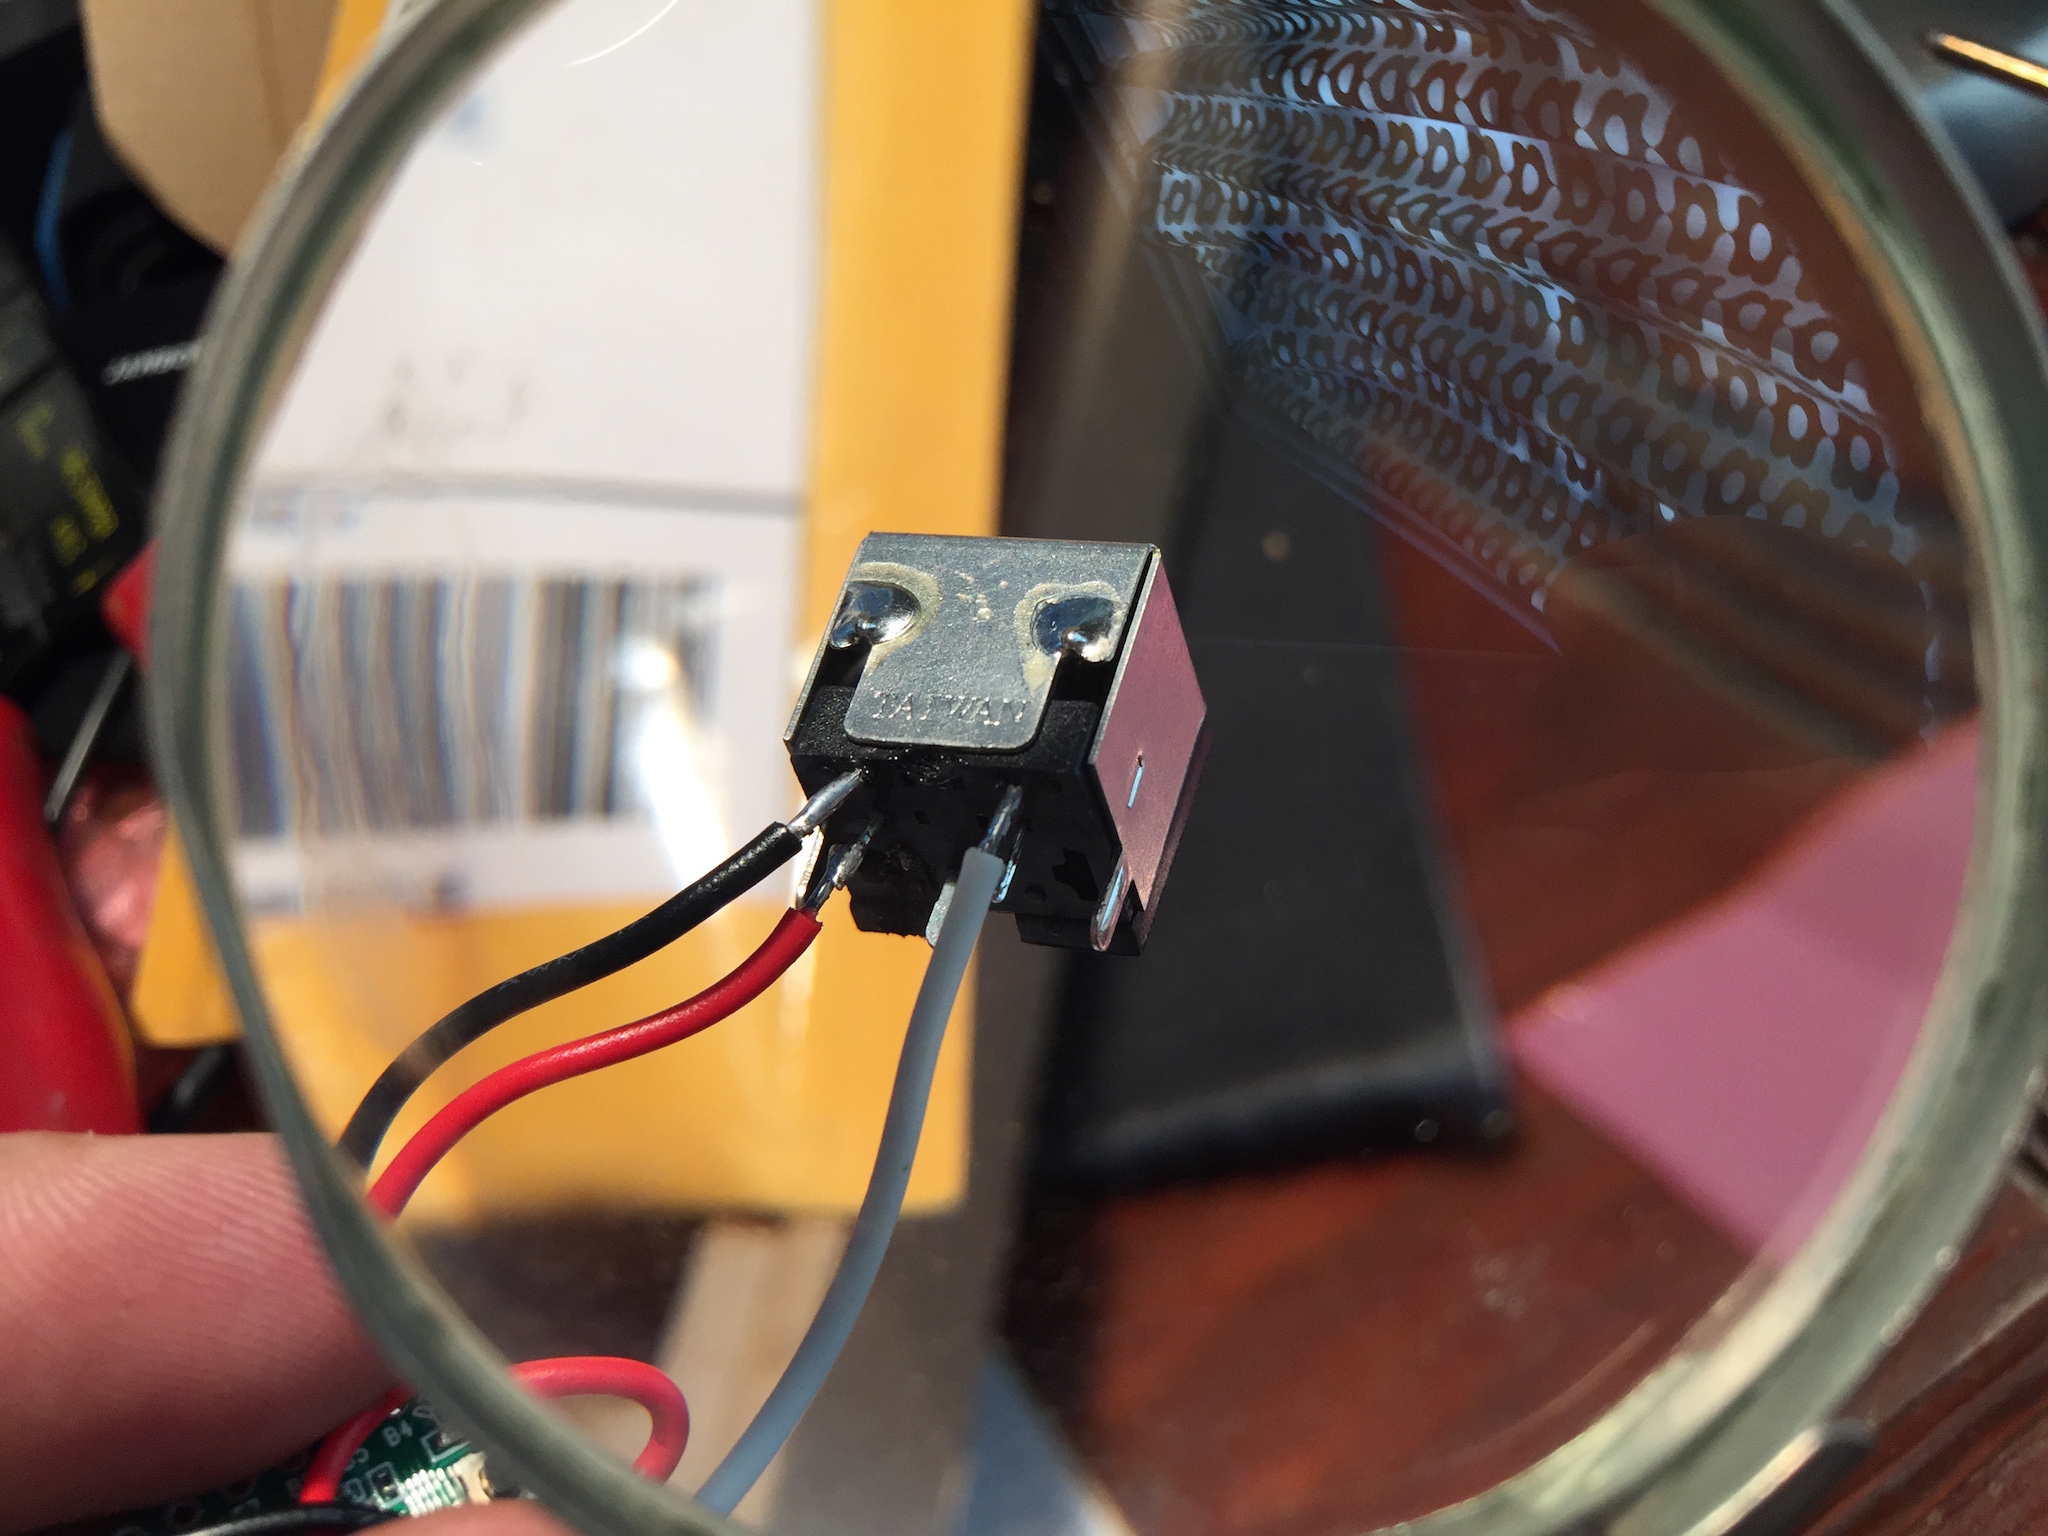
Going external, however, meant that I needed something to plug the cable into. ADB is basically just branded S-Video, so let’s go back to eBay and get some S-Video connectors. 10 for $5? Done.
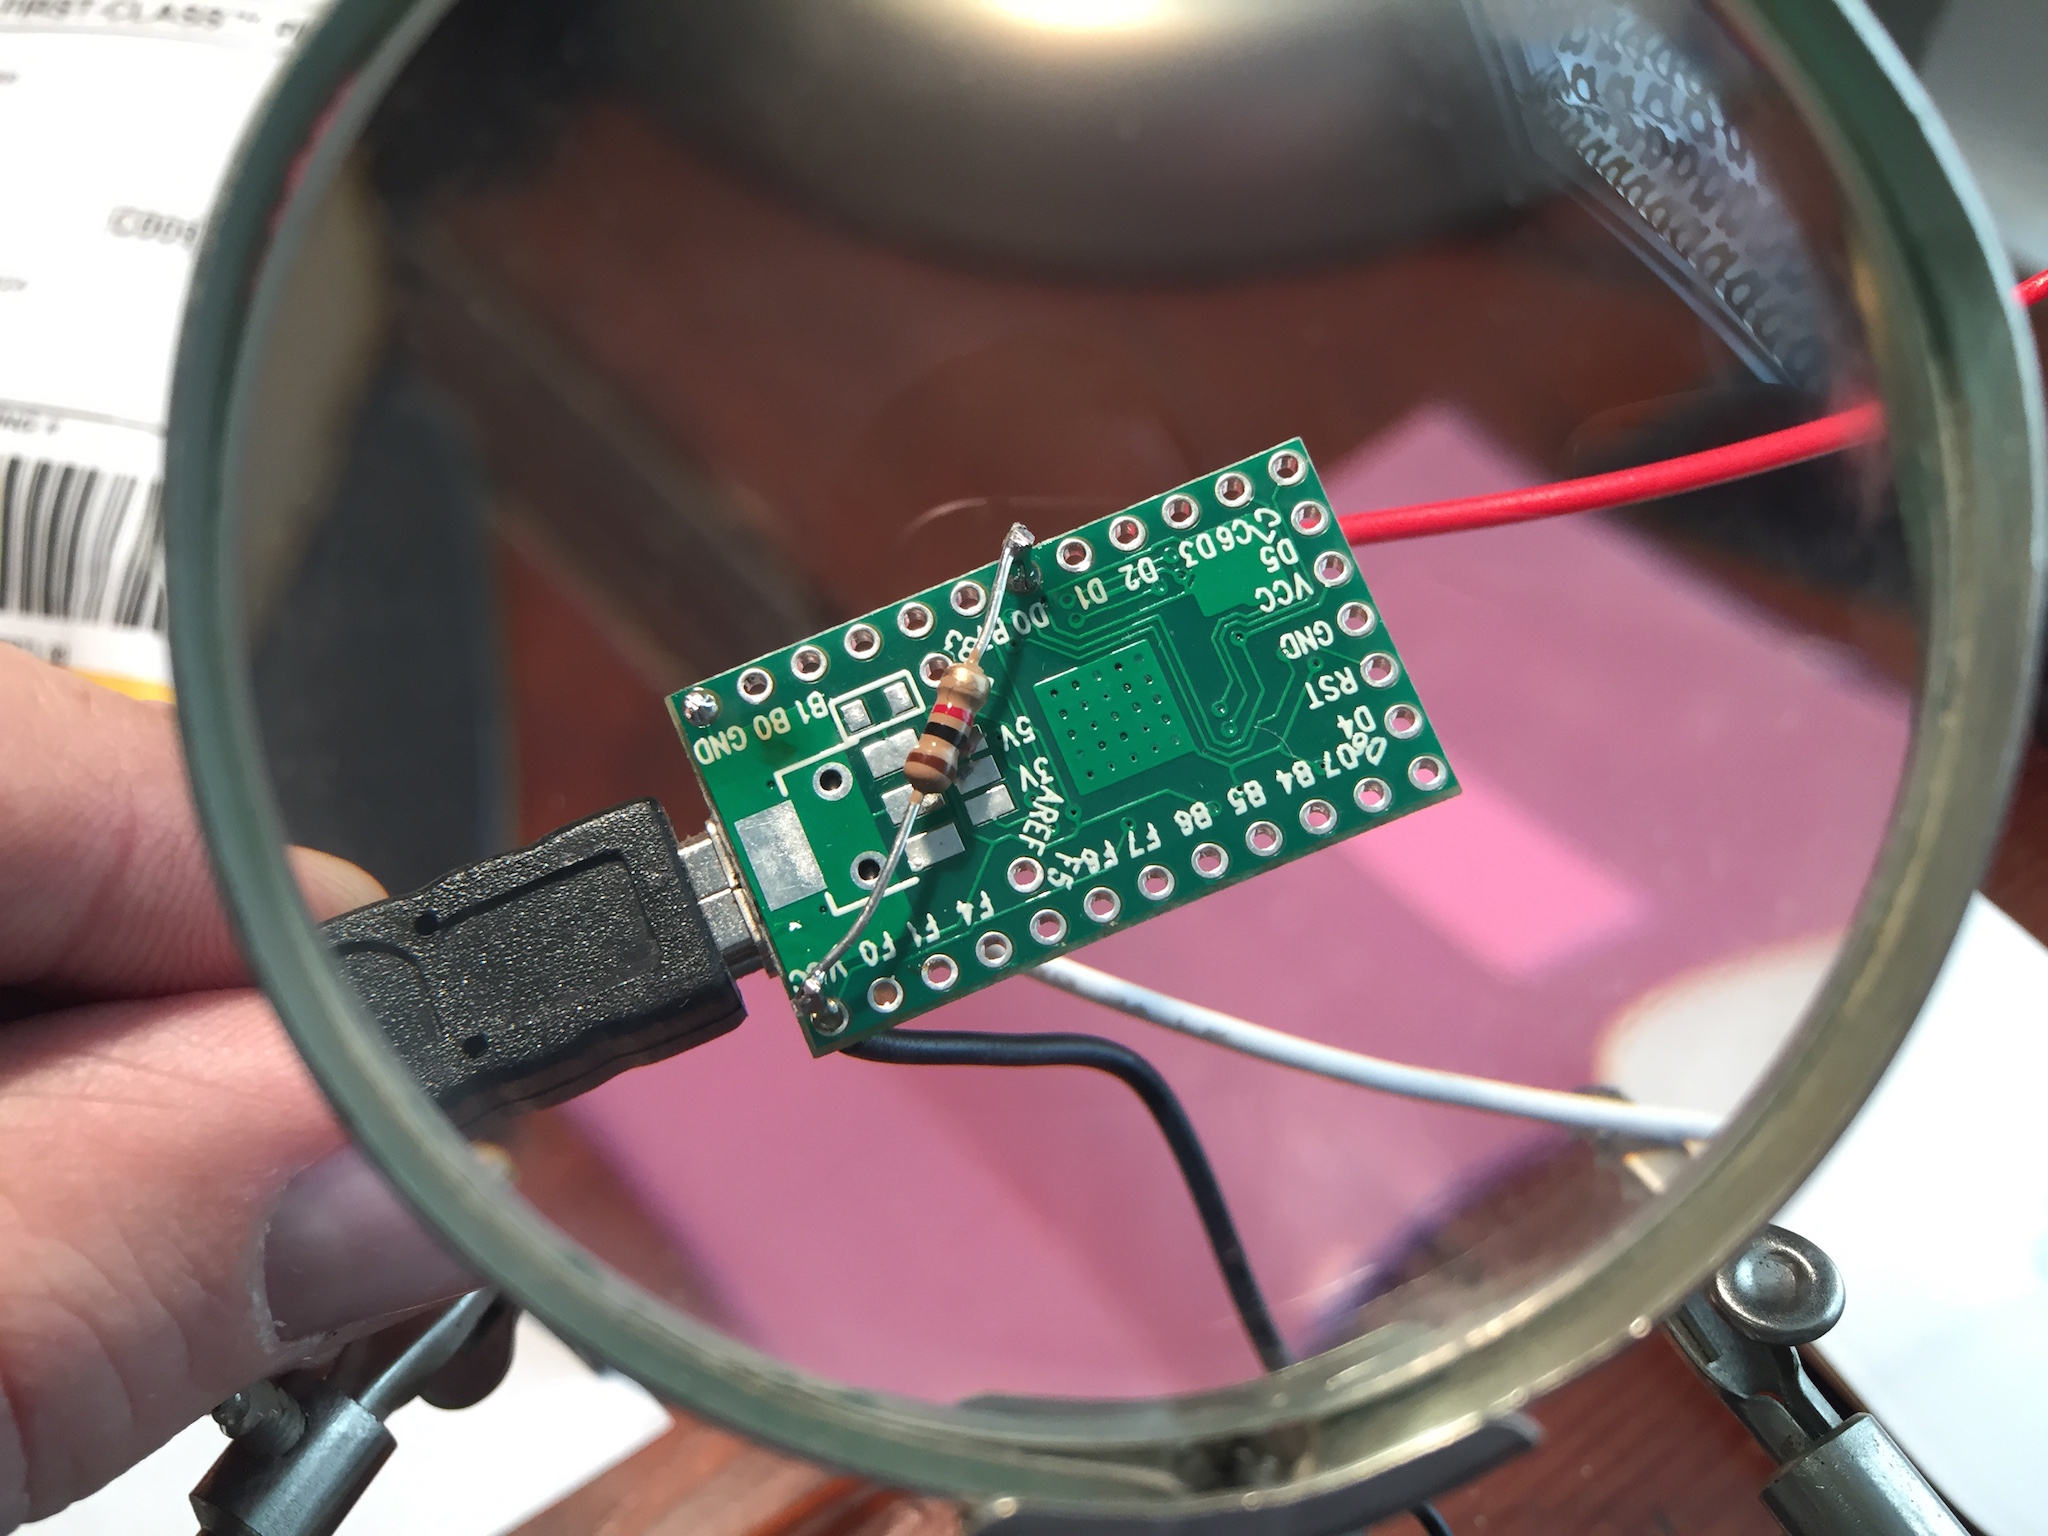
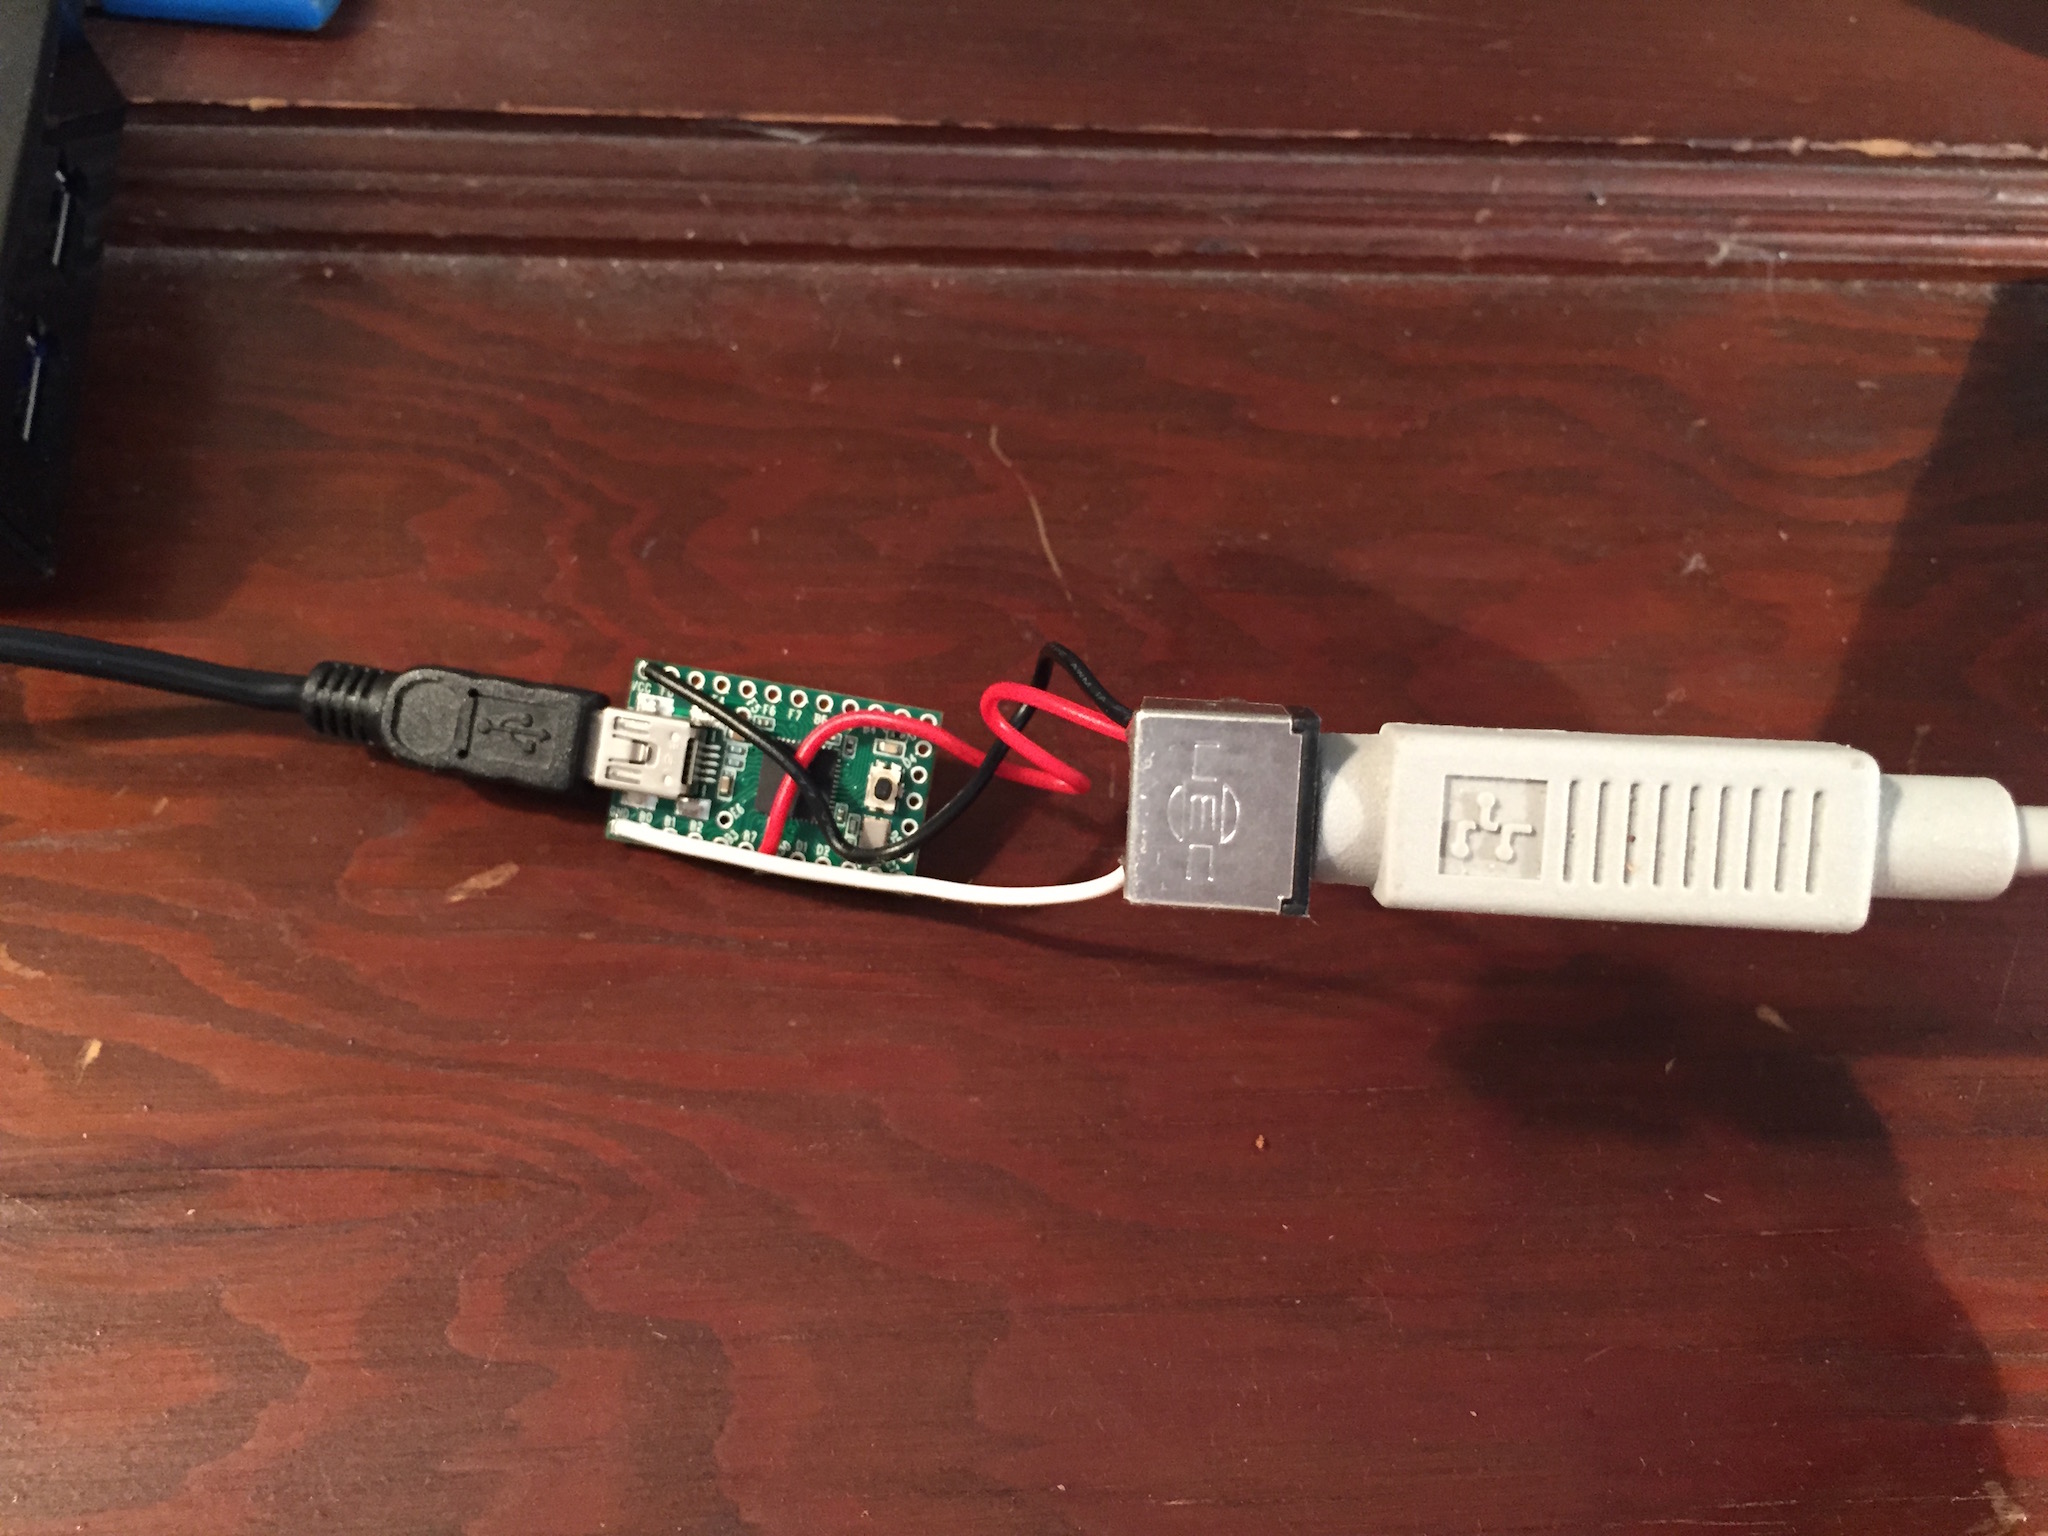
Getting it all together means you’ll need a microcontroller. I went with the Teensy 2.0 board, since that’s what ScottV used. There are also Arduino boards that will work. You can check Hasu’s github for more information. I ordered two, just to be on the safe side.
Compiling Hasu’s code is simple enough, but you’ll want to install CrossPack by Objective Development. It provides the tools necessary to compile the firmware. You can find them elsewhere, but ObDev puts it in one easy package. You’ll also need the Teensy Loader application from PJRC’s site to get the compiled firmware onto the Teensy device.
I had some generic USB mini cables lying around from various other peripherals, and I’ve been building up a small stock of soldering gear in preparation for other projects with Lex (maybe we’ll write about those later). So, the rough final cost for my keyboard:
- Apple Extended Keyboard II: $28
- Apple ADB keyboard cable: $5
- Teensy 2.0: $16
- S-Video connector: $0.50
- Random soldering components: $chickenfeed
For $50 and an hour’s work, I’m clackety-clacking away on a beautiful piece of hardware, and I have three backup units, in case anything goes wrong.
Gallery
Future modifications
- Provide a housing for the adapter. Mini Altoids tin (Alpstoids?)
- Apply retr0bright to the keyboard cases and space bars to remove the yellowing and return them to their platinum best. Should probably wait until Spring for plenty of natural daylight UV.
Get Caps Lock as Control.This will involve removing the physical lock on the Alps switch under the Caps Lock key, and modifying the Teensy firmware to treat the Caps Lock key as a momentary key. After that, OS X will handle the translation for me. Done!- Bluetooth! A wonderfully thorough writeup of a project to convert an IBM Model M to a Bluetooth wireless keyboard.
Conclusion
This was a fun project that has only just started me down the road of hardware hacking. I’m looking forward to future fun with Lex and a Raspberry Pi that he might be getting for Christmas (shhh, don’t tell).
If you find yourself getting the mechanical keyboard bug, you’ll do well to spend some time reading through the GeekHack and Deskthority sites. Very friendly, helpful people all firmly in the mechanical keyboard camp.
Followups
- Getting Control over Caps Lock - Making my Caps Lock key act like a proper Control key
- In Media Res - Getting mute, volume, and play/ause, prev, and next media keys working
- Self Control - Moving the Control behavior completely to firmware.
